6
❖
X e r o x D o c u P r i n t N 2 4 , N 3 2 , a n d N 4 0 F i n i s h e r
Install the Finisher
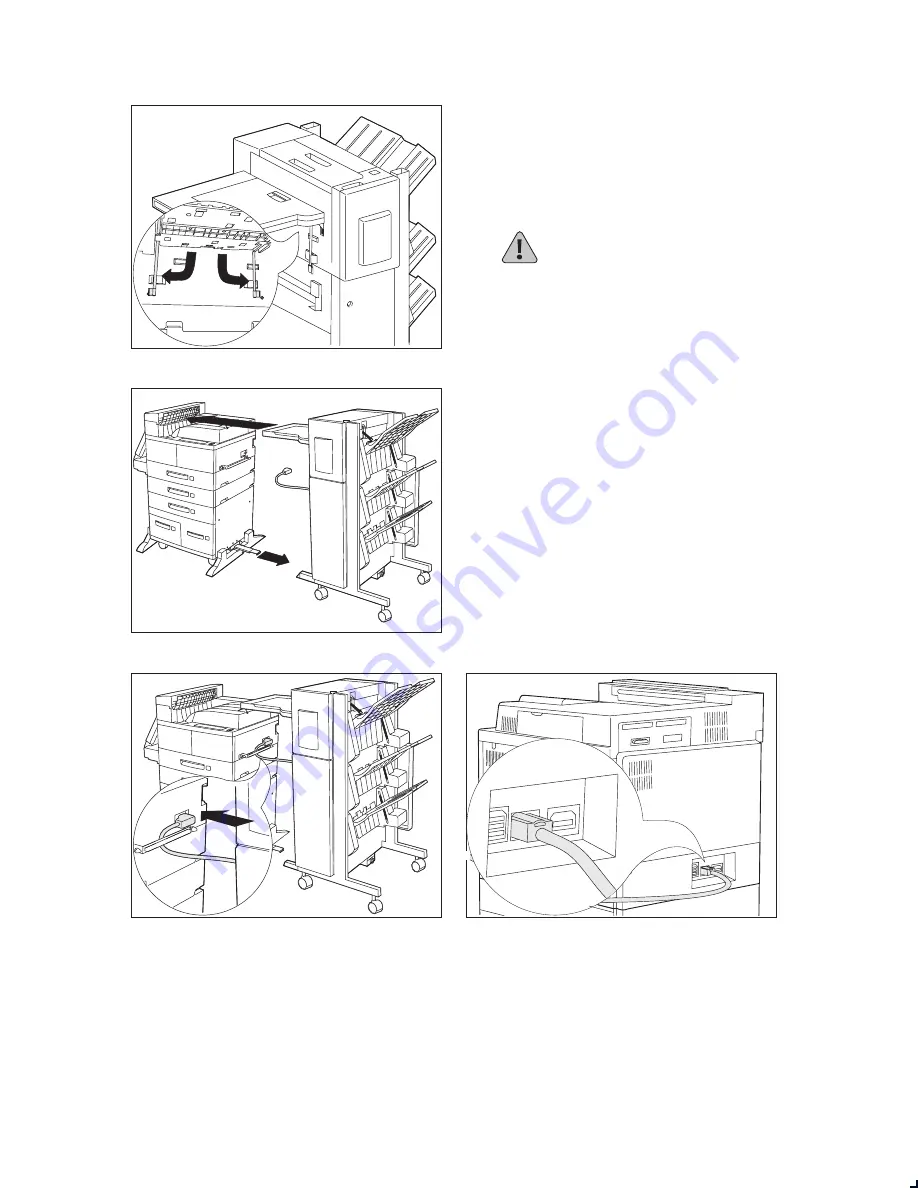
1
Hold the Paper Transport parallel to the
ground and unfold the two brackets under
the Paper Transport edge nearest to the
printer by pulling on the green tabs. Rotate
them into place by turning them down and
to the side as shown and push them snugly
against the retainers.
CAUTION: Use caution when moving
the finisher to ensure that it does not
tip over.
2
Slide the finisher towards the printer until
its GFI power cord and connector cable can
easily reach the printer.
3
Fully extend the Guide Rail that is attached
underneath the printer and align it with the
Guide Rail slot under the finisher. Make
sure the Guide Rail is completely inserted
into the guide rail slot under the finisher
and is aligned with the plate and hole
underneath the right hand side of the
finisher.
4
Pass the finisher GFI power cord behind
the Emissions Bracket Assembly and plug it
into the printer, as shown.
5
Attach the finisher connector cable to the
rear of the printer as shown.


