Appendix Xerox FreeFlow Quick Print
Print Provider Guide
9
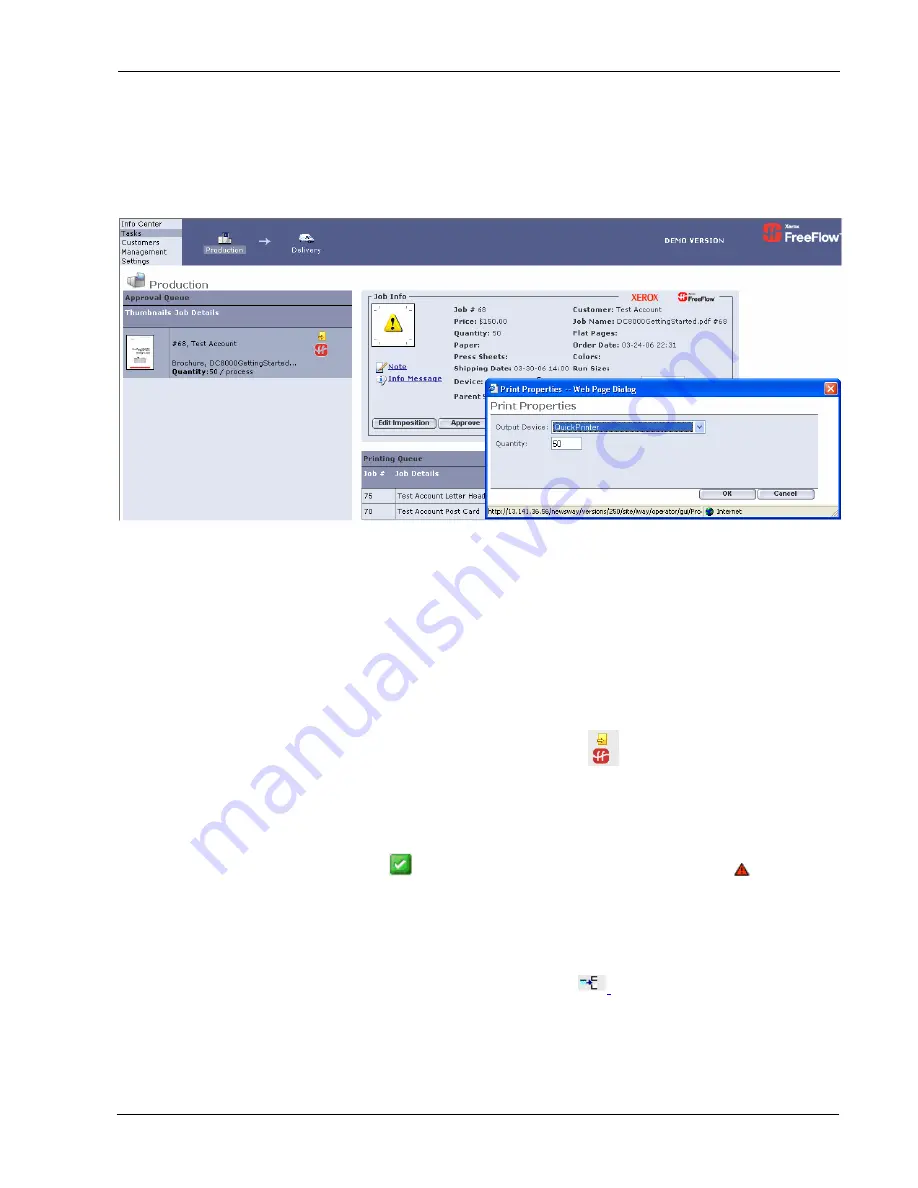
Figure 5: Edit Imposition or Check Output Device
Printing a FreeFlow Repository using FreeFlow Quick Print
In
order
to
approve
job
from
a
FreeFlow
Job
Library
or
DoucShare
(see
the
appendix
for
the
FreeFlow
Repository
for
steps
to
create
these
“Catalog
Ready”
items)
carry
out
the
following
steps
Note:
The
job
appears
with
a
Manual
Impost
Icon
in
Job
Info.
The
icon
for
the
job
is
also
unique.
Both
of
these
factors
identify
this
job
as
a
repository
or
“catalog
ready”
job.
1
Select
Tasks
/
Production
menu,
Choose
Job
in
Approval
queue.
2
Press
on
Approve
button
3
The
approval
is
successful
when
the
icon
appears
in
the
Status
column.
Jobs
that
fail
in
the
Printing
Queue
are
generally
due
to
network
errors.
Check
the
Device
set
‐
up,
Synchronize
with
the
External
Repository
and
the
FreeFlow
Repository
Set
‐
up
to
diagnose
this
problem.
Changing
the
Device
and
Quantity
1
Choose
the
Job
in
Approval
Queue
2
Select
the
multiple
queue
icon
in
Job
Info
next
to
the
Device
name
or
click
on
Edit
Imposition
button
3
Change
the
Output
Device
by
selecting
a
different
Printer
Name
4
Change
the
Quantity
if
appropriate
select
OK
and
continue
with
steps
1
‐
2


