Xerox
®
N60w Scanner
PC Installation
17-4
User Guide
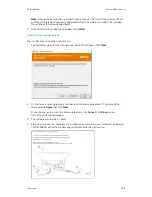
Note:
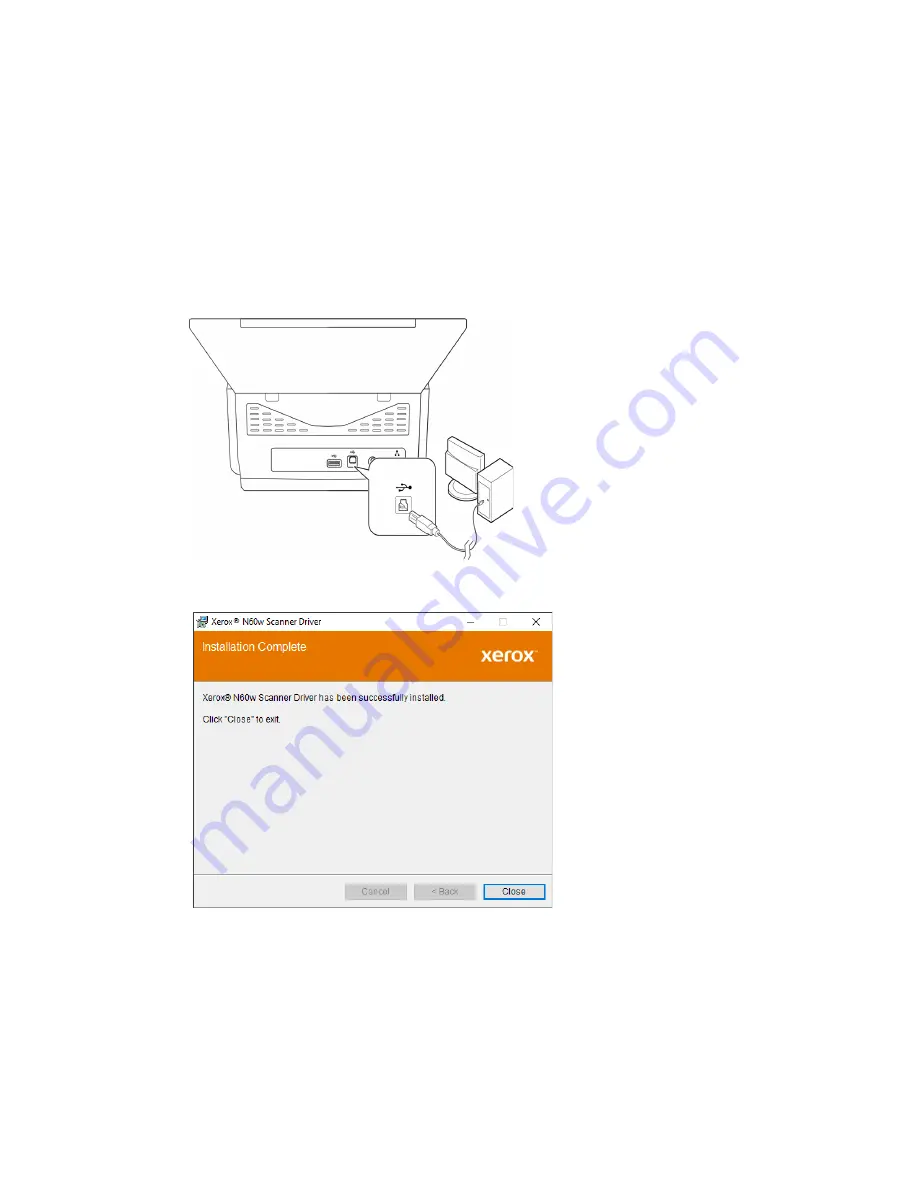
If you do not see this on-screen diagram for connecting the scanner, stop and follow the
instructions below.
Connect the USB Cable
If you did not connect the scanner earlier, proceed with the instructions below. It is recommended
that the cable provided with the scanner is the one used.
1.
Remove any tape from the USB cable.
2.
Plug the USB cable into the USB port on the scanner then into a USB port on the computer.
Check your computer’s manual for USB port locations. If the plug does not attach easily,
make sure that you are plugging it in correctly. Do not force the plug into either connection.
3.
Click
Close
on the Installation Complete window to close and exit the driver installer.
Summary of Contents for N60w
Page 1: ...Xerox N60w Scanner Scanner User Guide for Microsoft Windows AUGUST 2020 05 0987 000...
Page 14: ...Xerox N60w Scanner Welcome 2 4 User Guide...
Page 26: ...Xerox N60w Scanner LCD Buttons and Shortcuts 6 4 User Guide...
Page 28: ...Xerox N60w Scanner Cloud 7 2 User Guide...
Page 34: ...Xerox N60w Scanner Email 8 6 User Guide...
Page 36: ...Xerox N60w Scanner File 9 2 User Guide...
Page 40: ...Xerox N60w Scanner OneTouch 11 2 User Guide...
Page 42: ...Xerox N60w Scanner Hotspot 12 2 User Guide...
Page 84: ...Xerox N60w Scanner Maintenance 16 26 User Guide...
Page 92: ...Xerox N60w Scanner PC Installation 17 8 User Guide...

