


June 2014
2-5
Xerox® Phaser® 3020 Printer Service Manual
08-100 , 08-500
Status Indicator RAPs
08-100 Paper Feed Fault
The lead edge was not detected by the Paper Feed Sensor.
BSD-Reference:
1.1 AC Low Voltage and High Voltage Power / Interlocks
BSD-Reference:
7.1 Paper Feed and Registration
Initial Actions
NOTE: When clearing any jams, see if the Lead Edge of the Jammed Sheet reached the
Retard Roller.
Clear any jammed sheets. Refer to Section 7: Troubleshooting, in the Xerox® Phaser® 3020
User Guide for detailed instructions on clearing paper jams.
Procedure
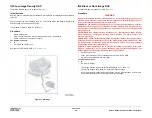
Check the Actuator on the Feed Sensor. The Actuator moves freely.
Y
N
Replace the Feed Sensor Actuator (
REP 1.12
),
PL 3.3
.
Check the position of the jammed sheet The Lead Edge reached the Retard Roller
Y
N
Enter Diagnostic (EDC) Mode. Select: [DC330 Component Control, 101-Clutch, Tray 1
Pick up] to engage the drive to pick up paper from tray 1 The clutch engages.
Y
N
•
Check the Feed Clutch connections on the Main PWBs for contamination.
Clean as necessary.
•
Check that the circuits from the Feed Clutch to the LVPS / HVPS for an open to
short circuit.
•
If the circuits are good, replace the Feed Clutch (
REP 1.16
),
PL 3.3
.
In Diagnostics Mode. Select: [102-Sensor, Feed Sensor] to block and clear the Paper
Feed Sensor. The signal changes.
Y
N
•
Check that the connection is secure and no contamination or damage is
present.
•
Check that there is no damage or contamination on any connectors from the
Feed Sensor to the LVPS / HVPS PWB. Repair as necessary.
•
Replace the Paper Feed Sensor (
REP 1.2
),
PL 3.3
.
Perform SCP Final Actions.
If the problem is intermittent, recheck the cables and look for a cable that is binding.
08-500 Paper Jam in Exit Area Fault
The machine has detected a paper jam in the Exit Area.
BSD-Reference:
7.1 Paper Feed and Registration
Initial Actions
•
Open the Top Cover and remove jammed sheets from exit area. Refer to Section 7: Trou-
bleshooting, in the Xerox® Phaser® 3020 User Guide for detailed instructions on clearing
paper jams.
•
Check the Paper Guides for proper position.
•
Power Off the machine, then power On while holding the WPS button to reboot the
machine.
Procedure
Enter Diagnostic (EDC) Mode. Select: [DC330 Component Control, 102-Sensor, Exit Sens]
to block and clear the Exit Sensor. The Exit Sensor is OK.
Y
N
•
Check for an open or short circuit and that no contamination is present.
•
Replace the Exit Sensor
PL 3.3
.
In Diagnostics, go to [102-Sensor, Registration] to activate and deactivate the Registration
Sensor. The signal changes.
Y
N
•
Check for an open or short circuit and that no contamination is present.
•
Replace the Feed Sensor PWB (
REP 1.2
),
PL 3.3
.
Inspect the Exit Roller and Drives for wear or damage. Replace if needed.
Summary of Contents for Phaser 3020
Page 1: ...Xerox Phaser 3020 Service Manual 702P02829 June 2014 Initial Issue ...
Page 2: ......
Page 4: ...June 2014 2 Xerox Phaser 3020 Printer Service Manual Initial Issue ...
Page 6: ...June 2014 ii Xerox Phaser 3020 Printer Service Manual Introduction ...
Page 18: ...June 2014 1 2 Xerox Phaser 3020 Printer Service Manual Service Call Procedures ...
Page 24: ...June 2014 2 2 Xerox Phaser 3020 Printer Service Manual Status Indicator RAPs ...
Page 36: ...June 2014 3 2 Xerox Phaser 3020 Printer Service Manual Image Quality ...
Page 46: ...June 2014 3 12 Xerox Phaser 3020 Printer Service Manual IQ11 Image Quality ...
Page 48: ...June 2014 4 2 Xerox Phaser 3020 Printer Service Manual Repairs ...
Page 74: ...June 2014 4 28 Xerox Phaser 3020 Printer Service Manual REP 1 18 Repairs ...
Page 76: ...June 2014 5 2 Xerox Phaser 3020 Printer Service Manual Parts List ...
Page 88: ...June 2014 6 2 Xerox Phaser 3020 Printer Service Manual General Procedures and Information ...
Page 108: ...Xerox Phaser 3020 Printer Service Manual June 2014 BSDs THIS PAGE INTENTIONALLY BLANK ...


