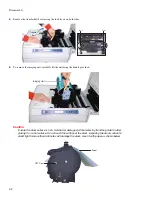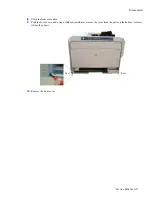
Disassembly
6-22
4.
Remove 5 screws from the LVPS.
■
A: Right side 2EA (3 * 6 Gold)
■
B: Left side 1EA (3 * 10 Silver)
■
C: Bottom 1EA (4 * 10 Silver)
5.
Remove 2 screws (3*10 silver) from the harness guide and free the harness, then remove the guide.
6.
Press the top of the LVPS cage towards door C and tilt it out to access and disconnect the 4 harnesses from the
LVPS.
7.
Remove the LVPS.
Screw
Screw
Screw
LVPS
C
A
Screw
B
B
C
A
Harness Guide
Screw
CON4
CON3
CON4
CON4
CON3
CON3
CON4
CON3
CON1
CON1
Fuse
CON2
CON2
Summary of Contents for Phaser 6100
Page 1: ...Service Manual X XEROX P h a s e r C o l o r L a s e r P r i n t e r 6100 ...
Page 2: ......
Page 10: ...vi ...
Page 22: ...Reference Information 2 6 ...
Page 28: ...Specifications 3 6 ...
Page 38: ...Summary of Product 4 10 RAM DIMM SPGPm Main Control FLASH MEMORY ENGINE CONTROL ...
Page 44: ...Summary of Product 4 16 ...
Page 66: ...Disassembly 6 10 3 Remove the toner caps and fit them to the inlets as shown below Toner Cap ...
Page 94: ...Disassembly 6 38 6 Disconnect 2 harnesses and remove the laser unit Harness Harness ...
Page 130: ...Maintenance and Diagnostics 7 20 ...
Page 196: ...Parts List 9 42 9 21 Transfer Belt Cam Assembly S18 9 0 8 S8 7 6 5 10 1 2 14 3 12 13 S8 11 4 ...
Page 200: ...Parts List 9 46 ...


