


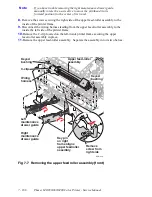
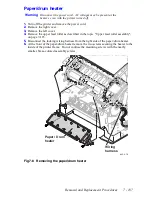
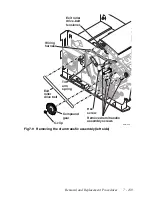

Removal and Replacement Procedures
7 - 181
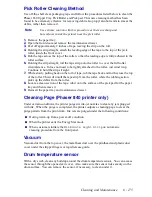
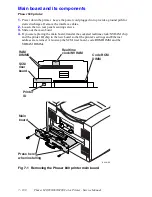
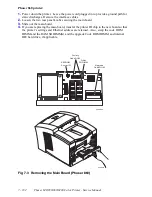
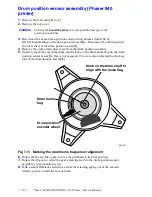
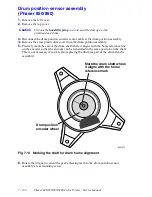
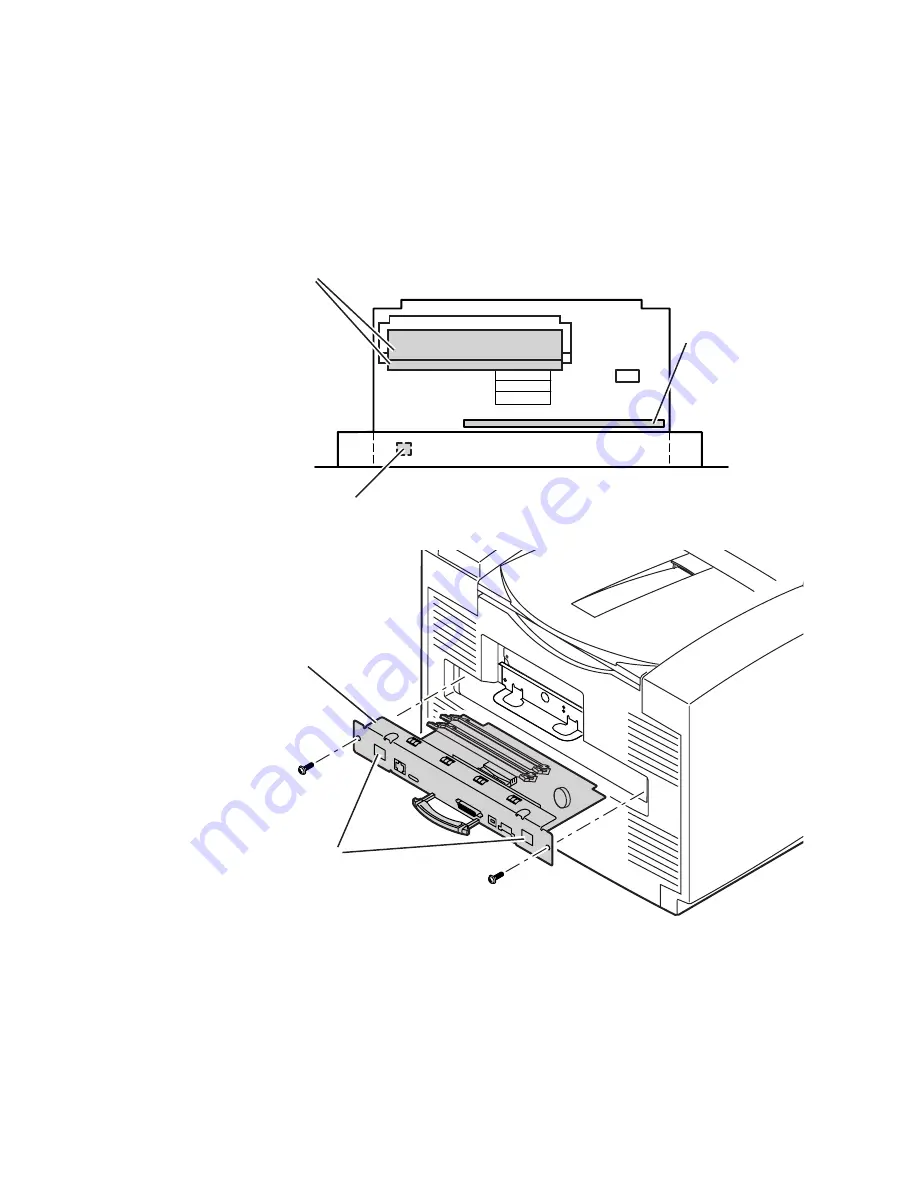
Phaser 850 printer:
1.
Power down the printer. Leave the power cord plugged in to provide a ground path for
static discharges. Remove the interface cables.
2.
Loosen the two rear panel securing screws.
3.
Slide out the main board.
4.
If you are replacing the main board, transfer the printer ID chip to the new board so that
the printer’s settings and Ethernet address are retained. Also swap the code ROM
DIMM and the SDRAM DIMMs.
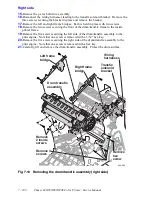
Fig 7-2 Removing the Phaser 850 printer main board
840-4-85
Main
board
RAM
DIMMS
Boot ROM/
Printer ID
Code ROM
Module
When
installing,
press on indents
to seat board
Summary of Contents for Phaser 840
Page 2: ......
Page 12: ...vi Phaser 840 850 860 8200 Color Printer Service Manual ...
Page 52: ...1 36 Phaser 840 850 860 8200 Color Printer Service Manual ...
Page 88: ...2 72 Phaser 840 850 860 8200 Color Printer Service Manual Blank Page ...
Page 134: ...3 118 Phaser 840 850 860 8200 Color Printer Service Manual ...
Page 174: ...4 158 Phaser 840 850 860 8200 Color Printer Service Manual ...
Page 188: ......
Page 250: ...8 234 Phaser 840 850 860 8200 Color Printer Service Manual ...
Page 286: ...270 Phaser 840 850 860 8200 Color Printer Service Manual ...
Page 287: ...071 0723 00 ...


