


7 - 188
Phaser 840/850/860/8200 Color Printer - Service Manual
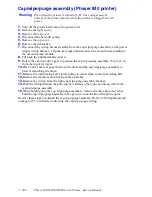
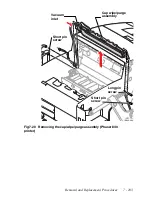
Drum/transfix assembly
1.
Turn off the printer and remove the power cord.
2.
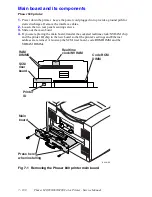
Remove the right cover.
3.
Remove the left cover.
4.
Remove the front panel.
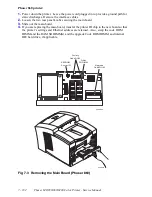
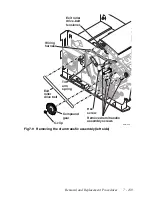
Left side
5.
Free the wiring harness leading from the drum/transfix assembly along the left side of
the print engine to the power control board and left I/O board.
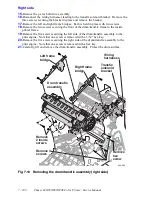
6.
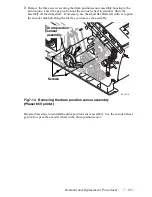
Remove the drum position sensor assembly.
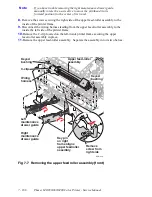
7.
Remove the upper feed-roller assembly.
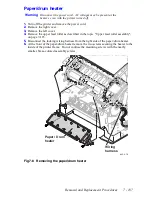
8.
Remove the paper/drum heater.
9.
Remove the drum temperature sensor.
10.
Remove the C-clip securing the compound gear and remove the gear and drive belt.
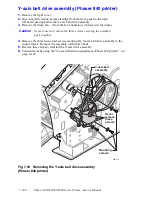
11.
Loosen the exit roller drive belt tensioner. Remove the exit roller drive belt.
12.
Remove the duplex roller pulley and keyed bushing from the left end of the shaft.
13.
Remove the three screws securing the paper-path motor in place. Remove the motor
so you can access the gear and keyed bushing from the right end of the duplex roller
shaft. Remove the duplex roller.
14.
Remove the tilt-arm spring.
Note
For Phaser 840 printers, refer to Service Bulletin 409 regarding
firmware version 8.24, and preventing stripper finger jams.
Summary of Contents for Phaser 840
Page 2: ......
Page 12: ...vi Phaser 840 850 860 8200 Color Printer Service Manual ...
Page 52: ...1 36 Phaser 840 850 860 8200 Color Printer Service Manual ...
Page 88: ...2 72 Phaser 840 850 860 8200 Color Printer Service Manual Blank Page ...
Page 134: ...3 118 Phaser 840 850 860 8200 Color Printer Service Manual ...
Page 174: ...4 158 Phaser 840 850 860 8200 Color Printer Service Manual ...
Page 188: ......
Page 250: ...8 234 Phaser 840 850 860 8200 Color Printer Service Manual ...
Page 286: ...270 Phaser 840 850 860 8200 Color Printer Service Manual ...
Page 287: ...071 0723 00 ...


