


3 - 76
Phaser 840/850/860/8200 Color Printer - Service Manual
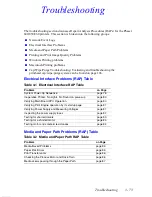
Electronics Troubleshooting
System power-up sequence
The following lists the chain of events that occur when you turn on a printer. You can
follow this list as one means of determining if the printer is operating correctly. The exact
chain of events depends upon the DIP switch settings, the last power down condition and
where the printer “believes” the printhead is positioned. The printer records in
non-volatile RAM the last known position of the printhead and the cap/wipe/purge
assembly. The Electronics Troubleshooting Checklist is the primary reference for
troubleshooting power-up problems, see "On-site Electronics Troubleshooting Checklist
Phaser 840/850" on page A-250 or "On-site Electronics Troubleshooting Checklist Phaser
860/8200" on page A-266.
Phaser 840/850 Customer Mode Power-Up Sequence
Power switch is turned on:
1.
Power supply senses AC line voltage conditions (110 VAC or 220 VAC) and enables
DC voltages. If an overload occurs, the printer turns off the DC supplies, giving a
“blink” effect to the front panel LEDs.
2.
Low-level, power-on self-test (POST) diagnostics are performed. The two status LEDs
at the rear panel should toggle and the front panel LEDs are turned on. The front panel
display is blank. This test takes from 4 to 15 seconds depending on installed RAM.
3.
If POST diagnostics pass, the front panel Error LED is turned off and the front panel
displays the Tektronix logo while the mechanical initialization checks are performed.
If an error is detected, the Phaser 850 printer flashes the front panel Error LED with a
repeating error code pattern as well as the rear panel PS LED. On the Phaser 840
printer, the pattern is displayed only on the rear panel PS LED (left side of the DIP
switches).
4.
The mechanical initialization is conditional on the initial position of the printhead and
cap/wipe/purge assembly. Two NVRAM parameters are checked for the last known
position.
If the printhead is in either the Locked or Print position:
a.
The cap/wipe/purge motor is run to ensure that the cap/wipe/purge
assembly activates its home-position sensor.
If the printhead is in the cap/wipe/purge position:
a.
The heaters in the printhead and cap/wipe/purge assembly are activated, as
a precaution, to melt the ink which may have cooled and solidified, thus
gluing the cap/wipe/purge and printhead together. 10 minutes pass while
the cap/wipe/purge assembly heats up.
b.
The printhead is tilted back.
c.
The ink is allowed to drain from the cap/wipe/purge assembly.
d.
The cap/wipe/purge assembly is lowered to its home position.
Summary of Contents for Phaser 840
Page 2: ......
Page 12: ...vi Phaser 840 850 860 8200 Color Printer Service Manual ...
Page 52: ...1 36 Phaser 840 850 860 8200 Color Printer Service Manual ...
Page 88: ...2 72 Phaser 840 850 860 8200 Color Printer Service Manual Blank Page ...
Page 134: ...3 118 Phaser 840 850 860 8200 Color Printer Service Manual ...
Page 174: ...4 158 Phaser 840 850 860 8200 Color Printer Service Manual ...
Page 188: ......
Page 250: ...8 234 Phaser 840 850 860 8200 Color Printer Service Manual ...
Page 286: ...270 Phaser 840 850 860 8200 Color Printer Service Manual ...
Page 287: ...071 0723 00 ...


