1
1-11
Connecting network cable to the EX7750
Connecting network cable to the EX7750
In this section, the front view and back panel of the EX7750 are illustrated, followed
by information for connecting to the Ethernet board.
Turn off the EX7750
before connecting it to any network device. If the EX7750 has
just finished processing, wait five seconds after the system reaches the Idle state before
using the power button on the front of the EX7750 to turn it off. For the proper
shutdown procedure, see
“Starting and shutting down the EX7750”
Before you begin, connect the crossover interface cable to the printer.
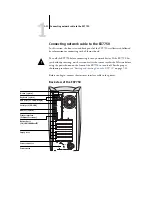
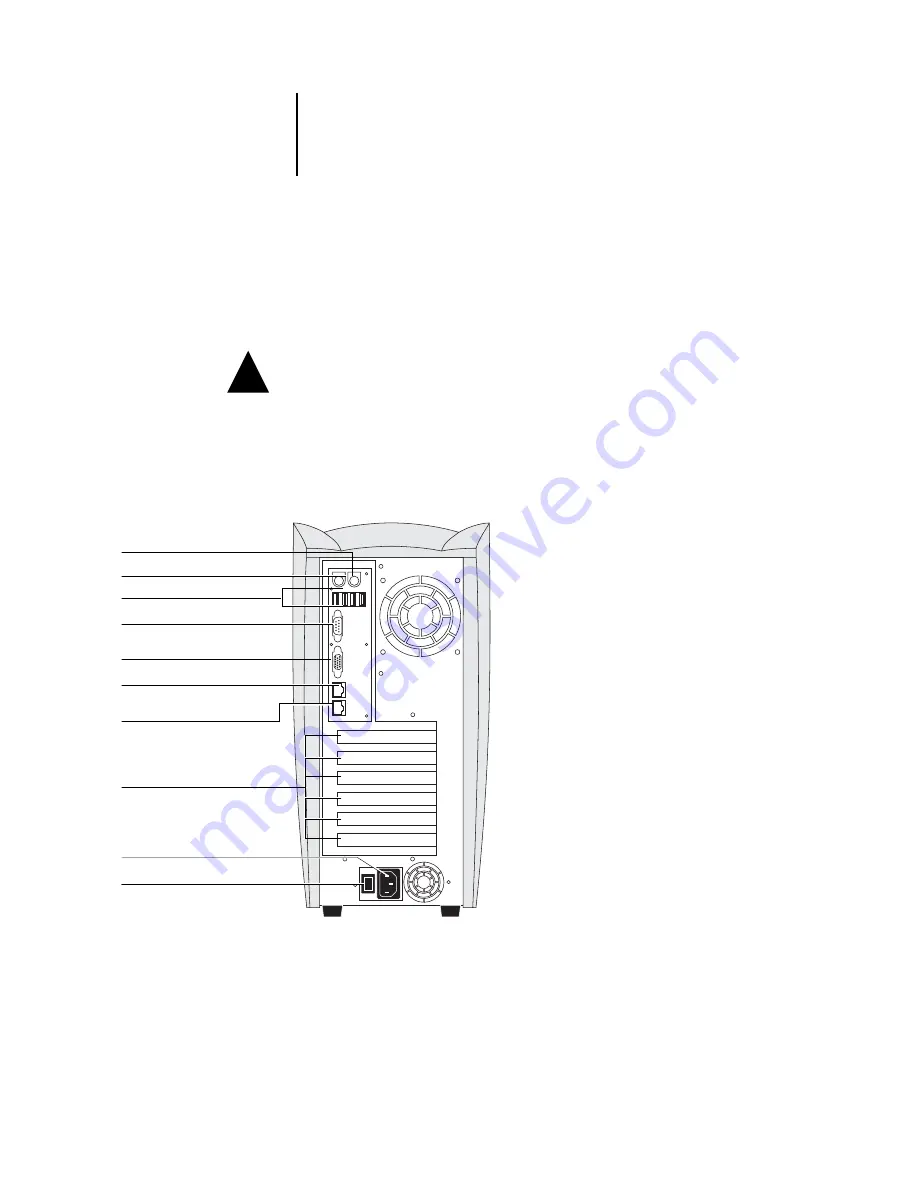
Back view of the EX7750
!
USB ports (ES-1000; dongle)
Printer interface
(Ethernet Crossover)
Power switch
Power connector
Serial port (ED-100)
Empty slots
Network port
(10/100/1000BaseTX)
Mouse (option)
Keyboard (option)
Monitor (option)
Summary of Contents for Phaser EX7750
Page 1: ...ONFIGURATION UIDE...
Page 8: ...This page is intentionally blank...
Page 46: ...This page is intentionally blank...
Page 170: ...This page is intentionally blank...
Page 174: ...This page is intentionally blank...
Page 208: ...This page is intentionally blank...
Page 220: ...This page is intentionally blank...

