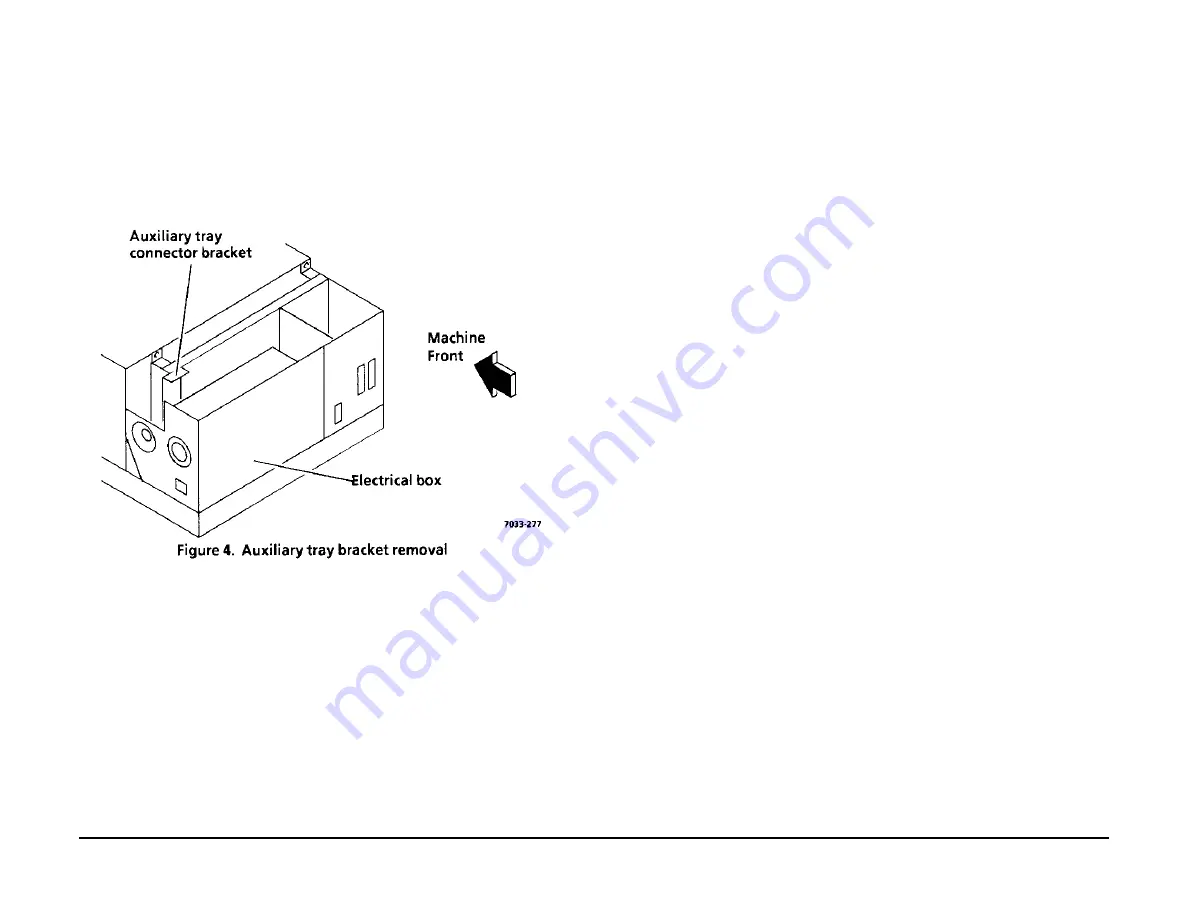
5. Remove electrical box assembly. (PL 5.10)
a. Disconnect the following connectors from the main PWB:
P101
P105
P107
P108
P109
P111 (RX only)
P400
P600
P104
P102
P110
P106
b. Disconnect the speaker in-line connector (P/J191).
c. Remove the wire harnesses from the slot above the speaker.
d. Remove auxiliary tray connector bracket (Figure 4).
e. Remove the five screws securing the ground straps to the electrical
box.
f. Remove the screw securing the video harness ground clip to the
electrical box.
g. Remove six screws securing electrical box assembly to terminal (two
on each end and two on the inside bottom of the box).
h. Lift the left end of the electrical box and pull the auxiliary tray harness
out through the bottom slot of the box.
6. Remove power supply. (PL 5.10)
a. Disconnect P300 at the main PWB, then P193 and P196 at the power
supply.
b. Remove two screws securing power supply to frame.
NOTE: Do not lift power supply by wire harness.
c. Lift out power supply by grasping in the middle at the cut out.
CAUTION
During reinstallation of the power supply, ensure the international AC
Power swtich is set to the same position as was the removed unit. An
incorrect setting will result in damage to the new power supply.
7. Remove speaker (PL 5.10)
a. Remove screw and securing plate from speaker.
b. Pull speaker out far enough to access in-line connector P/J191,
disconnect the connector, and remove speaker.
8. Remove RAM/ROM and G3/coupler PWBs. (PL5.10)
a. Disconnect power cord.
b. Remove PWB access cover.
c. If removing the G3/coupler PWB, loosen securing screw.
d. Slide board out of electrical box assenmbly.
e. RX only: Disconnect MJ3 on the coupler PWB. If removing the
coupler PWB, disconnect P/J3 on the coupler PWB. Compress the
standoffs, and separate the G3 and coupler PWBs.
NOTE: If replacing the RAM/ROM PWB, check the Tag Matrix to see if Tag 4 is
installed. If installed, perform ADJ 4.7.4 in thie Section.
9. Remove modem PWB. (PL 5.10)
a. RX only: Disconnect P/J3 on the coupler PWB. Compress the
standoffs, and separate the G3 and coupler PWBs.
b. Compress te standoff to release PWB.
c. Pull PWB out of connector J32.
8/91
4.6 Electronics
4-44
Telecopier 7032 / 7033 Service Manual
www.printcopy.info
www.printcopy.info
Summary of Contents for Telecopier 7032
Page 44: ...www printcopy info w w w p r i n t c o p y i n f o...
Page 59: ...www printcopy info w w w p r i n t c o p y i n f o...
Page 150: ...www printcopy info w w w p r i n t c o p y i n f o...
Page 155: ...www printcopy info w w w p r i n t c o p y i n f o...
Page 157: ...www printcopy info w w w p r i n t c o p y i n f o...
Page 158: ...www printcopy info w w w p r i n t c o p y i n f o...
Page 159: ...www printcopy info w w w p r i n t c o p y i n f o...
Page 160: ...www printcopy info w w w p r i n t c o p y i n f o...
Page 161: ...www printcopy info w w w p r i n t c o p y i n f o...
Page 167: ...www printcopy info w w w p r i n t c o p y i n f o...
Page 168: ...www printcopy info w w w p r i n t c o p y i n f o...
Page 169: ...www printcopy info w w w p r i n t c o p y i n f o...
Page 172: ...www printcopy info w w w p r i n t c o p y i n f o...


