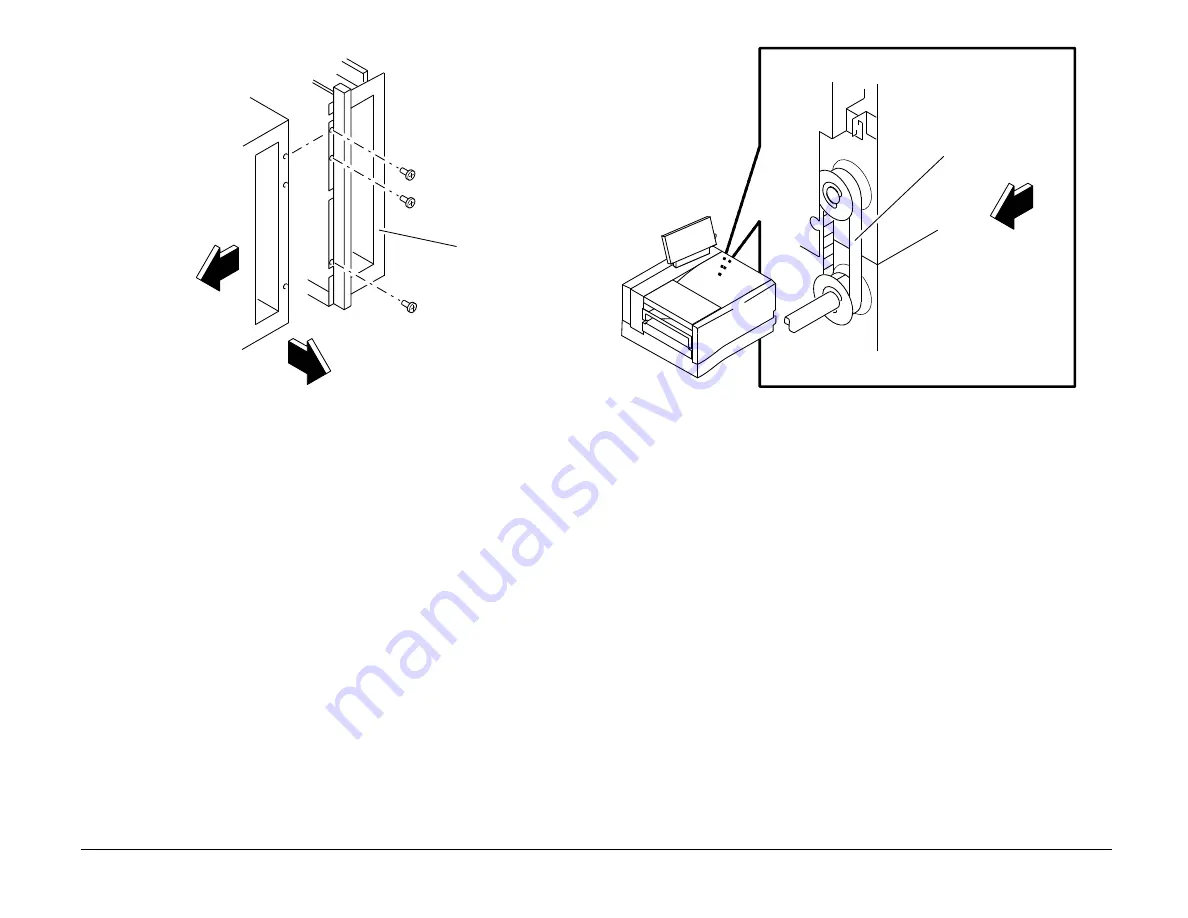
Figure 2. Auxiliary tray installation, front screws
Machine
Front
Machine
Top
Auxiliary
tray
7033-279
8.
Set the terminal in its normal operating position and perform the
following:
a.
If installed, secure the auxiliary tray grounding strap on both
sides of the electrical box.
b.
Install the paper guide and new right side cover.
c.
Install all covers removed during the installation.
d.
Install the output trays, handset, and both paper trays.
9.
Connect the power cord to the terminal and verify proper
operation by running copies from both paper trays.
10.
Mark the installation date on the product feature index label
located under the donor film housing.
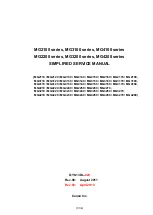
Figure 3. Drive belt installation
Belt
View rotated 90°
(rear frame, inside
right cover)
Machine
Front
7033-283
6/92
1.5, 1.5.1
8a-7
Telecopier 7032 / 7033 Service Manual
www.printcopy.info
www.printcopy.info
Summary of Contents for Telecopier 7032
Page 44: ...www printcopy info w w w p r i n t c o p y i n f o...
Page 59: ...www printcopy info w w w p r i n t c o p y i n f o...
Page 150: ...www printcopy info w w w p r i n t c o p y i n f o...
Page 155: ...www printcopy info w w w p r i n t c o p y i n f o...
Page 157: ...www printcopy info w w w p r i n t c o p y i n f o...
Page 158: ...www printcopy info w w w p r i n t c o p y i n f o...
Page 159: ...www printcopy info w w w p r i n t c o p y i n f o...
Page 160: ...www printcopy info w w w p r i n t c o p y i n f o...
Page 161: ...www printcopy info w w w p r i n t c o p y i n f o...
Page 167: ...www printcopy info w w w p r i n t c o p y i n f o...
Page 168: ...www printcopy info w w w p r i n t c o p y i n f o...
Page 169: ...www printcopy info w w w p r i n t c o p y i n f o...
Page 172: ...www printcopy info w w w p r i n t c o p y i n f o...


