1.2 Repair Analysis Procedures
RAP 1.2.1
Hard Disk Drive Malfunction
When the control panel display and reports indicate “Hard Disk
Failure”, try the following recovery procedure before performing a
reformat procedure. The reformat procedure will delete all files.
1. Disconnect the power cord. Wait 10 seconds.
2. Disconnect the hard disk interface PWB from the mother PWB. Do
not remove any cables.
3. Connect the power cord.
4. Wait for the normal idle control panel display to appear (to
initialize the terminal without the hard disk).
5. Disconnect the power cord. Wait 10 seconds.
6. Connect the hard disk interface PWB tothe mother PWB.
7. Connect the power cord.
8. Wait for the normal idle control panel display to appear (to
initialize the terminal with the hard disk).
9. Enter the service mode.
10. Enter the soft switch mode (1+0+[Enter]).
a.
Select soft switch 029 and set to 01100011
b.
Select soft switch 055 and set to 00011110
c.
Select soft switch 056 and set to 10111010
d.
Exit soft switch mode
11. Exit the service mode.
12. Disconnect the power cord. Wait 10 seconds.
13. Connect the power cord.
14.
If the “Hard Disk Failure” was caused by a programing bug rather
than a valid disk failure, the queued transmit jobs should continue
normally. The documents stored to the disk may be printed using
the “pending jobs, view/delete” function. Print out a Pending Jobs
Report to obtain the numbers assigned to the stored documents.
The file numbers may be used to view (print) the stored documents
or delete them.
NOTE: If you try to print documents stored to the disk using the
“print from memory” function, the terminal will report that there
are no documents stored to the disk.
15. If the preceding procedure resolved the failure indication, return
the terminal to normal operation. If the failure indication remains,
go to step 16.
16. Perform the following:
a.
Disconnect the power cord.
b.
Remove the auxiliary tray rear cover.
c.
Remove the rear access cover.
d.
Disconnect P/J271 and P/J272 from the hard disk interface
PWB.
e.
Remove the two screws securing the hard disk assembly, then
slide the assembly partially out of the auxiliary tray unit.
f.
Connect the power cord.
g.
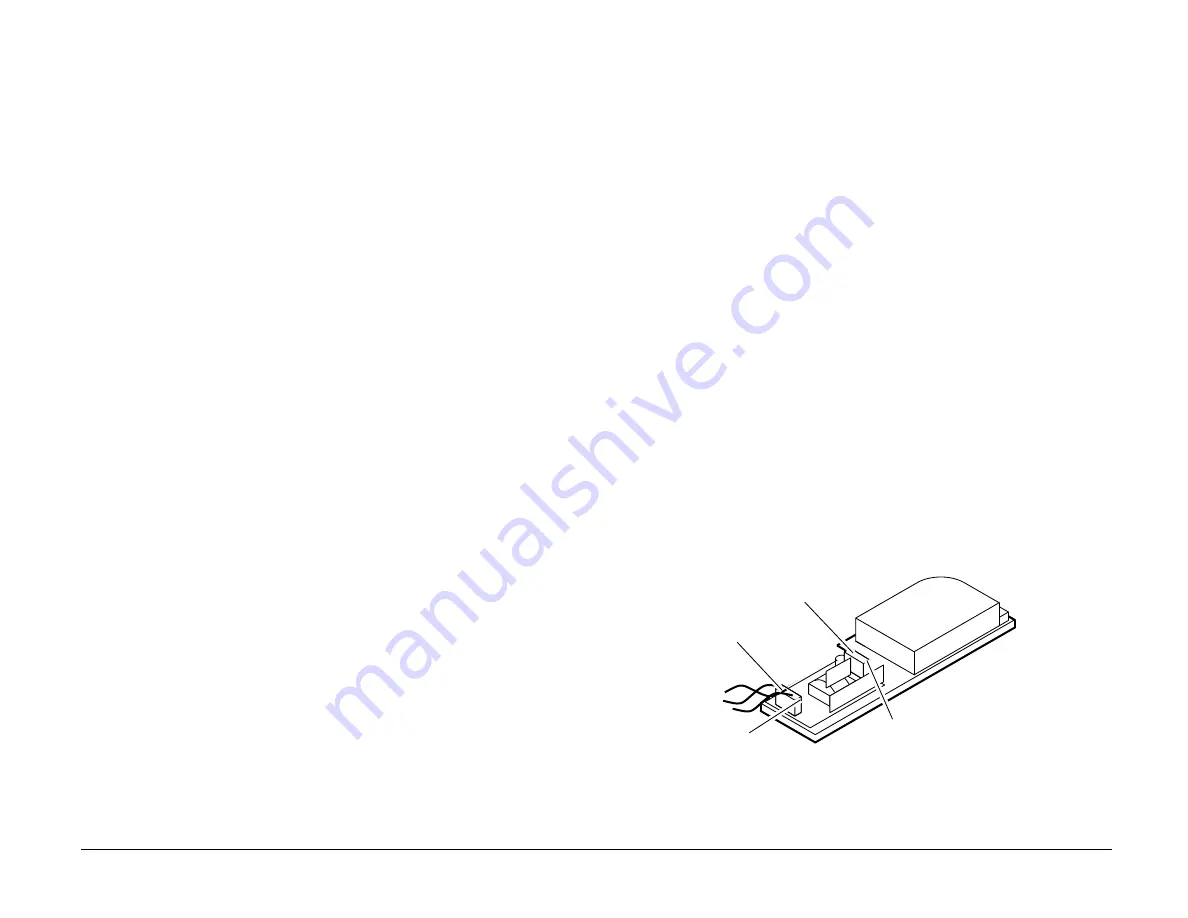
Measure the voltage to the hard disk power supply at P/J275
(Figure 1).
The voltage is 104 to 127 VAC.
Y
N
|
Replace power supply (main).
Figure 1. Hard disk assembly plug/pin locations
P/J275
Pin 1
Pin 1
7033-103
P/J274
6/92
1.2, RAP 1.2.1
8b-2
Telecopier 7032 / 7033 Service Manual
www.printcopy.info
www.printcopy.info
Summary of Contents for Telecopier 7032
Page 44: ...www printcopy info w w w p r i n t c o p y i n f o...
Page 59: ...www printcopy info w w w p r i n t c o p y i n f o...
Page 150: ...www printcopy info w w w p r i n t c o p y i n f o...
Page 155: ...www printcopy info w w w p r i n t c o p y i n f o...
Page 157: ...www printcopy info w w w p r i n t c o p y i n f o...
Page 158: ...www printcopy info w w w p r i n t c o p y i n f o...
Page 159: ...www printcopy info w w w p r i n t c o p y i n f o...
Page 160: ...www printcopy info w w w p r i n t c o p y i n f o...
Page 161: ...www printcopy info w w w p r i n t c o p y i n f o...
Page 167: ...www printcopy info w w w p r i n t c o p y i n f o...
Page 168: ...www printcopy info w w w p r i n t c o p y i n f o...
Page 169: ...www printcopy info w w w p r i n t c o p y i n f o...
Page 172: ...www printcopy info w w w p r i n t c o p y i n f o...


