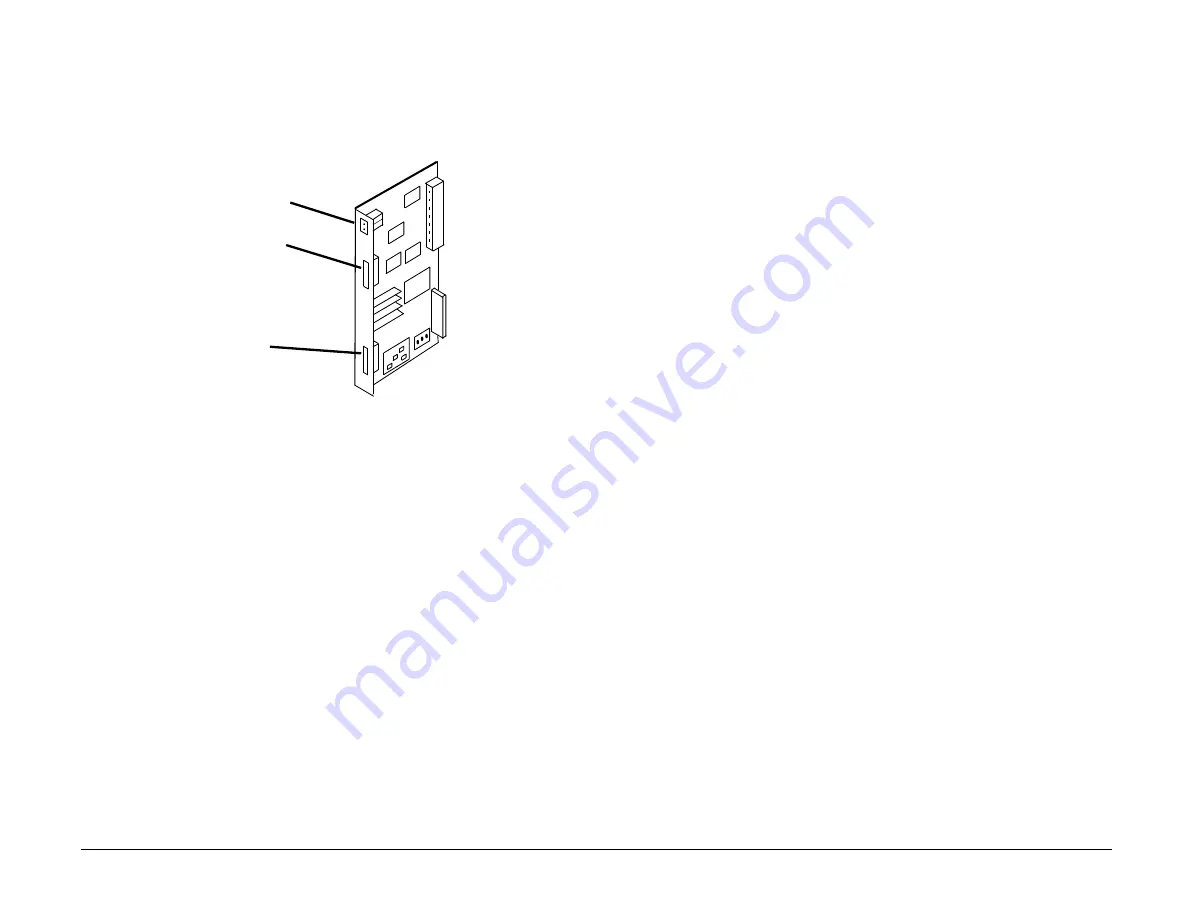
15. Assist the customer (If required) in connecting the Token Ring
network cable and printer cable (optional) to the Fax Server PWB
(Refer to figure 7).
Token Ring
Red and Green
Led’s
LPT 1
Figure 7 - Token Ring Connector Locations
Red and Green Led’s Status indicators for the Fax Server PWB
LPT1
Connection for optional printer (HP Laser Jet
or Compatible
Token Ring
Connection for DB-9 cable to the network
16. Enter the service mode and perform a diagnostic self test on the
terminal.
System Check
Note:
The network connection is not yet made. The LED sequence on
the Fax Server will not end with the normal indications.
1.
Power on the the terminal. If the normal idle display appears
continue to step 2. If not go to the System Check procedures in
Section 1 of this manual.
2.
The Red and Green LEDs on the Fax Server PWB will blink on and off
once. Then the Green LED will flash from dim to bright for about 1
seconds then blink on and off for about 5 seconds. Then the led’s
will remain off. At the end of the LED sequence a diagnostic print
out Refer to figure 8) will be printed on the terminal or optional
printer if installed. The diagnostic print contains the LAN Fax Server
PWB ID number and a fault that relates to the Fax Server not being
connected to the network. If this sequence does not occur proceed
to the Repair Analysis Procedures in this section.
3.
Print an Options Report. Observe that the report shows two options
installed, the RS-232 and LAN Fax Server. The report indicates an
RS232 option is installed when in fact no option exist. This is
because some of the data buss signals are common between both
options and are recognized by the terminal. All references to the
RS232 option listed on the report should be ignored. You should
however confirm that the terminal has recognized the “LAN Fax
Server “ in the Option Name column and “Token Ring“ in the Status
column.
4.
Remove power from the terminal. At this point if the Fax Server
software has been loaded onto the network file server, the network
connection can be applied. If an optional printer is to be used that
connection may be applied. It is recommended that the network
supervisor make these connections and perform all required setup
procedures for their network. The setup procedures are located in
the Supervisors Handbook.
5.
After connecting the LAN Fax Server PWB to the network and the
optional printer to the parallel port on the PWB apply AC power to
the terminal. Once the LAN Fax Server PWB downloads the network
files a printer configuration report is printed on the terminal (figure
9). This report will not be printed if the optional printer has not
been configured for the print server.
6/92
Telecopier 7032 / 7033 Service Manual
8h-21
1.5.2
www.printcopy.info
www.printcopy.info
Summary of Contents for Telecopier 7032
Page 44: ...www printcopy info w w w p r i n t c o p y i n f o...
Page 59: ...www printcopy info w w w p r i n t c o p y i n f o...
Page 150: ...www printcopy info w w w p r i n t c o p y i n f o...
Page 155: ...www printcopy info w w w p r i n t c o p y i n f o...
Page 157: ...www printcopy info w w w p r i n t c o p y i n f o...
Page 158: ...www printcopy info w w w p r i n t c o p y i n f o...
Page 159: ...www printcopy info w w w p r i n t c o p y i n f o...
Page 160: ...www printcopy info w w w p r i n t c o p y i n f o...
Page 161: ...www printcopy info w w w p r i n t c o p y i n f o...
Page 167: ...www printcopy info w w w p r i n t c o p y i n f o...
Page 168: ...www printcopy info w w w p r i n t c o p y i n f o...
Page 169: ...www printcopy info w w w p r i n t c o p y i n f o...
Page 172: ...www printcopy info w w w p r i n t c o p y i n f o...


