4.6 Electronics
Parts List on PL 5.10
Perform the indicated steps to remove a desired part.
Electrical Box Assembly
1
2
3
4
5
Power Supply
1
2
3
4
6
Speaker
1
2
3
7
RAM/ROM and G3/Coupler PWBs
8
Modem PWB
8
9
Main PWB
1
2
3
4
8
10
Telephone line filter (RX)
11
Removal
1. Remove left side cover. (PL 5.1A)
a. Disconnect power cord.
b. Remove document and copy output trays.
c. Remove three (3) screws securing left side cover.
d. Slide out left side cover.
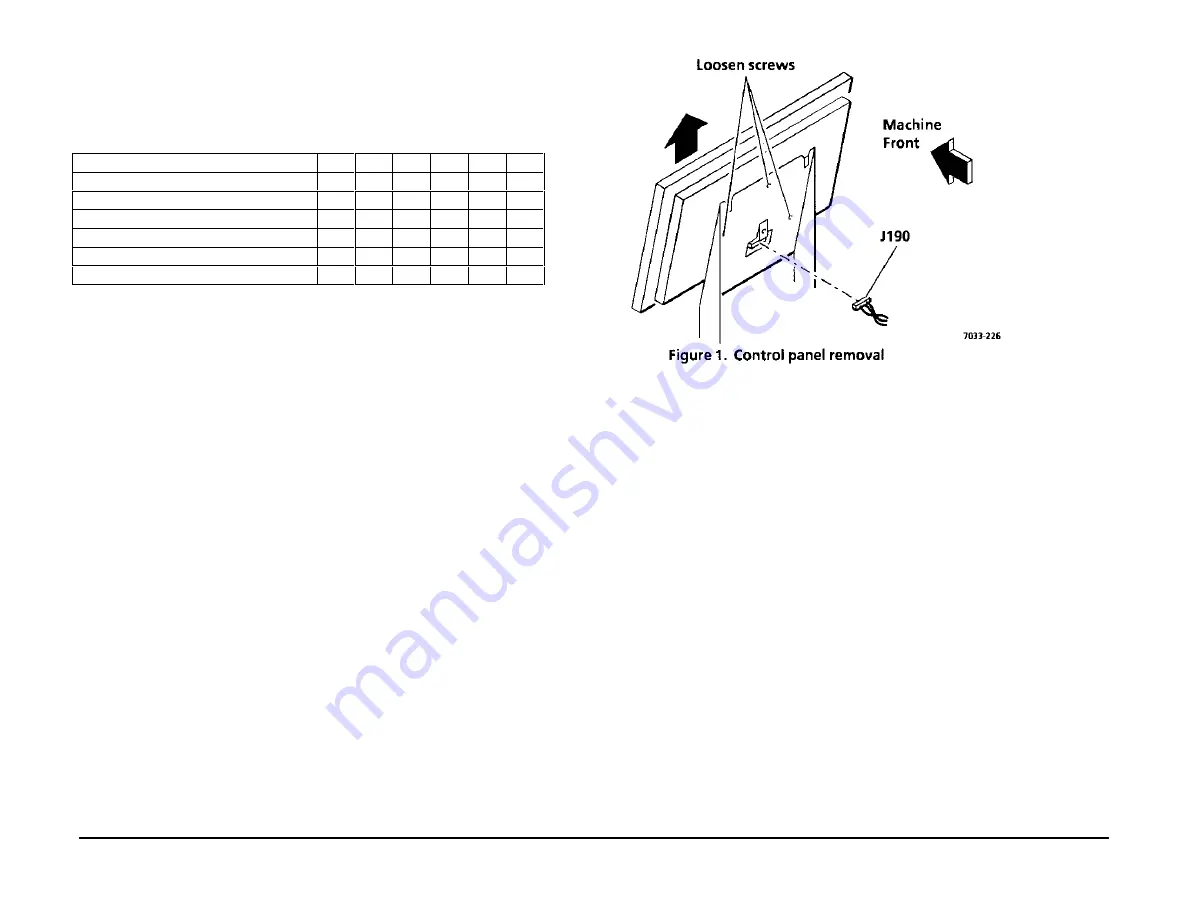
2. Remove control panel. (PL 5.1A)
a. Disconnect power cord.
b. Remove control panel bracket rear cover. (One recessed screw in
center of cover.)
c. Disconnect J190 on rear of control panel.
d. Loosen three screws securing the control panel to the bracket (Fig 1).
e. Lift off the control panel.
8/91
4.6 Electronics
4-42
Telecopier 7032 / 7033 Service Manual
www.printcopy.info
www.printcopy.info
Summary of Contents for Telecopier 7032
Page 44: ...www printcopy info w w w p r i n t c o p y i n f o...
Page 59: ...www printcopy info w w w p r i n t c o p y i n f o...
Page 150: ...www printcopy info w w w p r i n t c o p y i n f o...
Page 155: ...www printcopy info w w w p r i n t c o p y i n f o...
Page 157: ...www printcopy info w w w p r i n t c o p y i n f o...
Page 158: ...www printcopy info w w w p r i n t c o p y i n f o...
Page 159: ...www printcopy info w w w p r i n t c o p y i n f o...
Page 160: ...www printcopy info w w w p r i n t c o p y i n f o...
Page 161: ...www printcopy info w w w p r i n t c o p y i n f o...
Page 167: ...www printcopy info w w w p r i n t c o p y i n f o...
Page 168: ...www printcopy info w w w p r i n t c o p y i n f o...
Page 169: ...www printcopy info w w w p r i n t c o p y i n f o...
Page 172: ...www printcopy info w w w p r i n t c o p y i n f o...


