8-26
Maintenance
7
Press the Up
and Down
button to confirm your selection.
The LCD panel updates and the setup screen for the Alignment C test
pattern is displayed.
8
Using the Number Keypad, enter the number of the line which appears
the straightest from pattern C.
9
Press the Up
and Down
button to confirm your selection.
The LCD panel updates and the setup screen for the Alignment D test
pattern is displayed.
10
Using the Number Keypad, enter the number of the line which appears
the straightest from Alignment pattern D.
11
Press the Up
and Down
button to confirm your selection.
The LCD panel updates and the setup screen for the Alignment E test
pattern is displayed.
12
Using the Number Keypad, enter the number of the line which appears
the straightest from Alignment pattern E.
13
Press the Up
and Down
button to confirm your selection.
The LCD panel updates and the setup screen for the Alignment F test
pattern is displayed.
14
Using the Number Keypad, enter the number of the line which appears
the straightest from Alignment pattern F. The LCD panel updates and
returns to normal operation.
Summary of Contents for WorkCentre 490cx
Page 1: ...The Document Company XEROX WorkCentre 490cx Color All in One User Guide ...
Page 8: ...viii ...
Page 84: ...1 72 Getting Started ...
Page 94: ...2 10 Making a Copy ...
Page 158: ...3 64 Sending a Fax ...
Page 210: ...6 18 Scanning ...
Page 215: ...Clearing Jams 7 5 7 4 Adjust the paper guide to match the width of the paper ...
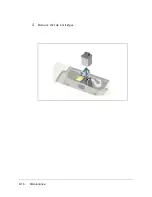
Page 254: ...8 16 Maintenance 4 Remove the Ink Cartridges ...
Page 320: ...Index 6 ...


