Setup and Use of Job Flow Sheets with Folders
WorkCentre 7425/7428/7435
System Administrator Guide
133
9. Wait several seconds for the Auto Clear service to log you out.
10. If you changed any settings, the printer will automatically reboot to register and enable your new
settings. After the printer is restarted, print out a Configuration Report to confirm that the ports are
enabled and TCP/IP is correctly configured. For information on how to print a Configuration Report,
see
Configuration Report
on page 22.
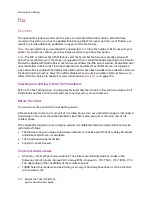
Configuring the SNMP Port
Configure the transport protocol for the SNMP port using CentreWare Internet Services.
1. Start a Web browser on a network connected computer.
2. Enter the printer’s IP address in the address box of the browser and press
Enter
.
3. Click the
Properties
tab.
4. Click
Port Status
.
5. Select (place a checkmark in) the
UDP
check box next to
SNMP
.
6. Click
Apply
.
7. Enter the System Administrator user ID and password when prompted and click
OK
.
8. Click the
Reboot
button when it displays. If a Reboot button fails to display, click the Status tab
and click
Reboot Machine
from that screen.
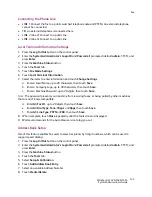
Creating Job Flow Sheets
Before you can a job flow sheet to a folder, you need to create at least one job flow sheet. To create a
job flow sheet, perform the following steps.
1. Press the
Log In/Out
button on the control panel.
2. Enter the
System Administrator’s Login ID
and
Passcode
if prompted (default
admin
,
1111
), and
press
Enter
.
3. Press the
Machine Status
button.
4. Touch the
Tools
tab.
5. Select
Setup & Calibration
.
6. Touch
Create Job Flow Sheets
.
Note:
If this selection is unavailable, follow the instructions in the next topic, Creating a Folder and
Linking to a Job Flow Sheet, to create your flow sheet.
7. Touch
Create
.
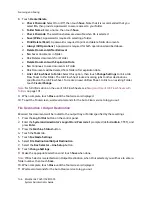
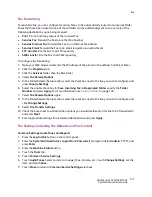
8. Select items to be set from the displayed item list, then touch
Change Settings
. When done, touch
Save
.
•
Name
: Set the name, up to 128 characters in length, for the job flow sheet.
•
Description
: Set the description, up to 256 characters in length, for the job flow sheet.
•
Keyword
: Enter a keyword, up to 12 characters in length, for job flow search.
•
Send as Fax
: Specify the fax transmission address. You can specify a total of up to 100
addresses, using either Address Numbers or by manual input (New Recipient).
Summary of Contents for WORKCENTRE 7428
Page 8: ...WorkCentre 7425 7428 7435 System Administrator Guide 8...
Page 9: ...9 1 General Information This chapter includes Resources on page 10...
Page 40: ...Administrative Tools WorkCentre 7425 7428 7435 System Administrator Guide 40...
Page 168: ...Scanning and Faxing WorkCentre 7425 7428 7435 System Administrator Guide 168...
Page 208: ...Troubleshooting WorkCentre 7425 7428 7435 System Administrator Guide 208...


