background image

42

Problem Solving

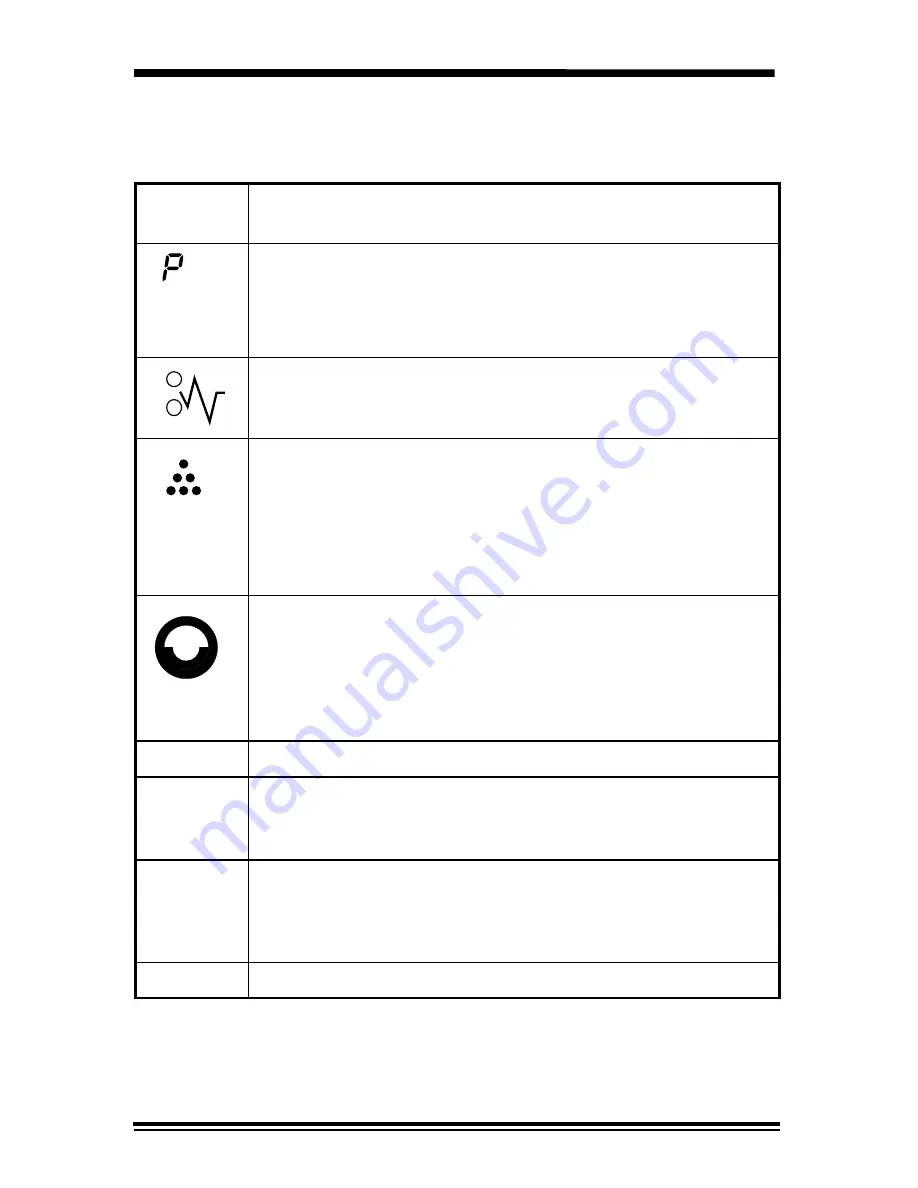
Status Code Chart

Status
Code

Suggested Solution

Ensure that there is paper in the selected paper tray.
Ensure that the Paper Tray is closed properly.
Paper may not have fed all the way into the copier.  (Refer
to 

Loading Copy Paper and Flashing


P

.)

Copy paper has misfed.  (Refer to 

Clearing the Paper

Path

.)

When the toner cartridge replacement indicator appears,
the toner cartridge will need to be replaced soon.  Be sure
to have a replacement cartridge in stock.

Copies will gradually become lighter until the copier stops
and the indicator begins to blink.  When this occurs the
toner cartridge must be replaced.

When the drum cartridge replacement indicator appears,
the drum cartridge will need to be replaced soon.  Be sure
to have a replacement cartridge in stock.  In approximately
1,000 copies, the Ready indicator will go out, the drum
cartridge indicator will blink, and the copier will stop
operating until the drum cartridge is replaced.

CH

Install toner cartridge.

A1 – A2

Remove misfed paper from the Set Document Feeder.
Refer to


A1 – A2 Set Document Feeder Misfeed

 for

detailed instructions.

U2 – U5

L1 – L5

H2 – H4

Switch OFF the Main Power.  Wait approximately 5
seconds.  Then switch ON the Main Power.  If the Status
Code continues, call for service.

L1

Ensure left shipping screw is removed.

Summary of Contents for XC 800 Series

Page 1: ...XC 800 XC1000 XC1200 Series User Guide 701P96454 10 97...

Page 2: ...Copies on the Document Glass 18 Making Copies on the Set Document Feeder XC865 XC1044 XC1045 XC1255 19 Copy Quality 20 Reduction Enlargement 22 Copying Oversized Documents 23 Book Mode XC830 XC865 XC...

Page 3: ...nt 37 Toner Cartridge Yield 38 Drum Cartridge Replacement 39 Problem Solving 40 Problem Solving Chart 40 Status Code Chart 42 Servicing Your Copier 43 In the USA and Canada 43 Ordering Supplies 43 Pac...

Page 4: ...turning the equipment off and on the user is encouraged to try to correct the interference by one or more of the following measures Reorient or relocate the receiving antenna Increase the separation...

Page 5: ...13R544 Information To get answers for any other questions you might have regarding your copier to register your warranty by phone or for assistance with the installation of your copier you may call 1...

Page 6: ...and materials out of reach of children Do not use this copier near water wet locations or outdoors Do not place this copier on an unstable cart stand or table The copier may fall causing personal inj...

Page 7: ...areas within these covers Never defeat interlock switches Machines are designed to restrict operator access to unsafe areas Covers guards and interlock switches are provided to ensure that the machine...

Page 8: ...oduced is dependent on copy volume and is heavier than air Providing the correct environmental parameter as specified in the Xerox installation procedures ensure that concentration levels meet safe li...

Page 9: ...79 Fuera de los Estados Unidos y Canad llame a su representante local de Xerox Copier Equipment Listing Copier Number Paper Tray Capacity Paper Tray Bypass Alternate Paper Tray Book Mode Set Document...

Page 10: ...net Wrap partially used reams of paper tightly Copier location For reliable copier operation and copy quality Xerox recommends Place your copier in a well ventilated room Recommended environment Tempe...

Page 11: ...Fuser lever Transfer corotron cleaner Document Cover Power Switch Paper Tray Bypass SDF Exit Tray SDF Original Guides SDF Input Tray Toner Cartridge Fuser Transfer corotron Alternate Paper Tray Paper...

Page 12: ...e Ready Indicator is lit the copier is ready to make copies IMPORTANT Save the carton and packing materials They should be used to repack the copier if it has to be shipped for servicing or in case yo...

Page 13: ...per tray on the right side of the copier Lower and unfold the tray 4 Remove all remaining pieces of tape from the copier 1 Remove the protective material and the shipping pins from the right and left...

Page 14: ...Be sure to remove the pressure plate lock from both paper trays 9 Press the release lever to open the copier 14 Store the pressure plate lock in the location shown Note Save the pressure plate lock It...

Page 15: ...ce Purchased replacement toner cartridges will yield approximately twice the number of copies 14 Remove the toner cartridge cover 10 Slide the toner cartridge into the copier until it locks into place...

Page 16: ...into a grounded outlet 1 Turn on the power switch In approximately two seconds the ready indicator will light Copying is now possible Note Save the carton and packing materials They should be used to...

Page 17: ...ontrast keys to lighten or darken copies while in the Text Photo or Toner Save settings The copy Lighter Darker feature is unavailable when Auto contrast is selected There are 5 contrast settings repr...

Page 18: ...to increase the percentage Any percentage from 70 to 141 may be selected The indicator above the key will light when a variable percentage is selected 11 Display Window Copy quantity reduction enlarge...

Page 19: ...tart again The copies will be made automatically Auto Clear This copier is enabled at the factory to return to the Normal Copy Mode approximately one minute after a job is completed Unless otherwise p...

Page 20: ...input areas Copy Paper Input Paper Tray 1 and Paper Tray 2 Alternate Paper Tray Paper Tray Bypass Paper Sizes 5 5 8 5 to 8 5 14 A5 to 216 356mm 3 5 5 5 to 8 5 14 A6 to 216 356mm Paper Weights Optimum...

Page 21: ...copier diagram and remove the misfed paper Do not reuse the misfed paper Ensure that the paper is under the corner snubbers Close the paper tray Press Start to make the remaining copies 1 Lift and pu...

Page 22: ...ve the max fill line 5 Close the Paper Tray 6 To cancel the blinking P without restarting copying press the Clear button or press Start to continue copying Flashing When the Alternate Paper Tray runs...

Page 23: ...Document Cover 2 Place the original face down and align it with the registration guide on the document glass Note Writing that is very close to the leading or trailing edge of the original may not co...

Page 24: ...4 and 8 5 14 216 353 mm The SDF comes from the factory with the Auto Start feature enabled Refer to Customizing Your Copier section of this User Guide for information about changing this setting 1 Sel...

Page 25: ...rom originals with a colored background Note When Auto is selected the copier automatically varies the contrast of your copies Lighter Darker settings are not available Text Use Text to copy documents...

Page 26: ...darken copies while in the Text Photo or Toner Save settings There are 5 contrast settings represented by 3 indicator lights The indicators light up one or two at a time to represent the selected set...

Page 27: ...crease or decrease the reduction or enlargement by 1 increments You may select any percentage from 70 141 Press the key to display the current percentage When a variable percentage is selected the lig...

Page 28: ...C1044 XC1045 XC1250 XC1255 This feature is useful when you want to copy facing pages of a document onto separate sheets of paper The maximum book size is 10 14 B4 1 Align the center of the document wi...

Page 29: ...ncies one sheet at a time Labels face up one sheet at a time Use labels and transparencies specifically designed for copiers high temperatures 1 Place the original face down and align it with the regi...

Page 30: ...py paper ranging in size from 3 5 5 5 to 8 5 14 A6 to 216 356mm Predrilled paper holes toward the front of the copier Letterhead paper face up with the top toward the left Transparencies one sheet at...

Page 31: ...ply button to select the alternate paper tray 6 Select other required features 1 Place the original face down and align it with the registration guide on the document glass and close the document cove...

Page 32: ...tity required 3 Press Start to make side 1 copy 1 Remove the first original and place the second original face down on the Document Glass with the TOP toward the RIGHT and lower the document cover 2 R...

Page 33: ...s XC810 XC1040 XC1045 XC1250 and XC1255 only 0 0 Main Tray 1 Alternate Paper Tray 2 Second Tray Auto Clear Time Out This feature allows you to select the time it takes for the copier to return to the...

Page 34: ...ight 3 1 step light 4 Normal 5 1 step dark 6 2 steps dark 7 3 steps dark 8 4 steps dark Paper Trail Edge Deletion The trail edge deletion can be turned off to accommodate originals that have print to...

Page 35: ...ay when the selected tray runs out of paper Models XC1250 and XC1255 only 11 0 On 1 Off Set Document Feeder Exposure Adjustment The copy exposure range may be adjusted when the copy image is consisten...

Page 36: ...de key for approximately 4 to 6 seconds The light next to Auto mode will light The lights within the Copier Diagram will flash 1 Press the 10 s unit key until the number 10 is displayed 2 Press Start...

Page 37: ...ft lint free cloth or paper towel with water 2 Lift the document cover 3 Wipe the surface of the document glass until it is clean and dry 4 Wipe the underside of the white document cover until it is c...

Page 38: ...1 Press the release lever to open the copier 2 Remove the green transfer corotron cleaner from inside the copier on the right hand side near the front and insert it into the transfer corotron unit 2...

Page 39: ...are not to touch the Fuser 1 Press the release lever to open the copier 2 Carefully remove the misfed paper Warning The fusing area is hot Take care when removing paper from the fuser area 3 Lift the...

Page 40: ...Input Misfeed 1 Pull the misfed original s toward the right to remove them from the SDF input tray Refeed the number of originals indicated 2 Open and close the document cover to clear the misfeed ind...

Page 41: ...copier will not operate until the toner cartridge is replaced 1 Press the release lever to open the copier 1 Press down on the green lever 1 on the front of the old toner cartridge and pull the cartri...

Page 42: ...aten cover open The number of times the copier is switched on and off Double sided copying will use more toner per ream of paper High humidity To get the most from your toner cartridge Always copy wit...

Page 43: ...atin America 1 Press the release lever to open the copier 2 Press down on the green lever 1 on the front of the toner cartridge and pull out the cartridge 2 Note The toner cartridge must be removed be...

Page 44: ...too dark If the original is light select the lower copy contrast position to darken the background of the copies If the original is dark select the upper copy contrast position to lighten the backgro...

Page 45: ...to Clearing the Paper Path The three trouble indicators are lit in the copier diagram The machine is in the program mode Press the Exposure mode key to exit Toner yield is lower than expected and the...

Page 46: ...cator begins to blink When this occurs the toner cartridge must be replaced When the drum cartridge replacement indicator appears the drum cartridge will need to be replaced soon Be sure to have a rep...

Page 47: ...g The copier model number XC ______________ on the control panel The serial number ________________________ Located on the back cover of the copier to the right of the power supply The purchase date f...

Page 48: ...te The pressure lock storage compartment is just inside the open copier 8 Replace the shipping pins into the right and left sides of the copier Note The shipping pins are stored on the underside of th...

Page 49: ...lb 52 130 gsm Copy Rate XC810 XC820 XC830 XC865 XC1040 XC1020 XC1044 XC1045 XC1250 XC1255 8 copies minute 8 5 11 A4 and smaller 10 copies minute 8 5 11 A4 and smaller 12 copies minute 8 5 11 A4 and s...

Page 50: ...18 5 10 6 510 470 270mm 21 7 18 5 12 2 550 470 310mm 20 1 18 5 14 1 510 470 359mm 21 7 18 5 15 7 550 470 400mm Machine Weight XC820 XC830 XC810 XC865 XC1040 XC1020 XC1044 XC1045 XC1250 XC1255 Includes...

Page 51: ...id credit card number should it be required Mastercard Visa or American Express HOW IS EXCHANGE OBTAINED Our exchange program is the easiest and quickest way to provide you with a fully operational co...

Page 52: ...consequential damages so the above limitation or exclusion may not apply to you NO OTHER WARRANTY IS MADE BY XEROX No other warranty is made by Xerox Any implied warranty of merchantability is limited...

Page 53: ...bill of sale to establish your date of purchase IF YOU HAVE A PROBLEM The first step is to call our trained Customer Support Representative at 1 800 TEAM XRX 1 800 832 6979 Many problems can be resol...

Page 54: ...bility to use your copier even if we know such damages are possible NO OTHER WARRANTY IS MADE BY XEROX No other warranty is made by Xerox Any implied warranty of merchantability is limited to the dura...

Page 55: ...Library of Congress Washington D C 20550 or telephone the Copyright Office at 202 707 9100 and ask for circular 21 Copying of other items may be prohibited If you have any questions seek legal advice...

Page 56: ...the Xerox Total Satisfaction Guarantee is three years from purchase date This Xerox Total Satisfaction Guarantee applies to Xerox equipment acquired by you from an Authorized Xerox Retailer and contin...

Page 57: ...atus This is not a WHMIS controlled product Ingredients by wt Iron Powder 85 Styrene Acrylate Copolymer 15 Carbon Black 1 CAS No 7439 89 6 25767 47 9 1333 86 4 Section II Emergency and First Aid Prima...

Page 58: ...m a Xerox sponsored Chronic Toner Inhalation Study demonstrated no lung change in rats for the lowest 1mg m exposure level i e the level most relevant to potential human exposure A very slight degree...

Page 59: ...ory Protection None required under normal use Eye Protection None required Protective Gloves None required Other None Section VIII Special Precautions Handling and Storage None Conditions to Avoid Avo...

Reviews: