Xerox Mobile Scanner
User’s Guide
26
8.
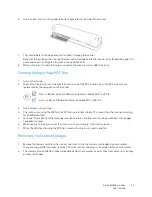
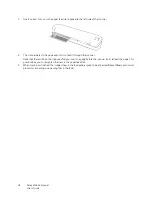
The scanner detects the page and starts to feed it through the scanner.
Note that there will be a short pause after you insert the page before the scanner starts to feed the page. This
pause allows you to straighten the item in the paper feed slot.
9.
When scanning is finished, the image is saved to the phone.
Retrieving the Scanned Images
Please follow your normal process for viewing, saving, or forwarding files on your phone. In most cases, you will need
to disconnect the phone from the scanner to be able to access the scanned files.
Troubleshooting Connection Issues
While several models of BlackBerry and Google Android mobile technology based phones have been tested to work
with the scanner, we cannot guarantee that every Smartphone or feature phone will work, nor guarantee that every
phone will work as described above.
Here are some basic troubleshooting steps you can try if your scanner is unable to recognize the phone as a
destination drive.
•
The phone did not display a prompt to choose the USB connection type.
Refer to your phone’s user manual for the available USB connection options when you plug the phone into a
computer.
Most phones have at least 3 USB options and they are usually to either “charge” the phone via the USB cable,
“sync” the phone with the software on the computer, or mount it as a “disc drive” to transfer files to/from the
phone.
These are the same options you should see when you plug the USB cable into the scanner instead of to the
computer. If you do not see the prompt, check your phone’s USB connection settings and change it to be a disc
drive if that option is not already selected.
The phone may have an option to always choose the previously selected USB connection and never prompt
you to make the selection again. This may be why you are not getting a prompt to choose your connection
type.
•
The phone is connected as a disc drive but the LEDs never stop flashing.
Solution 1:
Check to see if you have a memory card installed on the phone (such as a mini-SD or micro-SD card). An
external memory card must be installed in the phone for the scanner to detect the phone as a storage device.
Solution 2:
Some of the phones we tested did not work immediately when selecting the option to use the phone as a disc
drive. If you run into this problem with your phone, try the workaround steps listed below. If you find that this
procedure works, it must be used each time you connect the scanner to the phone:
1.
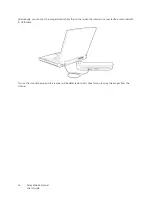
Connect the phone’s USB cable to the phone.
2.
Connect the other end of the USB cable to the USB port in the back of the scanner.
3.
Turn on the scanner.
4.
Select the “disc drive” option on your phone when prompted.
5.
At this time the scanner LEDs just continuously flash.
6.
Change the phone’s USB connection type from the “disc drive” option to the “sync” option.
7.
Immediately change the phone’s USB connection type back to “disc drive”.
8.
The phone should now initialize its storage properly and the scanner LEDs should stop flashing.


