19
CN3100 Vehicle Modem - Installation Guide - G7609 - 3.0
- DRAFT
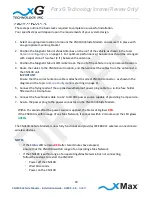
These steps outline the basic tasks required to complete a successful installation.
Your specific steps will depend upon the requirements of your system design.
1.
Select an appropriate location to mount the CN3100 Vehicle Modem and secure it in place with
an appropriate mounting bracket.
2.
Position the Magnetic Mount xMax Antennas on the roof of the vehicle as shown in the topic
Antenna Configurations
on page 11. For optimum performance, the antennas should be arranged
with a separation of two feet (2 ft.) between the antennas.
3.
Position the Magnetic Mount WiFi Antenna on the roof of the vehicle in any convenient location.
4.
Route the cables to the CN3100 unit location, and then connect the cables from the antennas to
the CN3100 unit.
IMPORTANT
Ensure that the correct antenna cable is attached to correct CN3100 connector, as shown in the
diagrams in the topic
Antenna Configurations
starting on page 11.
5.
Connect the flying leads of the supplied weatherproof power plug cable to a in-line fuse holder
fitted with a 10 Amp fuse.
6.
Connect the fuse holder cable to a 12 to 19 VDC power source capable of providing 3 amp service.
7.
Secure the power plug to the power connector on the CN3100 Vehicle Modem.
Within 15 seconds after the power source is applied, the Status LED glows
RED
.
If the CN3100 is within range of an xMax Network, it connects within 2 minutes and the LED glows
GREEN
.
The CN3100 Vehicle Modem is now fully functional and provides IEEE 802.11 wireless connections to
wireless devices.
NOTES
If the
Status LED
remains
RED
after two minutes have elapsed,
ensure that the CN3100 is within range of an operating xMax Network.
If the CN3100 is within range of an operating xMax Network, but not connecting,
follow these steps to restart the CN3100:
Power off the CN3100.
Wait 60 seconds.
Power on the CN3100.
For xG Technology Internal Review Only!
DRAFT


