


⑦
⑧
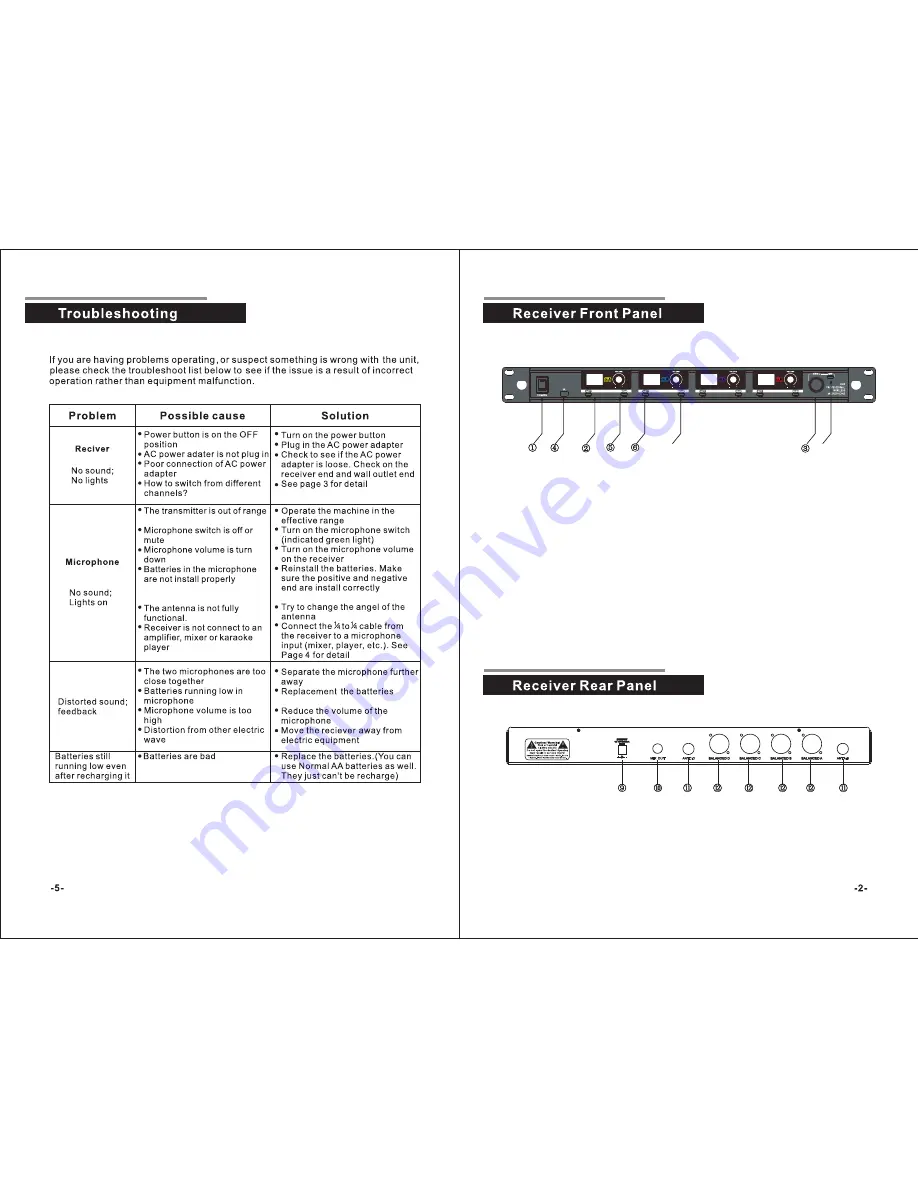
1. Power switch : Press to turn it on/off
2. OLED display panel: Display all information like the frequency channel and
group of the microphone.
3. Menu control: The main control to change frequency, group and channel
by turning from left to right. Press to confirm the freguency, group or channel.
4. IR Launcher :To submit matching signal to the receiver on the IR window of
the microphone in order to make microphone match the same channel with
this receiver.
5. Volume control knob: Adjust the volume on the microphone
6. IR sync shortcut (ACT): Press the button to begin IR syncing.
7. Scan: Press to start scanning a clean frequency automatically
8. Switching: This button is to select a channel which you want to operate
9. DC input jack: 12-18V 1200mA
10. Mix out
11. Antennal A/B
12. Balance audio output D/C/B/A
Summary of Contents for IU-4015
Page 1: ...4 MICROPHONE SYSTEMS...
Page 2: ......


