Page
3
of
3
Distributed by CML Distribution, Saxon House, Saxon Business Park, Hanbury Road, Bromsgrove, Worcestershire, B60 4AD, England.
V1 03/2016
Changing Transmit and Receive Frequency
If you are using more than one quadcopter at the same location or suffer video interference you can
change the camera transmission frequency* and the screen receiving frequency.
1.
Make sure the screen is turned off
2.
Select a new receive frequency by adjusting the 3 switches on the back of the FPV screen,
the default is 8 (5725GHz)
CH1
CH2
CH3
CH4
CH5
CH6
CH7
CH8
ON
1 2 3
ON
1 2 3
ON
1 2 3
ON
1 2 3
ON
1 2 3
ON
1 2 3
ON
1 2 3
ON
1 2 3
5865 GHz
5845 GHz
5825 GHz
5805 GHz
5785 GHz
5765 GHz
5745 GHz
5725 GHz
= Switch Position
3.
Turn the Screen on
4.
Turn the quadcopter on
5.
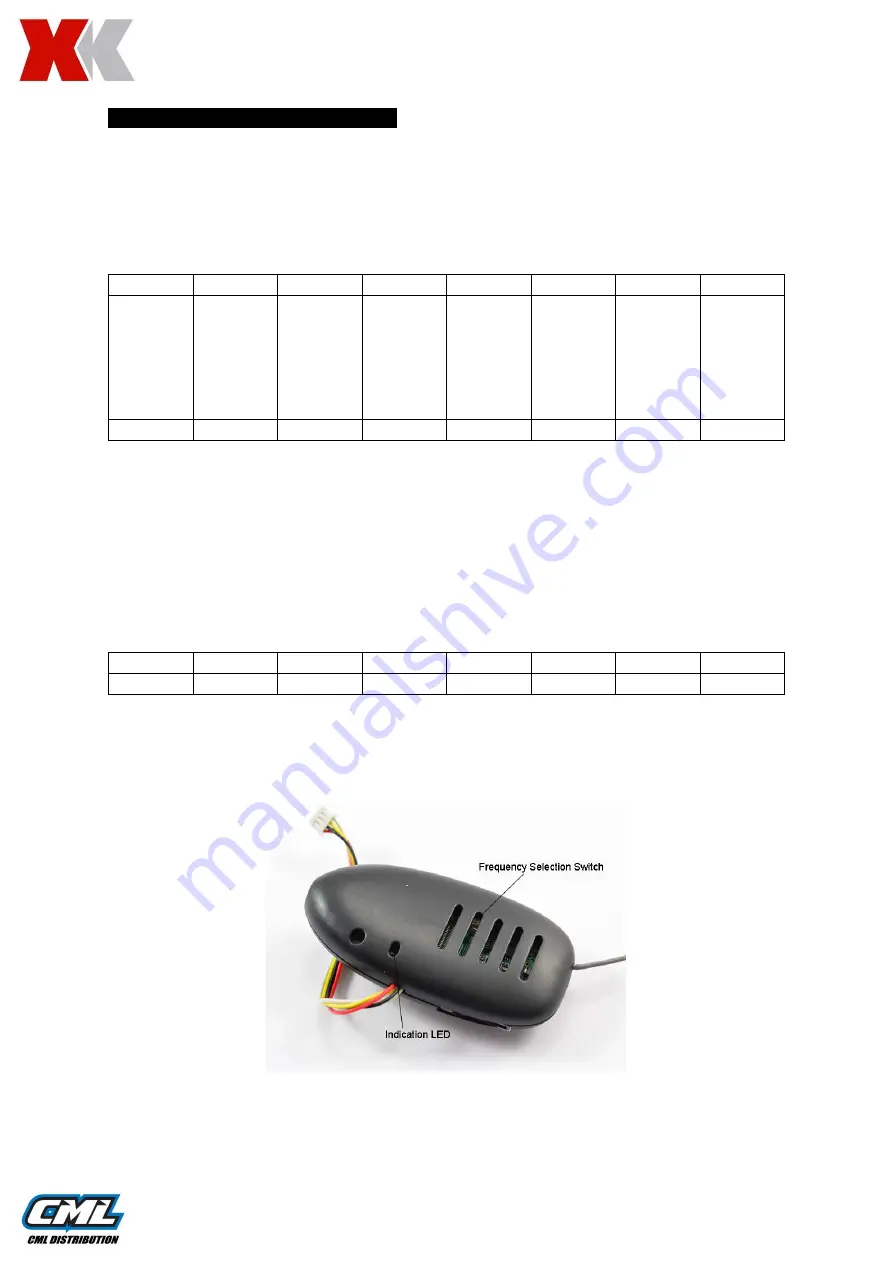
Carefully press the Frequency Selection Switch on the bottom of the camera to change
frequency. Each switch press will increase the channel section by 1.
The Indication LED will flash with each switch press to indicate the channel number and then
turn to a solid colour, i.e. channel 3 will be indicated by 3 flashes and then turn a solid red.
**Only press the switch with a non-metallic object to avoid damaging the camera unit**
1 Flash
2 Flashes
3 Flashes
4 Flashes
5 Flashes
6 Flashes
7 Flashes
8 Flashes
5865 GHz
5845 GHz
5825 GHz
5805 GHz
5785 GHz
5765 GHz
5745 GHz
5725 GHz
*If you change from the default Channel 8, you will need to select the camera transmission channel
each time you turn on your quadcopter on the camera unit.


