background image


EASI-GLIDE INSTRUCTIONS 
 

Introduction 

The Easi-Glide system can be used for Single and Double Door opening configurations. 
The maximum door weight is 45kg each. 
The system can be used for 35mm and 40mm thick doors. Thicker doors, up to 50mm, will require the Pelmet to be built 
out from the wall to allow the door to pass. 
Door widths of between 610mm and 915mm can be used. 
Single and Double Width Pelmets are supplied over-sized for on-site trimming to suit aperture and door width/s. 
Ensure that the wall that the Easi-Glide system is fitted to is not obstructed by skirting boards, light fittings, etc. 
Doors cannot be reduced in height from the top door edge lipping: The full lipping thickness is required for secure fixing 
of the Adjuster Bolts to the door.  
Please ensure that you follow the finishing instructions supplied with the doors. 
Storing, installing or finishing the product in a manner not detailed in the instructions may invalidate the warranty. 


Prepare the Opening 

Ensure that the door/s are of sufficient height and width to cover the Aperture when closed. 
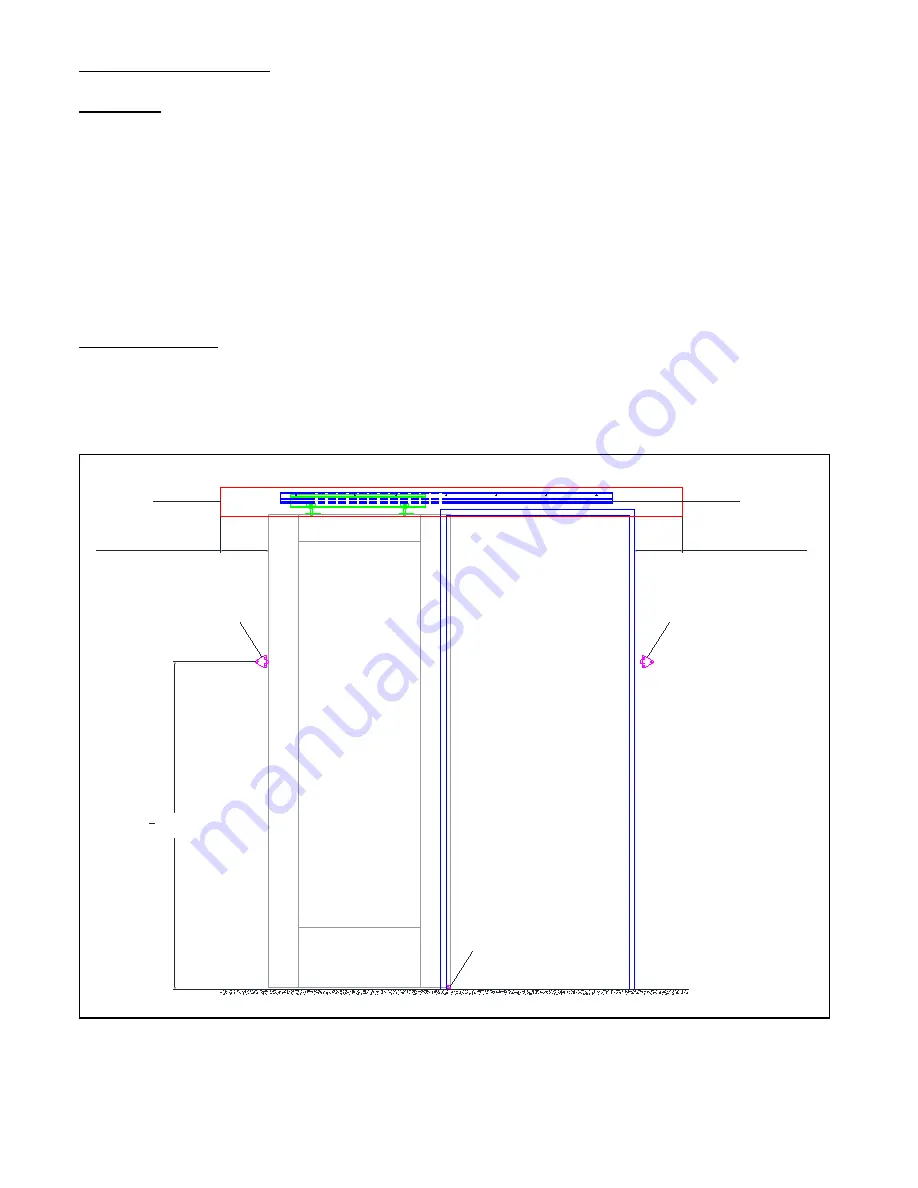
Calculate width of pelmet requirement and trim to suit the installation: The pelmet should extend at least 100mm beyond 
the aperture on the “door closed” side. The pelmet should extend beyond the aperture on the “door open” side by the 
width of the door plus 100mm. 


100mm or greater

100mm or greater

Approx 

2
3

 of door height

Pelmet

Track

Door

Aperture

Door Stop

Door Stop

Floor Guide


Summary of Contents for EASI-GLIDE

Page 1: ... XL JOINERY LTD EASI GLIDE INSTRUCTIONS PLEASE READ AND UNDERSTAND THESE INSTRUCTIONS FULLY PRIOR TO STARTING INSTALLATION IT IS STRONGLY RECOMMENDED THAT A COMPETENT TRADES PERSON INSTALLS THIS PRODUCT ...

Page 2: ...d in height from the top door edge lipping The full lipping thickness is required for secure fixing of the Adjuster Bolts to the door Please ensure that you follow the finishing instructions supplied with the doors Storing installing or finishing the product in a manner not detailed in the instructions may invalidate the warranty Prepare the Opening Ensure that the door s are of sufficient height ...

Page 3: ...place the Hanger bolts into the holes Mark the position of the screw fixing holes and pre drill prior to permanently fixing the Hanger Bolts screws Fit the Track to the Pelmet Fit the Track through its top horizontal edge into the underside of the Pelmet using 15mm screws The Pelmet Fascia is delivered separately to allow Track and Pelmet fitting 65mm Min 83mm Max Fit Track to Pelmet Pelmet Fit Pe...

Page 4: ... bottom of the door is approximately 5mm from the floor Ensure that the door hangs level and can slide along the track smoothly ensure that the door does not slide off the track Tighten the lower bolt to secure the door to the hangar Fit the Floor Guide to the Floor Assemble the Floor Guide Fix the Floor Guide to the Aperture reveal where it intersects with the floor Adjust the Floor Guide to the ...

Page 5: ...lled Pelmet Pre drilled Pelmet End Caps to fix to Pelmet Assembled Pelmet Pelmet Fascia Delivered Unassembled for On Site Installation after Track Fitted Fascia Supplied Loose Pre drilled Screw holes to fix Pelmet Fascia Fit the End Caps to the Pelmet and Fascia Once the Fascia has been fitted to the Pelmet the End Caps should be screwed to the Pelmet Ends pre drilling through the pre drilled End ...

Reviews: