


72
Hood Installation
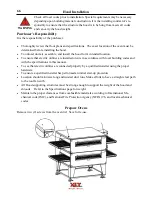
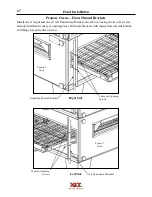
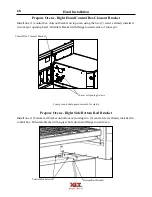
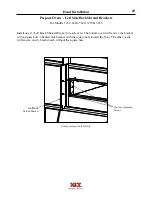
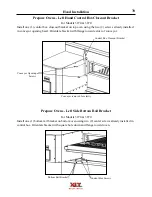
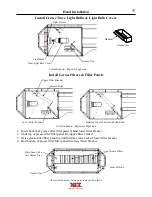
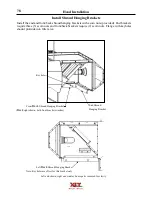
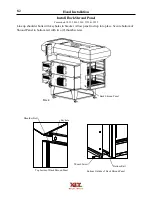
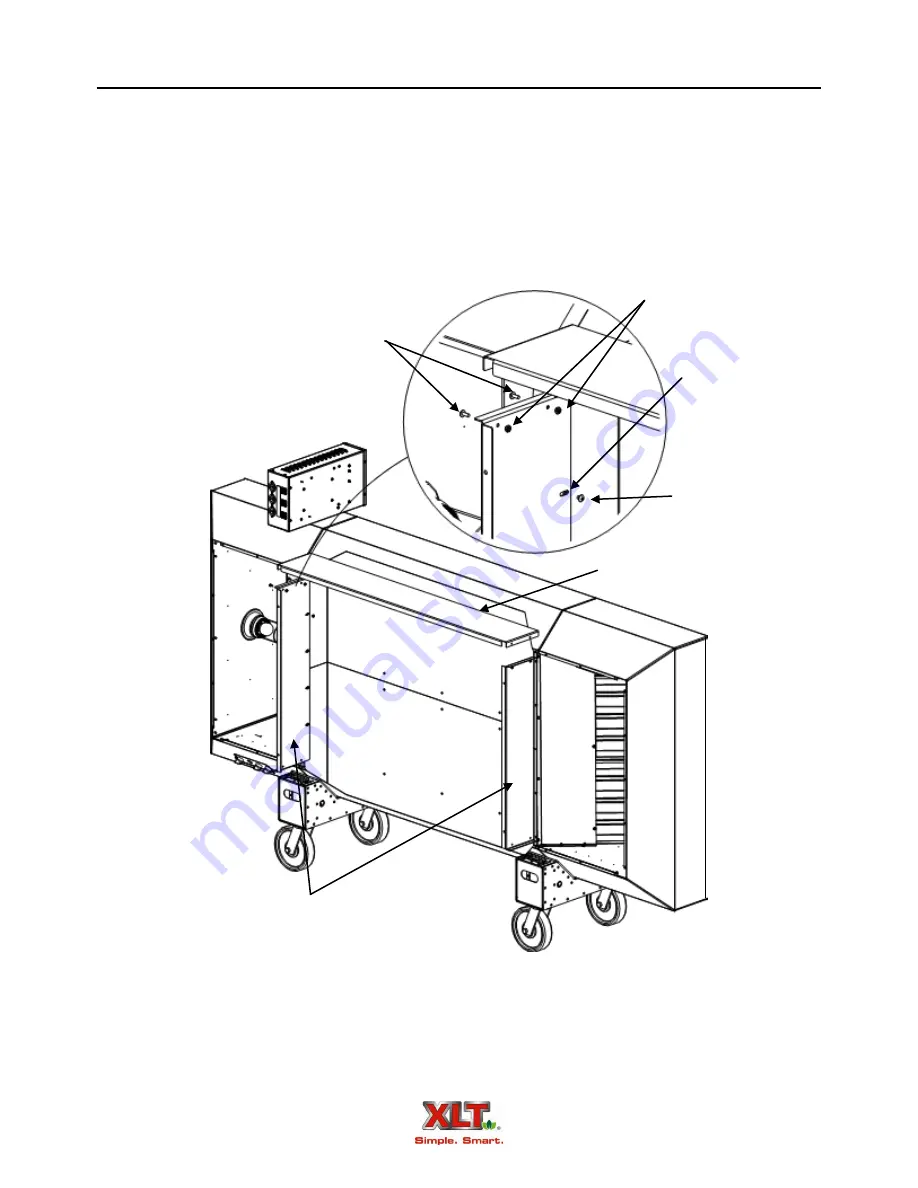
Prepare Hood
Attach inside filler panels using eight (8) 10-24 x 1/4” screws (provided). Tighten screws in ad-
justment slots with panels pushed as far as possible toward hood.
Attach back panel stiffener to inside filler panels using 10-24 x 1/2” Screws and Nuts, two (2) each
end (provided). Install so that the screw heads are inside filter areas.
10-24 x 1/4”
Screws
10-24 x 1/2” Screws
10-24 Nuts
Adjustment Slots
Inside Filler Panels
Back Panel Stiffener
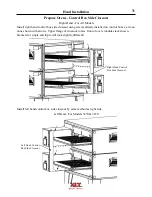
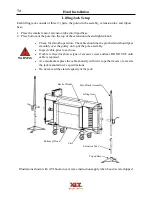
Illustrations shown with AVI hood on cart, same instructions apply when AVI hood is crate
shipped.
Summary of Contents for 1832-AE-B
Page 43: ...43 This page intentionally left blank ...
Page 88: ...This page intentionally left blank ...
Page 95: ...95 Oven Schematic 1832 2440 3240 3255 3855 Square Burner Standard ...
Page 96: ...96 Oven Schematic 1832 2440 3240 3255 3855 Square Burner World ...
Page 97: ...97 Oven Schematic 1832 2440 3240 3255 3855 Round Burner Australia ...
Page 98: ...98 Oven Schematic 3270 3870 Square Burner Standard RH Control Box ...
Page 99: ...99 3270 3870 Square Burner Standard LH Control Box Oven Schematic ...
Page 100: ...100 Oven Schematic 3270 3870 Square Burner World RH Control Box ...
Page 101: ...101 Oven Schematic 3270 3870 Square Burner World LH Control Box ...
Page 102: ...102 3270 3870 Round Burner Australia LH Control Box Oven Schematic ...
Page 103: ...103 Oven Schematic 3270 3870 Round Burner Australia RH Control Box ...
Page 104: ...104 Hood Schematic Standard ...
Page 105: ...105 Hood Schematic World ...


