background image

ASSEMBLY INSTRUCTIONS

IMPORTANT: Hand tighten bolts and Nylon Lock nuts until machine is fully assembled.

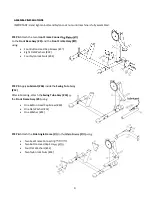
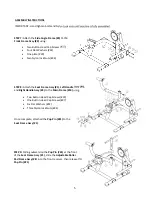
STEP 8:

Attach the 

eat  ra e  ss

,

Le t a le  ss

and

i t a le ss

 to the

ai ra e 

using: 

Two Button Head Cap Screws (#39)

One Button Head Cap Screws (#37)

Six Flat Washers (#32)

Three Nylon lock Nuts (#34)

Once complete, attached the 

P Pi  

 to the 

eat  ra e ss  

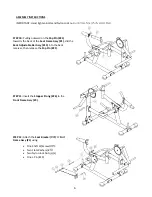
STEP 9:

Pulling outward on the

P Pi  

 at the front 

of the

eat  ra e  ss  

, slide the

sta le ller 

Pa ra e  ss

) into the front receiver, then release the

P Pi


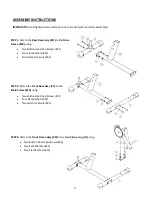
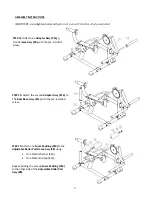
STEP 7:

Attach the 

i e 

le  ra e 

to the 

r t ra e  ss

 using: 

Two Button Head Cap Screws (#37)

Four Flat Washers (#32)

One plate (#20)

Two Nylon lock Nuts (#34)

Summary of Contents for XM-7615.1

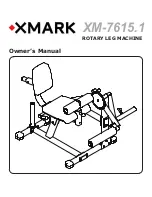
Page 1: ...Owner s Manual XM 7615 1 ROTARY LEG MACHINE...

Page 2: ...TABLE OF CONTENTS IMPORTANT SAFETY INFORMATON Page 2 BEFORE YOU BEGIN Page 2 ASSEMBLY Page 3 8 PARTS LIST Page 9 EXPLODED VIEW Page 10...

Page 3: ...under age 16 and pets should be kept away from this unit at all times It is the owner s responsibility to ensure that all users of this unit have read the Owner s Manual and are familiar with safety...

Page 4: ...d Cap Screws 37 Four Flat Washers 32 Two Nylon lock Nuts 34 STEP 3 Attach the r t ra e ss to the r t ase ss using Two Button Head Cap Screws 36 Two Split Washer 33 Two Flat Washers 32 STEP 1 Attach th...

Page 5: ...ri a t inside the i e ss After lubricating attach the i e ss to the r t ra e ss using One Button Head Cap Screw 40 One Flat Washer 31 One Washer 22 STEP 6 Attach the i e le ra e to the ai ra e using...

Page 6: ...e Nylon lock Nuts 34 Once complete attached the P Pi to the eat ra e ss STEP 9 Pulling outward on the P Pi at the front of the eat ra e ss slide the sta le ller Pa ra e ss into the front receiver then...

Page 7: ...ra e ss slid the a sta le ar ss into the back receiver then release the P Pi STEP 11 Insert the t er Pr to the r t ra e ss STEP 12 Attach the eat ra et to eat ra e ss using One Shaft W Screw 25 Two Fl...

Page 8: ...lled screw STEP 15 Attach one a Pa i to the sta le ller Pa ra e ss using One Plastic Washer 24 One Metal End Cap 23 Repeat adding the second a Pa i to the other side of the Adjustable Roller Pad Assy...

Page 9: ...he eat ra et using Four Flat Washers 31 Four Button Head Cap Screws 40 STEP 17 Attach the a Pa to the a sta le ar ss using Two Flat Washers 31 Two Button Head Cap Screws 40 STEP 18 Attach the i ller P...

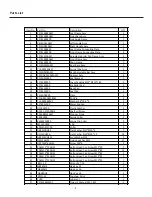
Page 10: ...Parts List 3 3 3 3 3 3 3 3 3 3 3 3 3 33 3 3 3 3 3 3 3 3 3 3...

Page 11: ...10 Exploded View...

Page 12: ...Customer Service service xmarkfitness com 1 800 719 4605 Hours 7 30 AM to 3 00 PM CST Monday Friday Visit xmarkfitness com for warranty information...

Reviews: