background image

Owner’s Manual

8/09

XM-7626

FUNCTIONAL TRAINER

Summary of Contents for XM-7626

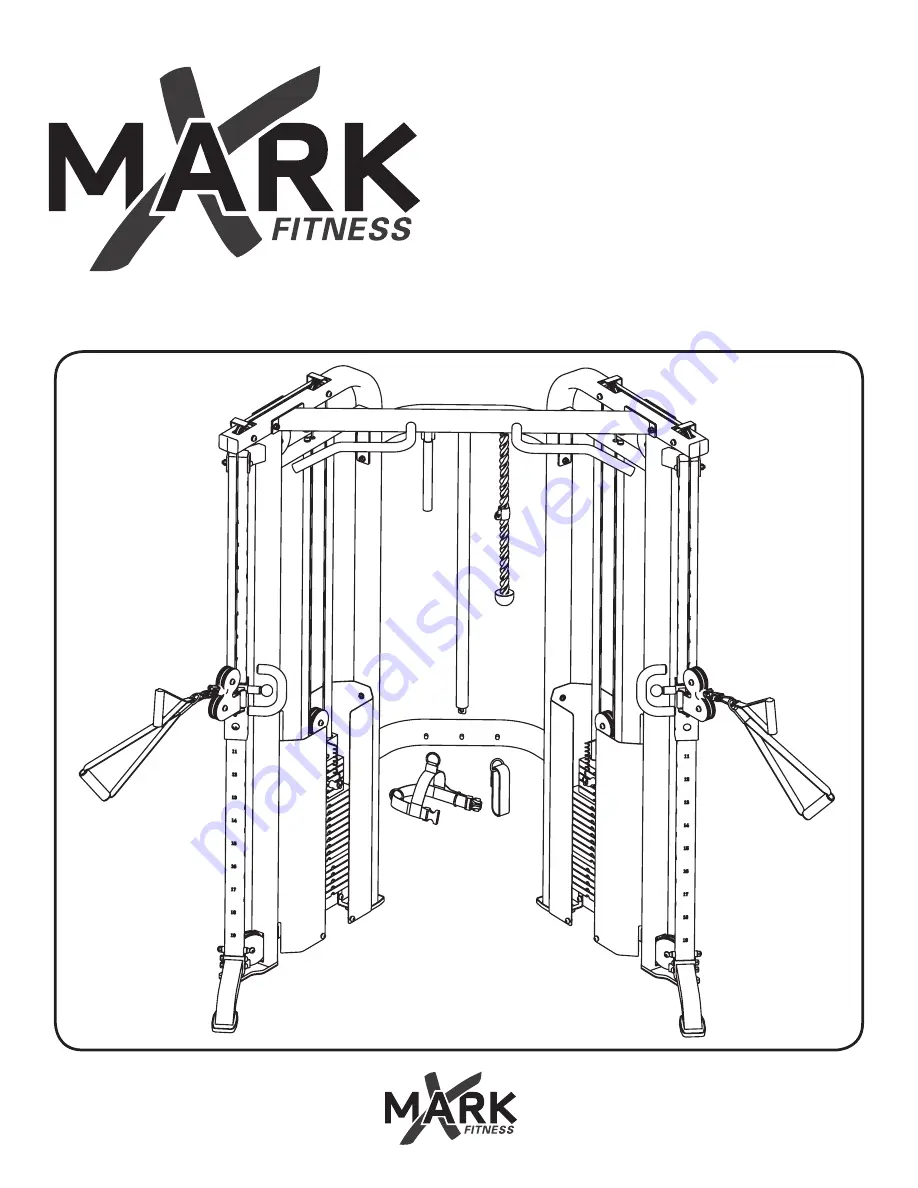
Page 1: ...Owner s Manual 8 09 XM 7626 FUNCTIONAL TRAINER...

Page 2: ...Table Of Contents Weight Stack Sticker Placement 2 Important Safety Information Before You Start Assembly Parts List Exploded View Warranty Information 3 4 5 12 13 14 15 16...

Page 3: ...read the Owner s Manual and are familiar with safety information and precautions This unit should only be used on a level surface and is intended for indoor use only XMARK Fitness recommends an equipm...

Page 4: ...e MAILING ADDRESS 7501 Trammel Drive Shreveport LA 71108 4 THANK YOU for making this unit a part of your exercise program XMARK Fitness assures the very best in value appearance durability and biomech...

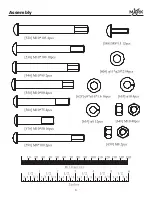
Page 5: ...Assembly 5...

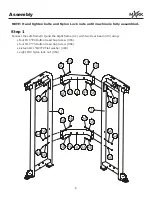
Page 6: ...s until machine is fully assembled Step 1 Connect the Left frame 1 and the Right frame 2 with two Rear beam 4 using four M10 80 Button Head Cap Screw 55 four M10 75 Button Head Cap Screw 56 sixteen 11...

Page 7: ...and Nylon Lock nuts until machine is fully assembled Step 2 Attach the Main top beam 3 to the Left frame 1 and the Right frame 2 using four M10 105 Button Head Cap Screw 52 eight 11 20 2 Flat washer...

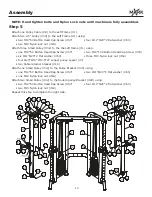
Page 8: ...37 five Weight plate 15LB 39 nine Weight plate 10LB 40 five Weight Plate 5LB 41 one Top plate 34 to the Left frame 1 using two M10 50 Button Head Cap Screw 57 two 10 Spring washer 61 two 11 20 2 Flat...

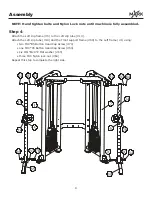
Page 9: ...Left slip frame 5 to the Left slip tube 13 Attach the Left slip tube 13 and the Front support frame 69 to the Left frame 1 using two M10 85 Button Head Cap Screw 70 one M10 95 Button Head Cap Screw 5...

Page 10: ...10 50 Button Head Cap Screw 57 two M10 100 Button Head Cap Screw 53 six 11 20 2 Flat washer 60 three M10 Nylon lock nut 64 four 20 16 10 5 27 Longer pulley spacer 7 two Cable retainer bracket 16 Attac...

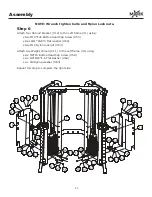
Page 11: ...Left frame 1 using two M10 100 Button Head Cap Screw 53 four 11 20 2 Flat washer 60 two M10 Nylon lock nut 64 Attach two Weight shroud 11 to the Left frame 1 using six M8 15 Button Head Cap Screw 58...

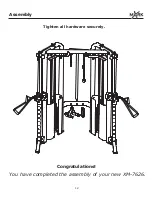
Page 12: ...Assembly Tighten all hardware securely You have completed the assembly of your new XM 7626 Congratulations 12...

Page 13: ...25 140 155 170 185 200 200 LB Stack 13 The weight stack image below illustrates how the weight stack decals should be applied to the weight stack Please note these decals should not be put on until th...

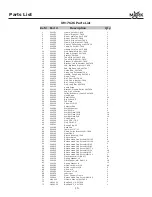
Page 14: ...p Handle Slip XM 7626 Shroud Weight XM 7626 Bracket Shroud Tube Slip Left XM 7626 Tube Slip Right XM 7626 Stopper Rubber XM 7626 Bracket Cable Retainer XM 7626 Pad Big Base Right XM 7626 Pad Big Base...

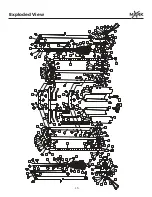
Page 15: ...Exploded View 15...

Page 16: ...ness to obtain warranty service You must prepay any shipping charges export taxes custom duties and taxes or any other charges associated with transportation of the parts or product In addition you ar...

Page 17: ...XMARK Fitness 7501 Trammel Drive Shreveport LA 71108 Customer Service 1 800 719 4605...

Reviews: