- 14 -
4
5
6
G
G
G
C
B
B
C
C
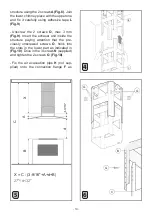
X
A
B
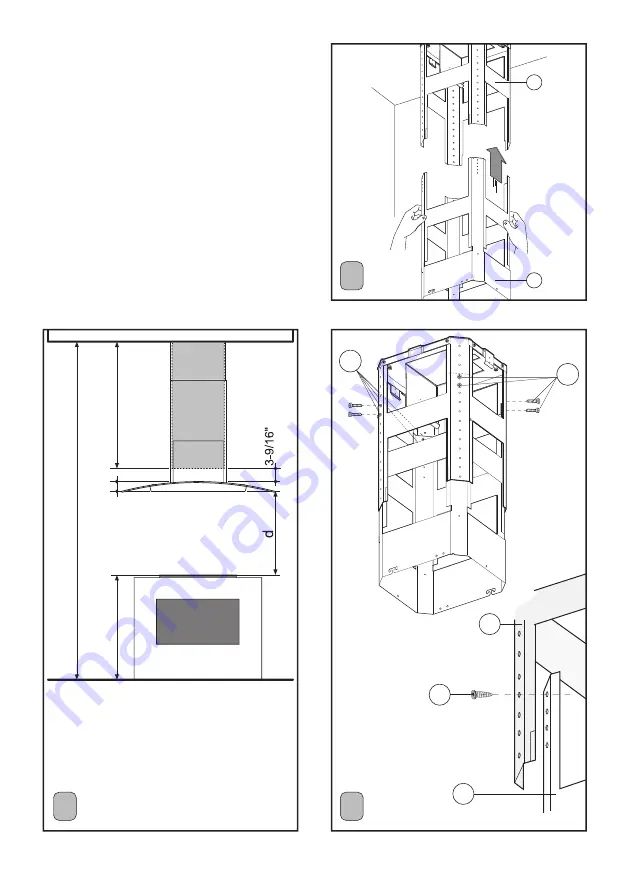
X = C - (3-9/16"+A+d+B)
27"<d<32"
A
L
N
O
N
O
L
Max 3 mm
O
O
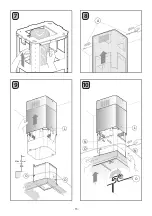
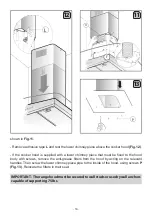
structure using the 2 screws
A (Fig.8)
. Join
the lower chimney piece with the upper one
and fix it carefully using adhesive tape
L
(Fig.9)
.
- Unscrew the 2 screws
O
, max 3 mm
(Fig.9)
. Insert the exhaust unit inside the
structure paying attention that the pre-
viously unscrewed screws
O
, hook into
the slots in the lower part as indicated in
(Fig.10)
. Drive in the 3 screws
N
(supplied)
and tighten the 2 screws
O (Fig.10)
.
- Fix the air evacuation pipe
H
(not sup-
plied) onto the connection flange
F
as
Summary of Contents for XOMI ISLAND XOMI36GC
Page 1: ...I worked really hard on this manual so please read it XOMI ISLAND MODELS XOMI36GC XOMI42GC ...
Page 2: ......
Page 15: ... 15 7 8 9 A L N O N O L Max 3 mm O O 10 ...
Page 37: ... 37 7 8 9 A L N O N O L Max 3 mm O O 10 ...
Page 46: ...He trabajado mucho en este manual así que léalo XOMI ISLAND MODELOS XOMI36GC XOMI42GC ...
Page 59: ... 59 7 8 9 A L N O N O L Max 3 mm O O 10 ...
Page 68: ...3011000130700 00 ...


