- 9 -
:.205#
609#
B
D
B
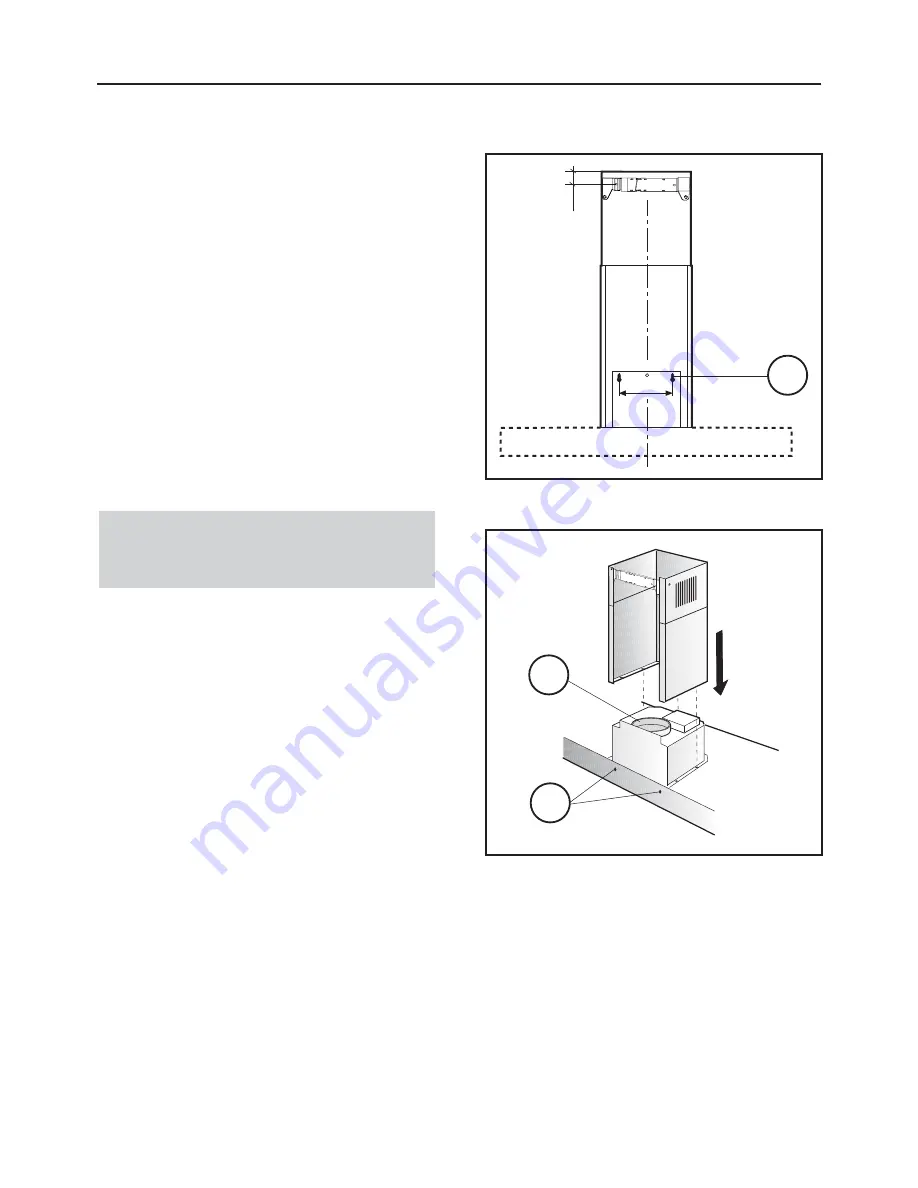
Fig.1
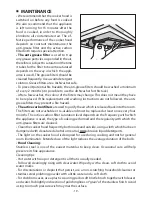
Fig.2
INSTALLATION INSTRUCTIONS
INSTALLATION - VENTED TO THE OUTSIDE
1. MOUNT TO THE WALL:
Drill the holes
A
respecting the distances
indicated
(Fig.1)
. Fix the appliance to the
wall and align it in horizontal position to
the wall units. When the appliance has
been adjusted, definitely fix the hood
using the screws
A
(Fig.2)
. For the vari-
ous installations use screws and screw
anchors suited to the type of wall (e.g.
reinforced concrete, plasterboard, etc.).
If the screws and screw anchors are pro-
vided with the product, check that they
are suitable for the type of wall on which
the hood is to be fixed.
IMPORTANT - The range hood must
be secured to wall studs or use drywall
anchors capable of supporting 75 lbs.
Summary of Contents for XOR24S
Page 22: ... 22 765 352 251 81 51 4 372 231 271 71 665 221 41 31 21 284 57 211 282 3 XOR24S XOR30S XOR36S ...
Page 46: ... 46 765 352 251 81 51 4 372 231 271 71 665 221 41 31 21 284 57 211 282 3 XOR24S XOR30S XOR36S ...
Page 70: ... 70 765 352 251 81 51 4 372 231 271 71 665 221 41 31 21 284 57 211 282 3 XOR24S XOR30S XOR36S ...
Page 73: ......
Page 74: ......
Page 75: ......


