installing the overlay panel
Installing the overlay panel is easy if you folllow these simple steps.
You will need the following tools:
A drill with 3/16” and 5/16” bits - and a #2 Phillipshead screwdriver
1.
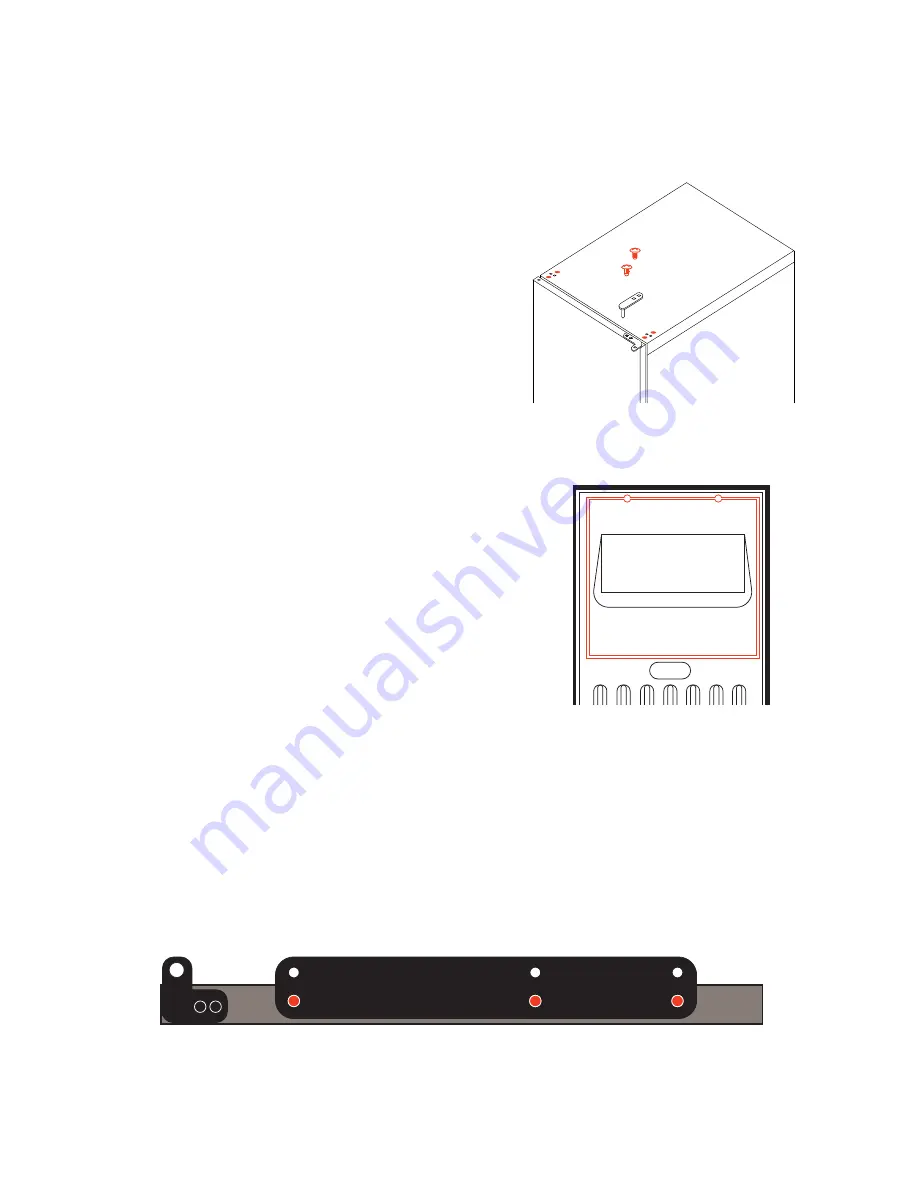
2. Place the door face down on a flat surface and
remove the door gasket from the groove (
shown in RED
)
gently starting at one corner. Lay it flat in a safe place,
you will be replacing it shortly.
In the four (4) corners of the groove, you will see four (4)
holes. These are for screws that will assist in securing the
panel.
3. Before proceeding, attach the handle (if used) to your overlay door panel in the desired position
remembering to countersink the screw heads so they do not prevent the overlay panel from laying
flat against the door.
4. Attach the BLACK support plate to the bottom of the door using the three (3) screws (
shown on RED
).
.
While supporting the door, remove the two (2) screws
(
shown
in RED
) that hold the Top Hinge in place.
Then remove the door by lifting it straight up.
TOP HINGE
REMOVED
+ +
++
++
++
BOTTOM OF DOOR
20


