4
ISP back to 0. If the picture can’t display when upgrading, it needs to solder JB1 on main board.
Please unsolder JB1 again after upgrading.
4.2 Initialization
Enter factory menu, select “OPTION”, “EEPROM” and “HOTEL OPTION” sub-menu, for adjusting
items see table 4.
Table 4 sub-menu adjustment
Items Preset
Remarks
HOTEL
0
1: HOTEL OPTION of factory menu is optional
0: HOTEL OPTION of factory menu is not optional
LOGO
1
1: display LOGO in no signal or turn on
0: no LOGO display
ADC PRESCALE
046
Software will preset the data according to different status.
SIF PRESCALE
02E
Software will preset the data according to different status.
BACK LIGHT
FF
Software will preset the data according the type of panel
ALL COLOR
1
1: white balance of each channel auto offset based on the HDMI white
balance
0: white balance of each channel adjust the offset base separately
Note: don’t set ALL COLOR to 1after the offset adjustment, if you do so, the
adjusted parameter of each channel will recover to the parameter of HDMI.
EEPROM-MEMORAY
RECALL
>
EEPROM Initialization (operate when EEPROM data chaos)
4.3 Adjustment for AFT voltage and AGC voltage of IF channel in TV
4.3.1 IF AFC adjustment
Disconnect J1(B face), input 38.9MHz PAL signal of 80dB to the pole of J1 near L11, Adjust L5
to value 1.25V of TP2. Enter factory menu, adjust TDA4470 from BG to LL, input 33.9MHz SECAM
signal of 80dB, adjust R71 to value 1.25V of TP2 then solder J1.
4.3.2 IF AGC adjustment
Input 184.25MHz(PAL/BG) RF signal of 60dBuv to RF terminal, adjust R64 to value 3.75 V
±
0.25 V of TP4 and there should be no obvious snowy picture. Increase the signal to 90dBuv and it
should be display normally and no obvious noise.
4.4 White balance adjustment
4.4.1 white balance adjustment of HDMI
a. Input VG-849 signal from HDMI: TIMING854 (800* 600/60Hz) and eighth-level gray scale
signal of PAT920. Use color analyzer CA210 to adjust white balance.
b. Enter submenu of COLOR TEMP, Select 9300k of color temperature
c. Fix value of B OFF, adjust R OFF and G OFF, let the color coordinate of the second level be
(285, 293) and the brightness be about 3nit-6nit. Fix value of B GAIN, adjust R GAIN and G GAIN,
let the color coordinate of the seventh level be (285, 293). Adjust R OFF, G OFF, R GAIN and G
GAIN repeatedly until the value of the two levels gray-scale are (285, 293).
4.4.2 VGA/YPBPR/AV white balance check and correct
a. Connect VG-848 signal of VGA to VGA terminal: TIMING854 ( 800 x 600 / 60Hz)
(PATTERN:CROSS) and auto adjust to full screen, then input PAT948 black/white signal, enter
factory menu ADC ADJ, select AUTOTUNE and wait for OK display. Input PAT920(8 gray levels),
check if the white balance is normal, if not, enter COLOR TEMP menu and set ALL COLOR to 0 and
fine adjust according to the method of 4.4.1c)
Summary of Contents for LC-19HU56S
Page 1: ...LCD TELEVISION LC 19HU56S...
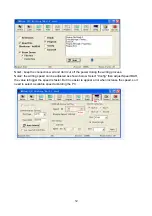
Page 11: ...9 6 Select the document then the window will appear as shown below Select...
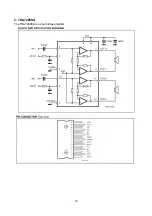
Page 18: ...16 2 TDA7266SA The TDA7266SA is a dual bridge amplifier...
Page 20: ...18...
Page 27: ...Main Board Schematic diagrams Page 1 total 8 pages 25...
Page 28: ...Main Board Schematic diagrams Page 2 total 8 pages 26...
Page 29: ...Main Board Schematic diagrams Page 3 total 8 pages 27...
Page 30: ...Main Board Schematic diagrams Page 4 total 8 pages 28...
Page 31: ...Tuner Board Schematic diagrams Page 5 total 8 pages 29...
Page 32: ...IR Key Board Schematic diagrams Page 6 total 8 pages 30...
Page 33: ...Power Board Schematic diagrams Page 7 total 8 pages 31...
Page 34: ...Back light Board Schematic diagrams Page 8 total 8 pages 32...
Page 36: ...APPENDIX B Exploded view LC 19X56 34...
Page 38: ...9219HU5610 Ver 1 0...


