background image


Safety instructions 

1 Instructions 

1.1 Be sure to switch off the power supply before replacing or welding any components or 

inserting/plugging in connection wire 

1.2 

Anti static measures to be taken (throughout the entire production process!): 

1.2.1    Do not touch here and there by hand at will; 
1.2.2    Be sure to use anti static electric iron; 
1.2.3    It’s a must for the welder to wear anti static gloves. 

1.3 Please refer to the detailed list before replacing components that have special safety 

requirements. Do not change the specs and type at will. 

2  Points for attention in servicing of LCD 

2.1 Screens are different from one model to another and therefore not interchangeable. Be 

sure to use the screen of the original model for replacement.   

2.2 The operation voltage of LCD screen is 700-825V. Be sure to take proper measures in 

protecting yourself and the machine when testing the system in the course of normal 
operation or right after the power is switched off. Please do not touch the circuit or the 
metal part of the module that is in operation mode. 

        Relevant operation is possible only one minute after the power is switched off.   
2.3 Do not use any adapter that is not identical with the TV set. Otherwise it will cause fire 

or damage to the set. 

2.4 Never operate the set or do any installation work in bad environment such as wet 

bathroom, laundry, kitchen,or nearby fire source, heating equipment and devices or 
exposure to sunlight etc. Otherwise bad effect will result.   

2.5 If any foreign substance such as    water, liquid, metal slices or other matters happens 

to fall into the module, be sure to cut the power off immediately and do not move 
anything on the module lest it should cause fire or electric shock due to contact with 
the high voltage or short circuit. 

2.6 Should there be smoke, abnormal smell or sound from the module, please shut the 

power off at once. Likewise, if the screen is not working after the power is on or in the 

course of operation, the power must be cut off immediately and no more operation is 

allowed under the same condition.   

2.7 Do not pull out or plug in the connection wire when the module is in operation or just 

after the power is off because in this case relatively high voltage still remains in the 
capacitor of the driving circuit.Please wait at least one minute before the pulling out or 
plugging in the connection wire. 

2.8 When operating or installing LCD please don’t subject the LCD components to bending, 

twisting or extrusion, collision lest mishap should result.   

Attention: 

This


service manual is only for service personnel to take reference with. Before servicing

please read the following points carefully. 


Summary of Contents for LC17H3S

Page 1: ...LCD TV LC17H3S LC20H3S LC15H3S...

Page 2: ...fire or damage to the set 2 4 Never operate the set or do any installation work in bad environment such as wet bathroom laundry kitchen or nearby fire source heating equipment and devices or exposure...

Page 3: ...r storage 20 60 C humidity Scope for operation 20 85 Scope for storage 10 90 2 13 Display of a fixed picture for a long time may result in appearance of picture residue on the screen as commmonly call...

Page 4: ...board TV board on line Check main board Check TV board Combined test for general assembly Connect to central signal source check if various TV functions station skipping modulate quantity control etc...

Page 5: ...tment 2 5 1 IF adjustment a Input DV 5V into TP2 input 12V to TP6 Input 5V to TP4 and input 0V to TP5 monitor voltage of TP3 input 38 9 MHz signal to TP1 and use a non inductance screw driver to adjus...

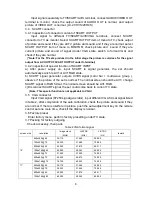
Page 6: ...lue to make x 284 y 299 This procedure may not be taken now f Enter AV mode input 8 grey degree signal adjust tint to 0 adjust brightness and contrast measure sixth degree with CA 210 make Y to 180 cd...

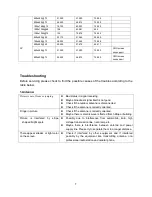
Page 7: ...VBS signal color bar multi wave group observe if the picture of the set is normal The normal screen should be AV1 change SCART signal to RGB format the normal screen should be AV1 RGB c Disconnect SCA...

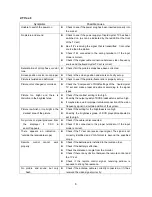
Page 8: ...signal receiving Maybe broadcast signal itself is not good Check if the outdoor antenna is disconnected Check if the antenna is correctly oriented Fringe in picture Check if the antenna is correctly o...

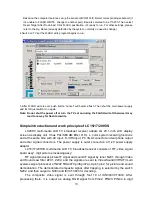
Page 9: ...e liquid crystal TV set and make proper adjustment according to the signal types Picture too bright and there is distortion in the brightest area Check if the contrast setting is too high Possibly the...

Page 10: ...may lead to incorrect display of the liquid crystal TVIn this case please press auto key on the remote control so as to enable the liquid crystal TV set to recheck the signal and then to display corr...

Page 11: ...receiver adopts LG 20 1 inch LCD display screen as display unit It has PAL SECAM B G I D K L L color system receiving functions and at the same time with AV input S VHS input PC VGA connector and earp...

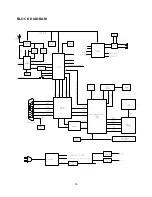
Page 12: ...n processor IC PW1306 PW1306 is a main processing IC built in type X86 CPU with outer memory 8M Flash N20 and controls the whole system The input signal from V port and G port is subject to internal a...

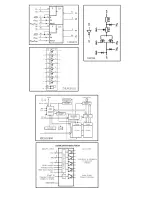
Page 13: ...BLOCK DIAGRAM 12...

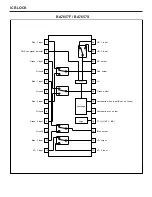
Page 14: ...Ground Ground Ground VCC CTL H IN1 L IN2 Red 1 input Green 1 input Blue 1 input Red 2 input Green 2 input Blue 2 input VD 1 input VD 2 input VD output Blue output Composite sync output Composite vide...

Page 15: ......

Page 16: ......

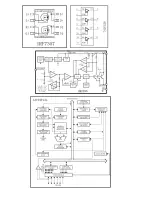
Page 17: ...GPIO PWM IR Decoder A 19 1 D 15 0 CS 1 0 2 Wire Serial Microprocessor Bus Memory Out Bus Memory Buffer Processor Memory Interface Memory In Bus OSD VYUV 7 0 VCLK VPEN PW130 ImageProcessor Internal Blo...

Page 18: ......

Page 19: ......

Page 20: ......

Page 21: ...ply L switch VCO 21 20 18 Loop filter 14 Offset comp optional 26 FPLL 0 90 VIF amp 6 7 8 15 VIF CAGC CBL Take over point SIF input switch CAGC 22 12 4 9 16 13 Standard switch 23 VS 17 CRef Intercarrie...

Page 22: ...V R L R Audio L S video HIGH VOLTAGE HIGH VOLTAGE MSP3420G...

Page 23: ...ght size remains unchanged 3 Definition of dark spot It is identified as a dark spot if it is dark in the state of white field and its dark size remains unchanged 4 Definition of two neighboring point...

Page 24: ...signal Check whether U1 pin 11 have output waveform Check N8 pin3 pin 5 s input signal Replace N8 Yes No Yes No No No Yes No No 23 Troubleshooting guide No raster Does the logo appear on the screen wh...

Page 25: ...B Hors Vers at X7 Check whether N1 has 5V power supply Check whether X9 pin 1 pin 2 have 5V power input Replace N2 Replace V105 V17 Replace N1 Measure N1 pin 33 pin 35 waveform Measure N1 pin 42 pin...

Page 26: ...LC15H3S 01...

Page 27: ...LC15H3S 02...

Page 28: ...LC15H3S 03...

Page 29: ...LC17H3S...

Page 30: ...LC20H3S 01...

Page 31: ...LC20H3S 02...

Reviews: