background image

INSTRUCTIONS

INSTRUCTIONS

03

14

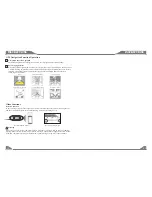
Backlight

Via backlight setup interface, you can manually adjust the display screen brightness according 
to the intensity of light of the environment to achieve satisfactory effect.

Touch Screen Calibration

If errors occur in touch position, you can calibrate touch coordinates.
Enter touch calibration interface, Use a touch pen to click the central area of symbol “+”, 
calibrate the screen in the moving sequence of the central area of “+”. After calibration is 
completed, system will automatically save data and exit the screen. 

Steering Wheel Setup  

You can also perform control to the unit by the steering wheel of the car. Connect the positive 
and negative terminal of the car SWC cable with the positive and negative terminal of the SWC 
cable of the unit respectively.
Click buttons on the steering wheel one by one and keep a record of relevant sequences. Click 
appropriate function setup to save the settings.

Time setup

Touch


[Time] icon in the main interface


to enter into the 

calendar setup interface. Click the display position of year/ 
month/day/hour/minute to reset the current parameters

.

Set in the time interface touch 12HR/24HR icon to switch 
between clock modes. 

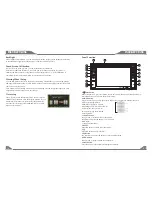
Panel Function

1.        SRC button

When the power on, press this button to turn on/off host; in any application procedure,
press this button can switch to the main interface.

2.MODE button 

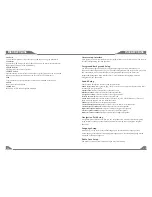
When the unit is power on, Repeat press this button can switch to different function
mode as following picture.

Note:

 When the device without

connecting to USB, SD, CDC or DVD
no disc inside, the system will 
automatically skip these related
working mode.

3.FM/AM button

In any mode, press the button to radio mode.
In radio mode, press the button to switch band.

4. AUX IN

To input external audio.

5.RESET

Press this button can back to default mode.

6.

Press this button can eject the disc.

7.EQ button

In a source mode, press the button to enter equalizer setup.

8.DVD button

In any mode, press this button to read the disc.

9.NAVI button

Press the button to enter into/exit navigation interface.

CDC

AUX

SD

USB

DVD

RADIO

TV

GPS

(Optional)

(Optional)

(Optional)

(Optional)

Summary of Contents for 2DTSBN6000

Page 1: ...Please read all instructions carefully before using 2DTSBN6000 ...

Page 2: ...ake CONTENTS NOTE instructions will not enjoy the warranty 2 To drive safely and avoid break the traffic rules do not watch program and operate the unit while driving 3 To avoid short circuit please do not exposure the device to rain 4 To avoid short circuit please do not put in the device or any metal objects left behind 5 Not open the machine for maintenance by yourself please go to the professi...

Page 3: ...n in the main interface to enter into the calendar setup interface Click the display position of year month day hour minute to reset the current parameters Set in the time interface touch 12HR 24HR icon to switch between clock modes Panel Function 1 SRC button When the power on press this button to turn on off host in any application procedure press this button can switch to the main interface 2 M...

Page 4: ...eeter woofer subwoofer Left front speaker attenuate adjust volume level of left front speaker Right front speaker attenuate adjust volume level of right front speaker Left rear speaker attenuate adjust volume level of left rear speaker Right rear speaker attenuate adjust volume level of right rear speaker Navigation Path Setup Navigation path is already set when you buy the product Do not enter in...

Page 5: ...roduct has auto correct function The normal receiving of satellite signals shall be affected and cause error in following environment 2 Other functions Rearview function In any running state the video signal can switch to reverse video state when reversing the car and the system shall return to its initial running state after reversing the car Do not rely on CCD system completely please make sure ...

Page 6: ... the unit audio system will automatically link with the paired cellphone In some cases you need to enable the playback of audio files by phone keypad due to different phone models Play pass the previous next song Stop External input operation Optional Connect the video input plug with external video input jack and connect the audio input plug with external audio input jack Touch Input icon on main...

Page 7: ...ace U Disc SD Card function operation When there is a USB device SD card connected the unit can conduct the playback of audio video image files in the USB device SD card Insert eject SD card 1 Insert a SD card recorded with media information into the SD card slot in the unit correctly until it is locked 2 When pulling out the SD card exit SD card playing state first then press the SD card and it s...

Page 8: ...2 Directly touch icon in the radio interface to fine tune station frequency 3 After a station is searched such as 88 15MHZ long press any position in the pre stored station list in the radio main interface the searched station will be stored in the selected position 4 FM band can save 18 stations Fm1 FM2 FM3 can each save 6 AM band can save 12 stations AM1 AM2 can each save 6 5 During search the u...

Reviews: