2.
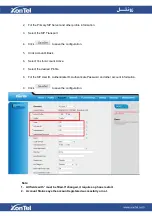
Fill the Primary SIP Server and other profile information.
3.
Select the SIP Transport.
4.
Click
to save the configuration.
5.
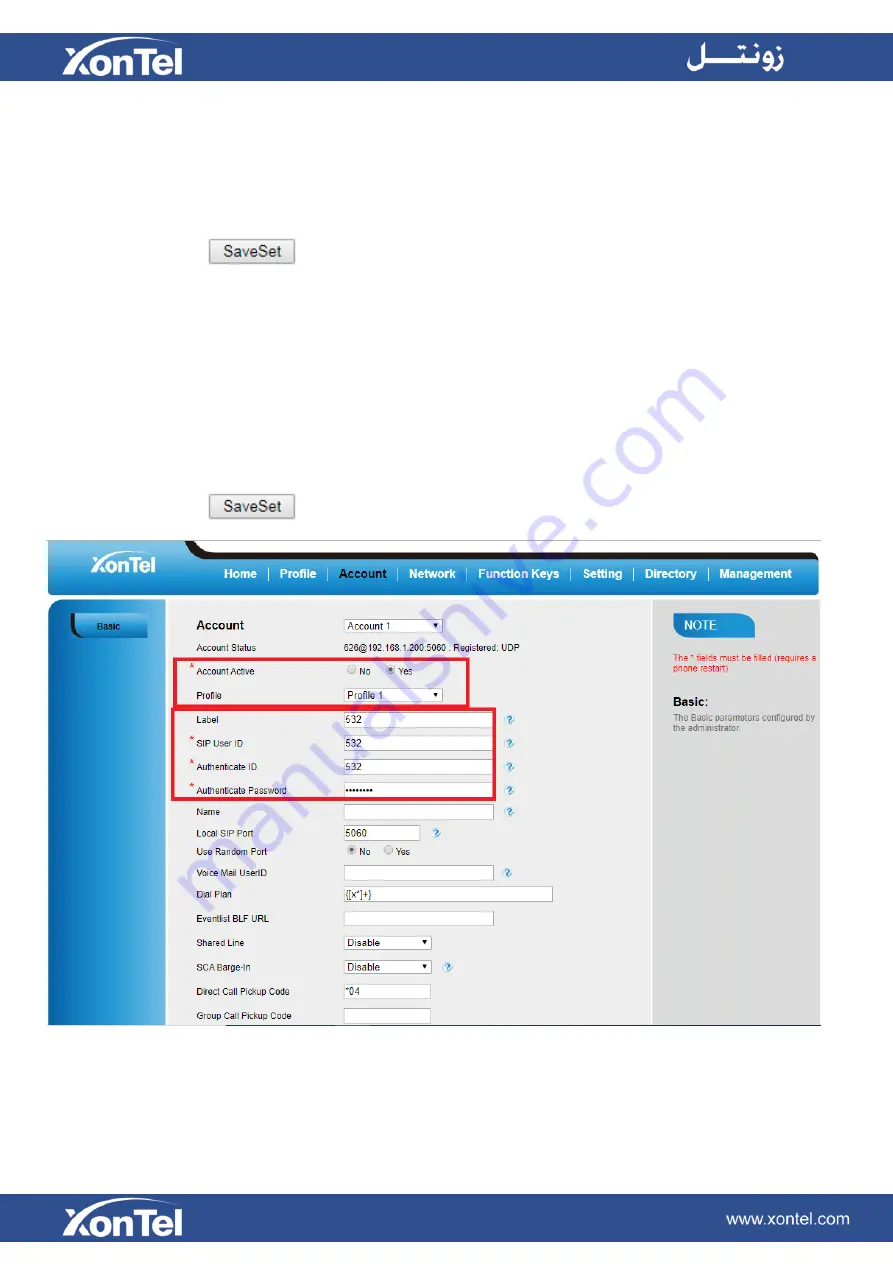
Click Account
→
Basic.
6.
Select Yes for Account Active.
7.
Select the desired Profile.
8.
Fill the SIP User ID, Authenticate ID, Authenticate Password and other account information.
9.
Click
to save the configuration.
Note:
1. All fields with
*
must be filled. If changed, it requires a phone restart.
2. Account Status says the account registered successfully or not.
Summary of Contents for XT-23G
Page 1: ...XonTel XT 23G User Manual ...
Page 9: ...3 Handset 4 Headset cord 5 Ethernet cable ...
Page 10: ...Phone Installation 1 Attach the phone stand ...
Page 11: ...2 Connect the Handset and optional Headset 3 Connect the Network and Power ...
Page 14: ...2 Press Menu Status Network 3 Press Menu Status Network IPV4 ...
Page 15: ...4 Press Menu Status Network IPV6 5 Press Menu Status Account XT 23G support twelve accounts ...
Page 65: ...When you place a call from the contact the phone idle screen will show the contact photo ...
Page 164: ...How to download XML Configuration Click Management Configuration ...
Page 165: ...How to Import Trusted CA certificate Click Management Trusted CA ...
Page 166: ...How to Import Server CA certificate Click Management Server CA ...


