background image


HTL 400T

 9 


Deutsch 

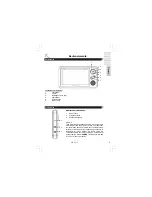
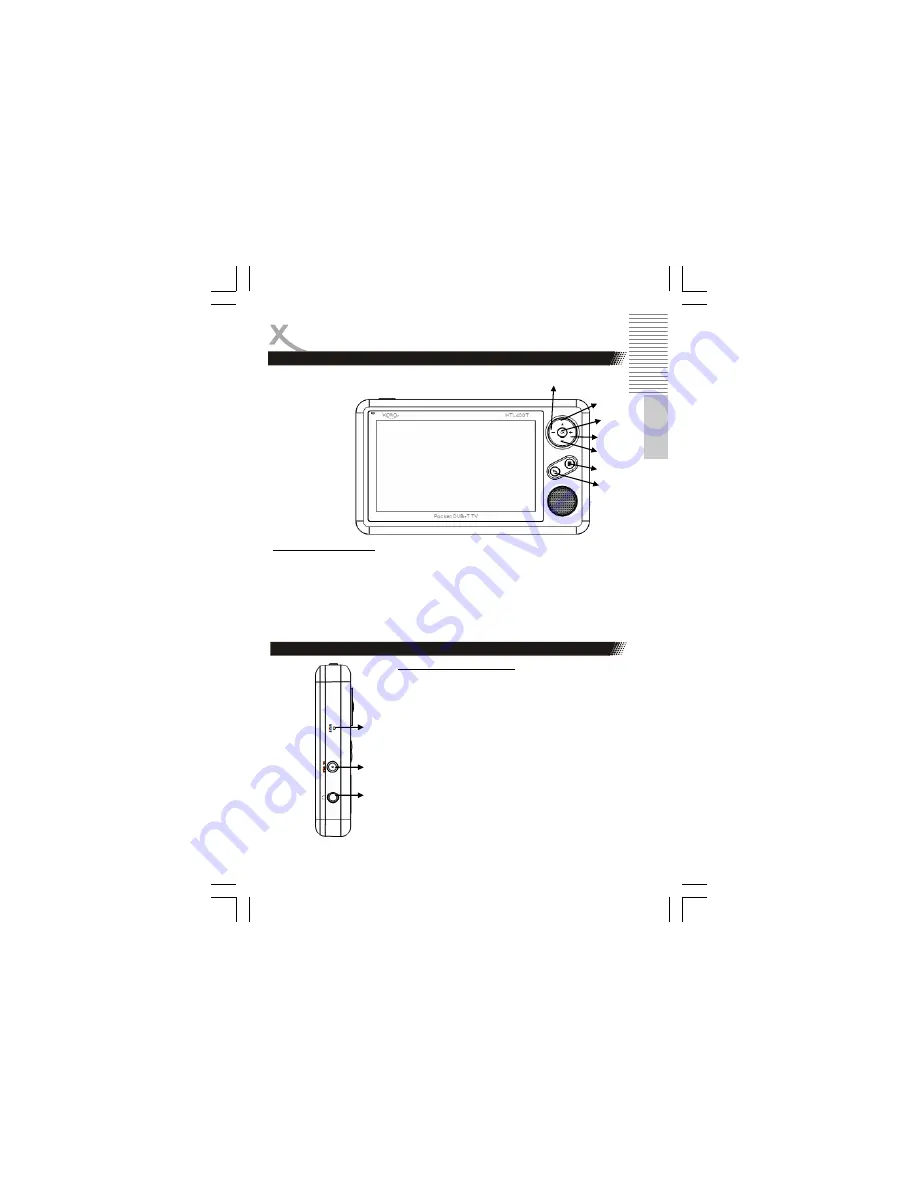
Bedienelemente 


Tasten der Vorderseite: 

1. Lautstärke 

2. Kanal 

3. 

Bestätigen Taste (OK) 

4. Lautstärke 

5. Zurück-Taste 
6. Menü-Taste 

Vorderseite 

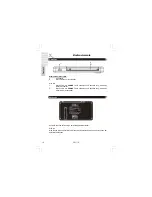
Linke Seite 

Elemente der Linken Seite: 
 

1. Reset 

Taste 

2. Stromanschluss 
3. Kopfhörerausgang 


Hinweis: 

Falls die Situation auftauchen sollte, das keine Taste 
mehr reagiert und sogar da Gerät sich nicht ausschal-
ten lässt, dann können Sie die Reset Taste benutzen. 
Drücken vorsichtig mit einem spitzen Gegenstand (z.B. 
Büroklammer) in den Einlass der Reset Taste. Ein 
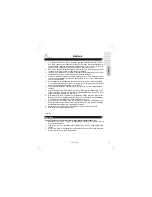
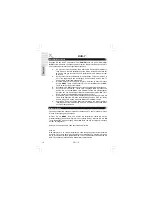
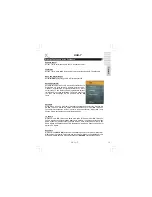
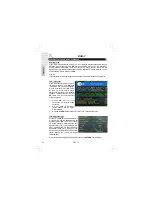
Tastendruck der Reset Taste reicht aus, um das Gerät 
auszuschalten. Mit der 

POWER

 Taste können Sie den 

HTL 400T wieder einschalten. 

1. 

2. 

3. 

5. 

6. 

7. 

4. 

1. 

2. 

3. 

Summary of Contents for HTL 400 T

Page 1: ...BEDIENUNGSALEITUNG USER MANUAL MANUEL D EMPLOI HTL 400 T Portable 4 3 inch DVB T LCD TV...

Page 2: ......

Page 3: ...Seite 9 Oberseite 10 R ckseite 10 Batterie 11 Verbinden Kopfh rer 11 DVB T Automatischer Start 12 Manueller Start 12 Wichtige Tasten und Funktionen 13 Einstellungen Hauptmenu 16 Manuelle Suche 16 Auto...

Page 4: ...Steckdose herausziehen wollen ziehen Sie immer am Stecker und nicht am Kabel Das Kabel k nnte ansonsten rei en 6 Das Ger t hat einen berladungsschutz Sollte dieser vom Fachmann ausge tauscht werden v...

Page 5: ...ge kommt 9 Die ffnungen des Geh uses dienen der L ftung damit das Ger t nicht ber hitzt Diese m ssen immer frei gehalten werden 10 Das Ger t sollte nicht in der N he von Hitzequellen wie z B fen Heizu...

Page 6: ...en Eigenschaften besitzen Falsche Ersatzteile k nnen zu Kurzschl ssen oder Feuer und ande ren Pannen f hren 4 Nach jeder Reparatur sollte der Techniker Sicherheitschecks durchf hren um die richtige Fu...

Page 7: ...ormalen Hausm ll Durch eine richtige Entsorgung alter Produkte tragen Sie zum Umweltschutz und zur Gesundheit der Menschen bei Wiederverwertung von Papier und Pappe Das Materialwiederverwertungssymbol...

Page 8: ...sschlie lich in der Originalver packung Bitte benachrichtigen Sie Ihren H ndler wenn Sie Transportsch den feststel len Entsorgen Sie das Verpackungsmaterial entsprechend den geltenden Vor schriften Tr...

Page 9: ...h rerausgang Hinweis Falls die Situation auftauchen sollte das keine Taste mehr reagiert und sogar da Ger t sich nicht ausschal ten l sst dann k nnen Sie die Reset Taste benutzen Dr cken vorsichtig mi...

Page 10: ...R Taste mindestens 3 Sekunden lang damit das Ger t einschaltet 2 Dr cken Sie die POWER Taste mindestens 3 Sekunden lang damit das Ger t wieder ausschaltet Auf der R ckseite befindet sich der aufklappb...

Page 11: ...Laden Sie die Batterien erst auf wenn sie leer sind um die Lebensdauer zu erh hen 7 Lagertemperatur und Feuchtigkeit bei kurzer Lagerung Aufbewahrung nur in einem trockenen Umfeld mit geringer Luftfe...

Page 12: ...uswahl mit der OK Taste Das Ger t springt automatisch in das Hauptmen zur ck F W hlen Sie erneut die Systemeinstellungen aus und dr cken Sie die OK Taste Bitte beachten Sie dass die Einstellung Zeitzo...

Page 13: ...dr cken Sie die OK Taste und w hlen die Option Untertitel SUBTITLE mit der OK Taste aus Falls Untertitel angeboten werden erscheint ein Auswahlfenster Mit der OK Taste k nnen Sie die entsprechenden Un...

Page 14: ...est tigen Sie die Auswahl mit der OK Taste Es wird ein Popup Fenster einge blendet Hier w hlen Sie die entspre chenden Teletext Videotext mit der OK Taste aus Der Tele Videotext wird nun geladen 1 Mit...

Page 15: ...TV Programmtitel Unten Aktueller TV Programmtitel Sie befinden sich nach dem Starten des EPG Fensters in der Kanalliste Sie k nnen mit den Tasten den Sender wechseln und dann ndert sich auch die Progr...

Page 16: ...n zur Verf gung Startfrequenz Endfrequenz und Bandbreite Startfrequenz Mit den Taste k nnen Sie die Frequenz ndern Die Frequenzen sind durch die Landesauswahl fest gelegt Endfrequenz Mit den Taste k n...

Page 17: ...gel die Option 01 00 Men sprache OSD Language Mit dieser Option ndern Sie die OSD Sprache Mit den Tasten wechseln Sie zwischen den Sprachen Men ansicht Menu Style Mit dieser Option k nnen Sie das allg...

Page 18: ...wird auf einem 4 3 Fernsehbildschirm darzustellen So kommt es dass im Schnitt ein Film im Fernseher nur 33 50 des Kinofilmbildes enth lt 4 3 Bei dieser Einstellung wird jede Sendung unabh ngig von dem...

Page 19: ...t sich die und Software Informationen und das Erstellungsdatum der Software anzeigen zu lassen Werkseinstellung Version bertragung 4 3 4 3 LB 16 9 Wide Einstellung 4 3 OK unverzerrte Dar stellung im 4...

Page 20: ...ng in Ihrer Gegend Richten Sie die Antenne neu aus Achten Sie auf die Richtung des Sendemastes Wiederholen Sie den Suchlauf Kein Strom Verbinden Sie das Ger t mit dem Stromnetz und schalten Sie den Em...

Page 21: ...erallgemeinert kann gesagt werden je h her die Aufl sung ist desto sch rfer ist das Bild Manche TV Stationen senden mit kleineren Aufl sungen als andere Die Empfangsbedingungen k nnen Sie teilweise se...

Page 22: ...Kanal 21 69 Bandbreite 7 oder 8MHz Signaleingangslevel 78 20 dBm Wellenform COFDM Demodulation QPSK QAM16 QAM64 bertragungsmodus 2K 8K Guard interval 1 4 1 8 1 16 1 32 Code rate 1 2 2 3 3 4 5 6 7 8 Vi...

Page 23: ...tellt die Schnittstelle zwischen der Ger tehardware und dem Benutzer her PID DER PID Kode ist eine Identifikationsnummer f r Video Audio EPG und andere Daten Die PID ist eine Organisationsstruktur im...

Page 24: ......

Page 25: ...nt Panel 9 Left Side 9 Top Side 10 Rear Panel 10 Battery 11 Connection Headphone 11 DVB T Automatic Start 12 Manual Start 12 Important functions 13 Setting Main Menu 16 Manual Search 16 Automatic Sear...

Page 26: ...sources 4 Make sure that the power cable is not wound around the device while in opera tion 5 Never place the machine on the power cable while it is being operated 6 Only use extension cables that ar...

Page 27: ...ch the player off if the device is not in use 6 Do not uses the device permanent in the 4 3 mode This can cause damage to the TV screen 7 Do not increase the volume when the player is just playing ver...

Page 28: ...this indicates a need for service 4 When replacement parts are required be sure the service technician has used replacement parts specified by the manufacturer or have the same characteris tics as th...

Page 29: ...re are sepa rate collection systems for used electrical and electronic product Please help us to conserve the environment we live in Recycling of paper and carton The material recycling symbol on the...

Page 30: ...Keep the packaging materials you may need them to transport your player in the future Always transport or send the player in its original packing Do not change or modify any components of the device...

Page 31: ...Reset button 2 DC In 3 Headphone jack Note In case that no button has a reaction and the device can not switch off by the POWER button press and hold them more than 3 seconds than you can uses the RE...

Page 32: ...on 2 Internal extendable Antenna Notes 1 Press the POWER button more than 3 seconds to start the device 2 Press the POWER button more than 3 seconds for power off the device On the rear side you can f...

Page 33: ...ting time of 4 hours by DVB T or video playback The operating time by only listening music is around 5 hours Power consumption depends on the operations of the player such as brightness of the screen...

Page 34: ...the main menu 6 Select again the option System Setting and press the OK button to display them Choose the option Time Zone and change the setting by using the button Confirm the selected Time Zone by...

Page 35: ...button and choose in the selection menu the option Subtitle Start the subtitle by pressing the OK button and new window ap pears on the screen where you can select the subtitle TV Radio Press the OK...

Page 36: ...you can choose the videotext Select one and press the OK button to start the Videotext The videotext displays on the screen Following buttons are useful for the navigation in the videotext window 1 Wi...

Page 37: ...Right Side Actually date Right Side Actually and next TV program title Bottom Side Full TV program title By appearing the EPG window you can navigate in the TV channel list by using the buttons If yo...

Page 38: ...e available Start Frequency With the button you can change the frequency The steps of the fre quency are defined by the country selection End Frequency With the button you can change the frequency The...

Page 39: ...T Time Zone OSD language With this option you can change the OSD language Press the buttons to change the language Menu Style With this option you can change in general the outlook of the menus Press...

Page 40: ...ave a normal TV and want both sides of the picture to be trimmed or format ted to fit your TV screen 4 3 If you have a normal TV In this case a wide picture with black bands on the upper and lower por...

Page 41: ...n full screen AUTO OK undistorted dis play in 4 3 OK undistorted dis play with bars all sides in 4 3 OK undistorted display in full screen OK undistorted display with bars in full screen Factory Defau...

Page 42: ...ealign the antenna Please pay attention to the direction of the antenna tower Retry the Auto Scan No power Plug the power cord into the outlet tightly and turn on the power Press and hold the POWER bu...

Page 43: ...andwidth 7 or 8MHz Input Signal Level 78 20 dBm Waveform COFDM Demodulation QPSK QAM16 QAM64 Transmission Mode 2K 8K Guard interval 1 4 1 8 1 16 1 32 Code rate 1 2 2 3 3 4 5 6 7 8 Video decoding ISO I...

Page 44: ...ed in digital TV signals FEC FEC stands for Forward Error Correction applied to correct signal transmission errors between antennas and the receiver OSD The OSD On Screen Display is all the menus and...

Page 45: ......

Page 46: ......

Page 47: ...es et Commandes Face avant 9 C t gauche 9 Dessus 10 Face arri re 10 Batterie 11 Connexion Casque 11 TNT Installation automatique 12 Installation manuelle 12 Fonctions importantes 13 Configuration Menu...

Page 48: ...ble lectrique n est pas enroul autour de l appareil lorsque celui ci est allum 5 Ne jamais placer l appareil en fonctionnement sur le c ble lectrique 6 Toujours utiliser des rallonges lectriques con u...

Page 49: ...ffe de l appareil Ces ouvertures ne doivent pas tre obstru es 10 Ne jamais placer l appareil sur un lit un canap un tapis ou autre surface similaire qui risquerait d obstruer les ouvertures de l appar...

Page 50: ...mandes pourra entra ner des dommages et n cessitera un travail suppl mentaire de la part d un technicien qualifi pour r parer l appareil e Si l appareil est tomb ou s il a t endommag de quelque fa on...

Page 51: ...mes de recyclage diff rents pour les produits lectriques et lectroniques usag s Merci de nous aider prendre soin de notre environnement Recyclage de papier et carton Le symbole de recyclage sur le ca...

Page 52: ...age original au cas o vous devriez retourner l appareil au revendeur Toujours transporter ou renvoyer l appareil dans son emballage d origine Ne changer ou modifier aucun composant du lecteur ou des a...

Page 53: ...ERO 2 Prise secteur 3 Prise casque Note Dans le cas o les touches ne r agissent pas et l appareil ne peut pas tre teint en utilisant la touche POWER appuyer durant plus de 3 secondes alors il faut uti...

Page 54: ...ractable Notes 1 Appuyer sur la touche POWER durant plus de 3 secondes pour mettre l appareil en marche 2 Appuyer sur la touche POWER durant plus de 3 secondes pour teindre l appareil A l arri re de l...

Page 55: ...ED s teint 5 Une batterie compl tement charg e a une autonomie de 4 heures lorsque l appareil est utilis en mode TNT ou vid o La consommation lectrique d pend des param tres tels que la luminosit le n...

Page 56: ...lectionner l option R glage Syst me et appuyer sur la touche OK pour afficher les r glages S lectionnez l option Fuseau Horaire et changer le r glage l aide des touches Confirmer le fuseau horaire s...

Page 57: ...sous titre de l appareil Appuyer sur la touche OK et s lectionner dans le menu s lection l option Sous titre Activer le sous titre l aide de la touche OK et une nouvelle fen tre dans laquelle vous pou...

Page 58: ...nner le T l texte S lectionner un des t l textes disponibles et appuyer sur la touche OK pour d marrer le T l texte Le t l texte s affiche sur l cran Les touches suivantes sont utiles pour la navigati...

Page 59: ...e actuelle C t droit Titre des missions actuelle et suivante En bas Titre int gral de l mission actuelle Lorsque la fen tre EPG appara t vous pouvez naviguer dans la liste des cha nes l aide des touch...

Page 60: ...nibles Fr quence de d but A l aide des touches vous pouvez changer la fr quence Les chelles de fr quence sont programm es par pays Fr quence de fin A l aide des touches vous pouvez changer la fr quenc...

Page 61: ...gue OSD Cette option permet de modifier la langue de l Affichage sur l Ecran Appuyer sur les touches pour modifier la langue Style du Menu Cette option permet de modifier l aspect g n ra des menus App...

Page 62: ...e format de l Image PS Si le signal TV est en 4 3 et que vous souhaitez que les 2 c t s de l image soient ajust s l cran de votre t l viseur 4 3 Si le signal TV est en 4 3 Dans ce cas des bandes noire...

Page 63: ...an avec bandes noires AUTO OK Affichage sans distorsion en 4 3 OK Affichage sans distorsion avec bandes noire en 4 3 OK Affichage sans distorsion plein cran OK Affichage sans distorsion plein cran ave...

Page 64: ...la direction o se trouve l metteur Recommencer la recherche des Cha nes Aucun courant Branchez le c ble d alimentation l appareil et l adaptateur sur la prise secteur Appuyez sur la touche POWER duran...

Page 65: ...entr e 78 20 dBm Forme d onde COFDM D modulation QPSK QAM16 QAM64 Mode de transmission 2K 8K Intervalle de Garde 1 4 1 8 1 16 1 32 Taux de code 1 2 2 3 3 4 5 6 7 8 D codage Vid o ISO IEC13818 2 MPEG2...

Page 66: ...l information vid o luminosit couleur taux de rafra chissement etc est transmise PID Le code PID Packed Identification est le chiffre d identification pour les signaux audio et vid o dans le flux de...

Page 67: ...HTL 400 T 23 Francaise...

Page 68: ......

Page 69: ......

Page 70: ...XORO by MAS Elektronik AG Pollhornbogen 19 21107 Hamburg Deutschland Tel 49 040 77 11 09 17 Fax 49 040 76 73 35 15 xoro mas de www xoro de...

Reviews: