Installation
The installation should minimise resistance and prevent any leakage in the ducting. Where possible the
use of flexible ducting should be avoided. If an extract spigot is not used it should be closed with a cover.
If installing in a position where condensation is likely to run back towards the fan, you will need a
suitable condensation trap.
Position of air intake:
•
As far as possible from and opposite to the main source of air replacement to ensure airflow
across the room (e.g. Opposite an internal doorway).
•
Near the source of steam or odours.
•
Not where ambient temperatures are likely to exceed 50ºC, or above a cooker hob or eye level
grille.
•
If installing in a room containing a fuel burning device, it is the installer’s responsibility to
ensure that there is enough replacement air to prevent fumes being drawn down the flue when
the fan is operating up to maximum extract. Refer to Building Regulations for specific
requirements.
•
Exhaust air must not be discharged into a flue used foe exhausting fumes from appliances
supplied with energy other than electric. Requirements of all authorities concerned must be
observed for exhaust air discharge.
•
The inlet grilles should be situated at least 0.5m distance from the discharge outlet of a flued
heating or cooking appliance.
Position of the air outlet:
•
At least 0.5m away from open door or window, or the inlet of another ventilation device.
The fan unit must always be firmly fixed.
This can be done by either of the methods below:
•
Using woodscrews fixed through the corner of the ventilator box.
•
Using threaded bolts in the notched holes.
Electrical
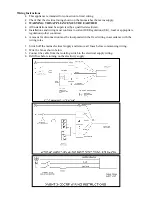
The Xvent 340 and Xvent 340DC can be wired to run at speed 1, 2 or 3 or by use of a 3-speed switch,
which gives speed choices to the user. The Xvent 340DCRF is to be wired to run at 3 speeds by use of the
RF wireless control system. See section on remote control. For wiring of the ventilation unit see wiring
instructions.
Maintenance
This fan unit requires little maintenance.
Every 4-5 years it is advised to disassemble the unit, remove the motor and impeller assembly and clean
the impeller using soapy water (making sure that water does not get into the motor)
CE-conformity
This unit meets all relevant CE standards.
Removing the cover
Insert a screwdriver in one of the 4 openings in the slanting corners of the box.
Turn the screwdriver so that the corner piece unlocks and loosens the cover.
It may be necessary to unlock more than one corner.
Removing the motor and impeller assembly
Remove the motor and impeller assembly by using the 3 click connections fixed to the casing.
Insert a screwdriver into
one of the grooves and turn it until the section becomes free.
When all 3 positions are loosened the motor plate can be removed from the casing.
Reassembly
Place the ventilator unit in the correct position and click the cover back in place.


