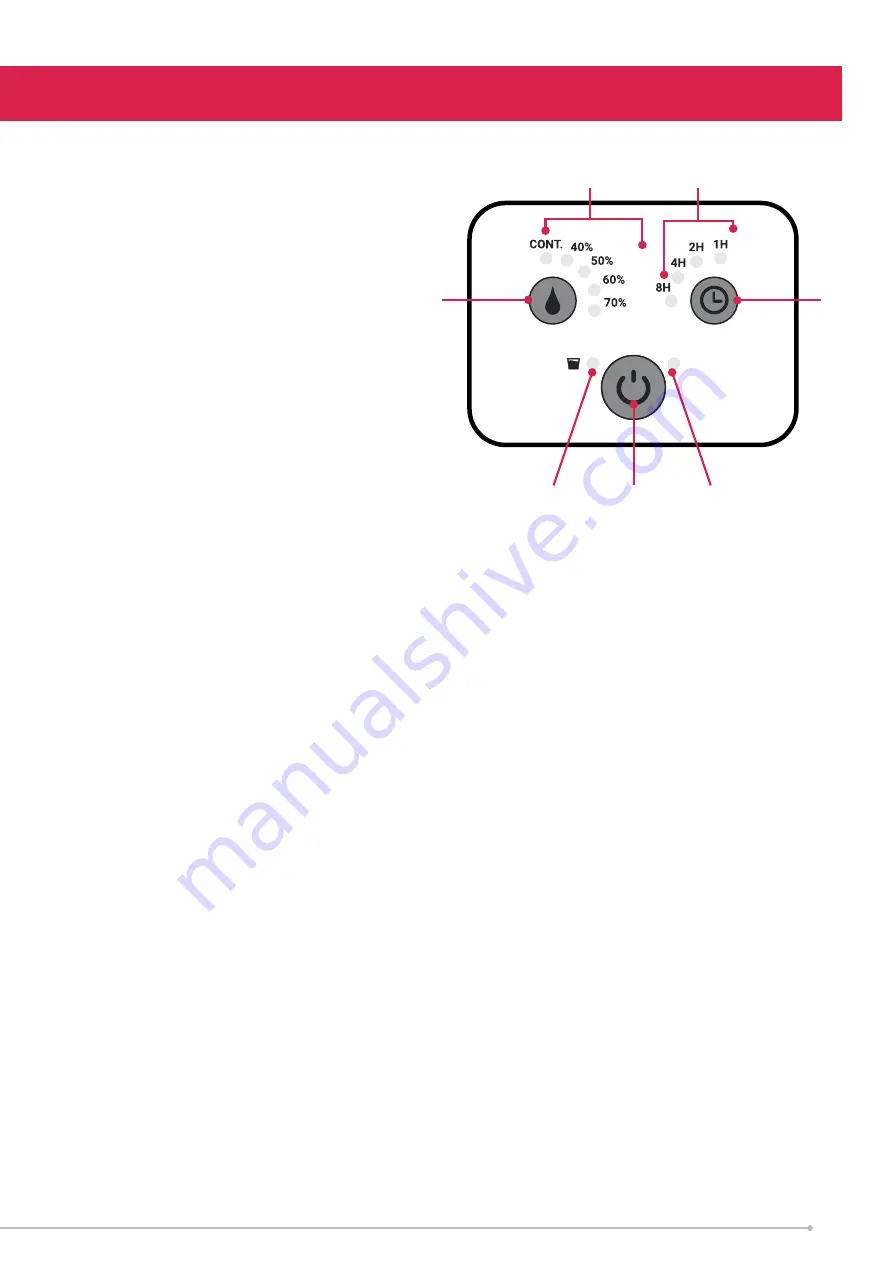
Steps:
1. Plug the unit into a correct mains socket. (Please refer to the rating label at the rear
of the unit for correct voltage/frequency.)
2. Press
ON/OFF
button to turn on the unit. The power indicator will turn on and the
compressor will start to work.
3. Press the humidity setting button to set the working mode you need: continuous working,
humidity 40%, 50%, 60% or 70%. The relative indicator will light on.
If you prefer dryer conditions (reduced humidity) set towards 40%. For more humid
conditions set towards 70%. 'CONT' means the unit will be set to Continuous and will
continue to run regardless of humidity level.
4. Press the
TIMER
button to set the operating time you need. There are 4 hour
indicators above the
TIMER
button: 1, 2, 4, 8H. The time can be accumulated, so it’s
not just 4 different hours you could set. For example, choose 1 and 2 hours at the
same time, the unit will work 3 hours continuously, choose 1, 2 and 4 hours at the
same, it will work 7 hours. Thus, the timer could be set up to 15 hours. In this case all
the hour indicator lights are illuminated. When the set time is reached, the dehumidifier
will stop working automatically.
5. To turn off the unit, press
ON/OFF
button again.
6. Pre-setting function: By pressing the
TIMER
button without turning on the other
functions (including
ON/OFF
button), you can
PRE-SET
the time for the product
to switch on later. For example, if you press the timer to ‘2’, the unit will switch on
automatically after 2 hours.
7. When the water tank is full, the “Full Water” indicator will light up. Remove the water
tank carefully, empty the water and replace securely ensuring snug fit.
1. Power indicator
2.
ON/OFF
(power) button
3. Water tank
“Full”
indicator
4. Humidity setting button
5. Working mode indicator
(continuous working, humidity
40%, 50%, 60%, 70%)
6. Timer operation indicator
7. Timer button
4
6
5
1
2
3
7
Control Panel and Operation (EverDri10E & EverDri14EL)
10


