


Chapter 2. Using the Tablet
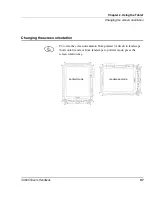
Changing the screen orientation
iX104C5
User’s Handbook
37
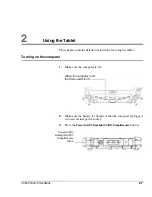
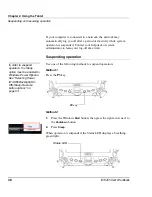
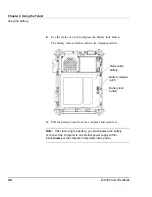
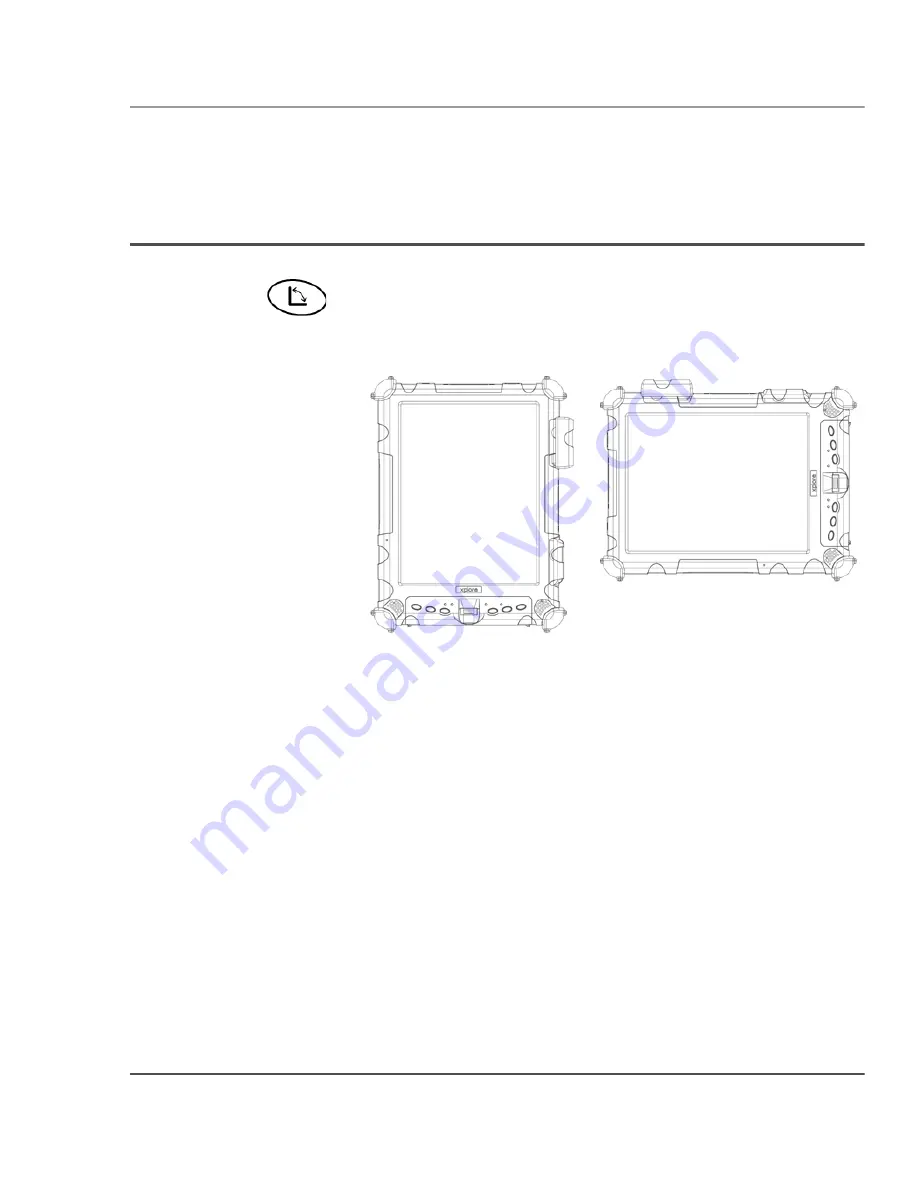
Changing the screen orientation
To rotate the screen orientation from portrait (vertical) to landscape
(horizontal) mode or from landscape to portrait mode, press the
screen rotation key.
portrait mode
landscape mode
Summary of Contents for iX104C5
Page 1: ...USER S HANDBOOK...
Page 2: ......
Page 10: ...10 iX104C5 User s Handbook...
Page 16: ...16 iX104C5 User s Handbook...
Page 26: ...26 iX104C5 User s Handbook...
Page 68: ...68 iX104C5 User s Handbook...
Page 84: ...84 iX104C5 User s Handbook...
Page 98: ...98 iX104C5 User s Handbook...
Page 99: ......
Page 100: ...95 01097 Rev A...