background image


13 

per message. The preset messages are set by the PS. 


Inbox

  -  Stores  up  to  10  received  text messages;  when  the  received messages  10,  the  oldest 

message  is  cleared  and  the  newest  incoming  message  is  registered.  When  a  new  message 

arrives, the contents will be displayed on the LCD  .When you choose messages  stored in the 

list, you can view the sent messages and the caller ID that initiated the call. 


Outbox 

- stores up to 10 outgoing text messages; when the outgoing messages exceed 10, the 

oldest  message  is  cleared  and  the  newest  sent  message  is  registered.  When  you  choose 

messages  stored  in  the  list,  you can view  the  sent messages  and  the  caller ID  to  whom  they 

were sent. 


To obtain access, select the Messages section from the menu, press the menu/enter button to 

enter into Messages and use the ▲▼ keys to highlight one of the three choices:   


a) Quick Text   

Select  Quick  Text  from  the  message  menu  by  pressing  the  menu/enter  button  to  view  the 

registered  message(s)  using 

the ▲▼ keys, select the message you  want to send, and press 

the menu/enter button to see the contents of the message. Press the menu/enter button again 

to view the list of contacts, and using the ▲▼ keys, select the contact for the message to be 

sent.  Press  the  menu/enter  button  and  the  message  will  be  sent  to  the  contact(s).  An 

acknowledgement  will  be  shown  on  the  display  of  either  "Sent  Success"  or  "Sent  Fail".  If  the 

message  is  failed,  check  to  make  sure  that  the  user  receiving  the  message  has  their  unit 

powered on. 


b) Inbox   

Text  messages  are  shown  initially  on  the  screen.  If  you  are  in  another  mode  or  miss  the 

message, the message icon will be displayed indicating a new message(s) has arrived. Select 

inbox  from  the  message  menu  by  pressing  the  menu/enter  button  to  view  the  registered 

message(s).  Using  the 

▲▼  keys,  select  the  message  you  want  to  view,  and  press  the 

menu/enter button to see the contents of the messages. Messages that have yet to be viewed 

will  be  indicated  with  a  downward  arrow  inside  the  envelope;  after  a  message  is  viewed  the 

arrow will no longer be shown. 

If you want to delete messages from the Inbox, select #2 Delete All from within the Inbox menu 

by pressing the menu/enter button, the question to Delete All will appear with the word 

“Yes?" 

Press the menu/enter button to delete all messages. If you choose not to delete the messages, 

press the return button to exit out. 


Summary of Contents for DX-7000 Series

Page 1: ...User Manual Version 1 2023 04 04 VHF Transceiver DX 7100 UHF Transceiver DX 7400...

Page 2: ...ording and playback Remote Stun Revive Monitor function Alpha Numeric Full Keypad TDMA Direct Mode Voice Encryption Mode AES256 DMRA256 DTMF Encode Decode 2 Tone Encode Decode Lone Worker Mode Multipl...

Page 3: ...y Squelch Sensitivity Selectivity Spurious and Harmonic Rejection FM Hum and Noise Audio Output Power Audio Distortion Audio Response Input Impedance 0 22uV 12 dB SINAD 0 20uV 10dB SINAD 60dB 12 5KHz...

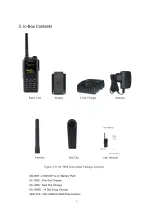
Page 4: ...harger Adapter Antenna Belt Clip User Manual Figure 3 1 DX 7000 Series Main Package Contents XB 2600 2 600mAH Li ion Battery Pack XC 100D One Slot Charger XC 200D Dual Slot Charger XC 1000D 10 Slot Ga...

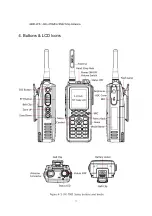
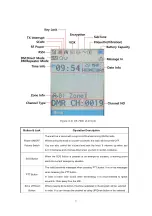
Page 5: ...5 460D WS 440 470MHz SMA Whip Antenna 4 Buttons LCD Icons Figure 4 1 DX 7000 Series buttons and knobs...

Page 6: ...ou turn it counter clockwise SOS Button When the SOS button is pressed in an emergency situation a warning alarm alerts the current emergency situation PTT Button The radio transmits messages when pre...

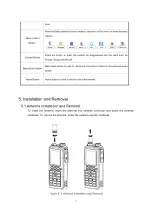
Page 7: ...Menu Back Button Menu back button is used to cancel out of a menu or return to the previous menu screen Home Button Home button is used to return to the initial screen 5 Installation and Removal 5 1...

Page 8: ...n the battery pack with the groove of the body arrow 3 and push the locking latch down to the direction of arrow 4 The battery latch will click shut when locked Figure 5 2 Battery Removal and Installa...

Page 9: ...igure 5 4 align the accessory with the radio and to place it on the accessory connector position and tighten up the screw to the direction of arrow 1 To remove the external accessory unscrew the acces...

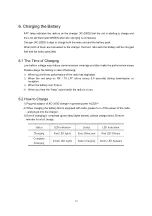
Page 10: ...f following 1 When you think the performance of the radio has degraded 2 When the red lamp on RX TX LED blinks every 0 5 seconds during transmission or reception 3 When the battery icon flickers 4 Whe...

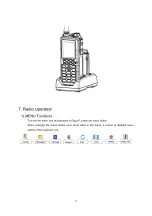
Page 11: ...o Operation 1 MENU Functions To enter the menu tree as displayed in Figure7 press the menu button When pressing the menu button once more while in the menu it moves to detailed menu section of the sel...

Page 12: ...the menu enter button to see the list of contact press the keys to the desired contact and press the PTT button to initiate the call The radio will revert to the original contact channel after a prese...

Page 13: ...ge Press the menu enter button again to view the list of contacts and using the keys select the contact for the message to be sent Press the menu enter button and the message will be sent to the conta...

Page 14: ...urn off the power saving mode d Message draft A new text message can be created using the keypad Letters numbers and special symbols can be input up to 40 characters The message can be forwarded to an...

Page 15: ...Lone Worker Busy Channel Lock BCL Busy Channel Lock Out BCLO Keypad Lock Tones Backlight Brightness LED Control Language Screen and Power Save 1 Power level This function sets the power transmitting l...

Page 16: ...on allows the sound of the Radio to be turned ON OFF The kind of the tones is set via the PS Contact your Authorized Dealer for further information 8 Backlight This function allows you to adjust the t...

Page 17: ...on 8 Precautions 8 1 Precautions for safe operation of this equipment Do not remove the antenna from the radio or do not transform the antenna or do not make any changes on the antenna The strong elec...

Page 18: ...ic wave which may have an effect on the operation of other equipment and also can be affected by those other devices Please turn off the radio before boarding on the airplane When using the radio in t...

Page 19: ...act a conductive metal to a battery terminal there is a heat and fire risk to your radio Please don t listen to the radio at a high volume level when using earphones Loud volume may have a lasting bad...

Page 20: ...aged due to the user s mishandling or improper operation When the product is damaged due to fire pollution earthquakes and any other natural or unnatural conditions accidents etc In case of a malfunct...

Reviews: