20
30 5724
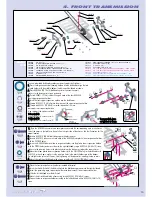
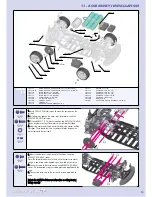
PINION GEAR ALU HARD COATED 24T / 48 (INCLUDED)
30 5720~34
PINION GEAR ALU HARD COATED 20T~34T / 48 (OPTION)
30 5790
SPUR GEAR 90T / 48 (OPTION)
30 5793
SPUR GEAR 93T/48 (INCLUDED)
30 5796
SPUR GEAR 96T / 48 (OPTION)
30 5960
26 MM WHEELS (2) (OPTION)
30 6200
ALU SERVO MOUNT (2)
30 6300
ANTENNA MOUNT
30 6310
ANTENNA (2)
30 9310
WHEELS MOUNTING HARDWARE (4+4)
30 9317WASHER S 3.2 (10)
30 9332
HEX SCREW SH M3x5 (10)
30 9333
HEX SCREW SH M3x6 (10)
30 9334
HEX SCREW SH M3x8 (10)
30 9345
HEX SCREW SFH M3x10 (10)
30 9350
HEX SCREW SB M3x3 (10)
30 9400
BODY CLIP (8)
80 3001
HUDY 24 MM WHEELS STARBURST - WHITE (4)
309345
306300
309334
306310
305724
306200
309310
309310
803001
309332
309333
309334
309345
SERVO
309350
309317
309400
305793
305790 OPTION
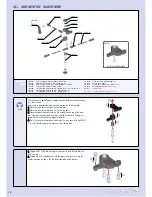
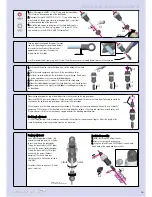
11. ACCESSORY INSTALLATION
1
1..
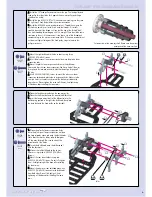
Use #309332 (SH M3x5) screws to mount the spur gear on the
layshaft.
2
2..
Install a pinion gear on the motor shaft and secure it with the
#309350 (SB M3x3) set screw.
3
3..
Put one #309317 (S 3.2) washer each on two #309334 (SH M3x8)
screws. Use these to mount the motor to the right rear bulkhead.
4
4..
Adjust the motor and the pinion so that the pinion meshes with the
spur gear. There should be just a tiny amount of play between the
pinion teeth and the spur teeth.
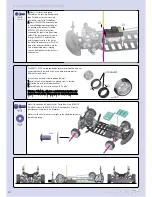
1
1..
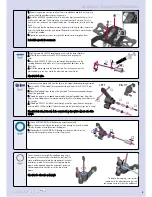
Mount the aluminum servo mounts to the chassis using two
#309333 (SFH M3x6) screws.
Note: The forward servo mount is fixed, while the rear servo mount
can go in one of two holes, depending on the width of your servo.
2
2..
Secure the servo to the servo mounts using #309334 (SH M3x8)
screws. We recommend using the rubber grommets supplied with the
servo.
3
3..
Connect the servo horn to the servo with a screw supplied with
servo.
RReeffeerr ttoo tthhee SSeett--U
Upp BBooookk ffoorr m
moorree iinnffoorrm
maattiioonn oonn sseettttiinngg sstteeeerriinngg
lliinnkkaaggee ccoorrrreeccttllyy..
BAG
11
309332
SH M3x5
309333
SFH M3x6
309334
SH M3x8
309334
SH M3x8
309317
S 3.2
309350
SB M3x3
➊
➋
➌
➊
➋
➌
Summary of Contents for T1 EVO2
Page 1: ......

