5
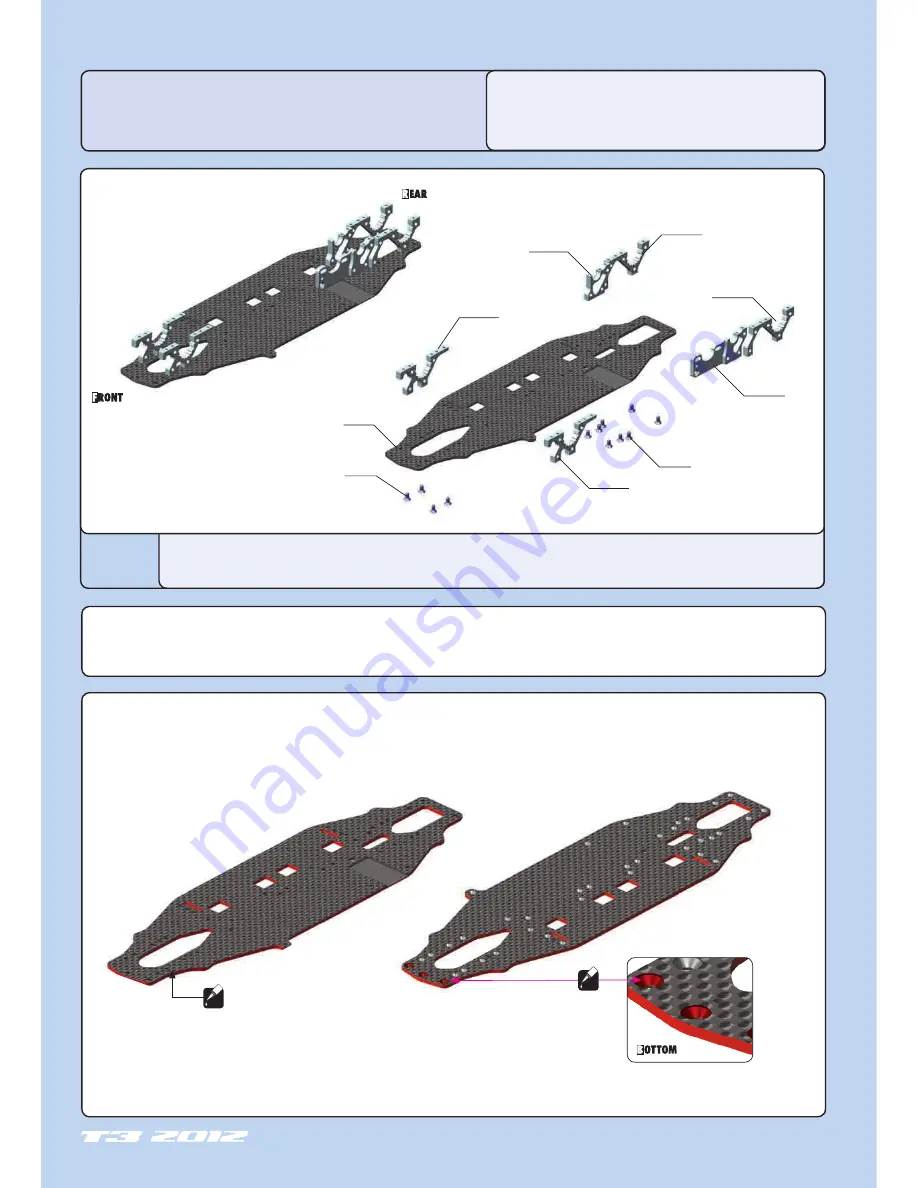
The XRAY T3 comes partially pre-assembled. Before starting assembly, disassemble the chassis parts, noting the position and orientation of the parts, particularly the
bulkheads. Keep the parts, including the screw hardware, close at hand. In the assembly steps that follow, each section begins with a parts list. Parts indicated with
STYLE B
are from the previously disassembled chassis parts in section 0.
CA
KIT
At the beginning of each section is an exploded view of the parts to be assembled. There is also a
list of all the parts and part numbers that are related to the assembly of that section.
The part descriptions are color-coded to make it easier for you to identify the source of a part.
Here are what the different colors mean:
STYLE A - indicates parts that are included in the bag marked for the section.
STYLE B
-
indicates parts that were set aside in Section 0.
STYLE C - indicates parts that are already assembled from previous steps.
0. KIT
(FACTORY PRE-ASSEMBLED)
COLOR INDICATIONS
903306
903306
302027-O
303052-O
303022-O
301132
302027-O
303014-O
303022-O
30 1132
T3’12 CHASSIS 2.5MM GRAPHITE
30 2027-O T3 ALU FRONT LOWER SUSP. ADJUST. BULKHEAD - ORANGE
30 3014-O T3 ALU RIGHT LAYSHAFT BULKHEAD - ORANGE
30 3022-O T3 ALU REAR LOWER SUSP. ADJUST. BULKHEAD - ORANGE
30 3052-O T3 ALU MOTOR MOUNT BULKHEAD - ORANGE
90 3306
HEX SCREW SFH M3x6 (10)
To protect and seal edges of graphite parts, sand edges smooth and then apply CA glue.
Do this for: chassis edges; filed battery slots, countersunk holes.
CA
Apply only a bit of CA glue
on the countersunk holes
Summary of Contents for T3 2012
Page 1: ......


