Xsens DOT Quick Setup Guide
XD0501P
© Xsens Technologies B.V.
4. Step-by-step guide
1. Open the package and charge the sensors. See sections 4.1, 4.2 and 4.3 below for instructions on
how to use the sensors.
2. Download the Xsens DOT App to connect the Xsens DOT sensors and have first insights into the
functionalities of the sensors. See section 4.4 below for instructions on how to use the Xsens DOT
App.
3. In order to start developing your own app, download and read the SDK programming guide and the
SDK folder. Both can be downloaded from the product page, the link is provided in section 1.
4. Download Android studio to start developing your app.
4.1 Xsens DOT Sensor instructions
1. To turn on the sensor, connect it to a micro USB cable with a power supply. Afterwards, they can
be disconnected from the cable.
2. To turn off the sensor, press the orange button for about 3 seconds
3. After charging, make sure to switch off the sensor if not needed.
4. When left idle for 10 minutes, the sensors go in power-save mode. To activate them, simply shake
them or rotate them.
4.2 Xsens DOT LED blinking patterns
LED Pattern
State
LED Pattern
State
OFF
Power off
Blink 1x second
Waiting for connection
ON
USB Powered (battery full) Blink 1x every 10 seconds Connected – not measuring
Flashing 1s/cycle
Charging (battery <25%)
Blink 2x every 10 seconds Connected – measuring
Flashing 2s/cycle
Charging (battery <50%)
Fast blink 8x + short
pause
Advertisement
Flashing 3s/cycle
Charging (battery <75%)
Fast blink 2x + long pause Bootloader
Flashing 4s/cycle
Charging (battery >75%)
On for 1 second and fade
out in 3 seconds
Being powered off
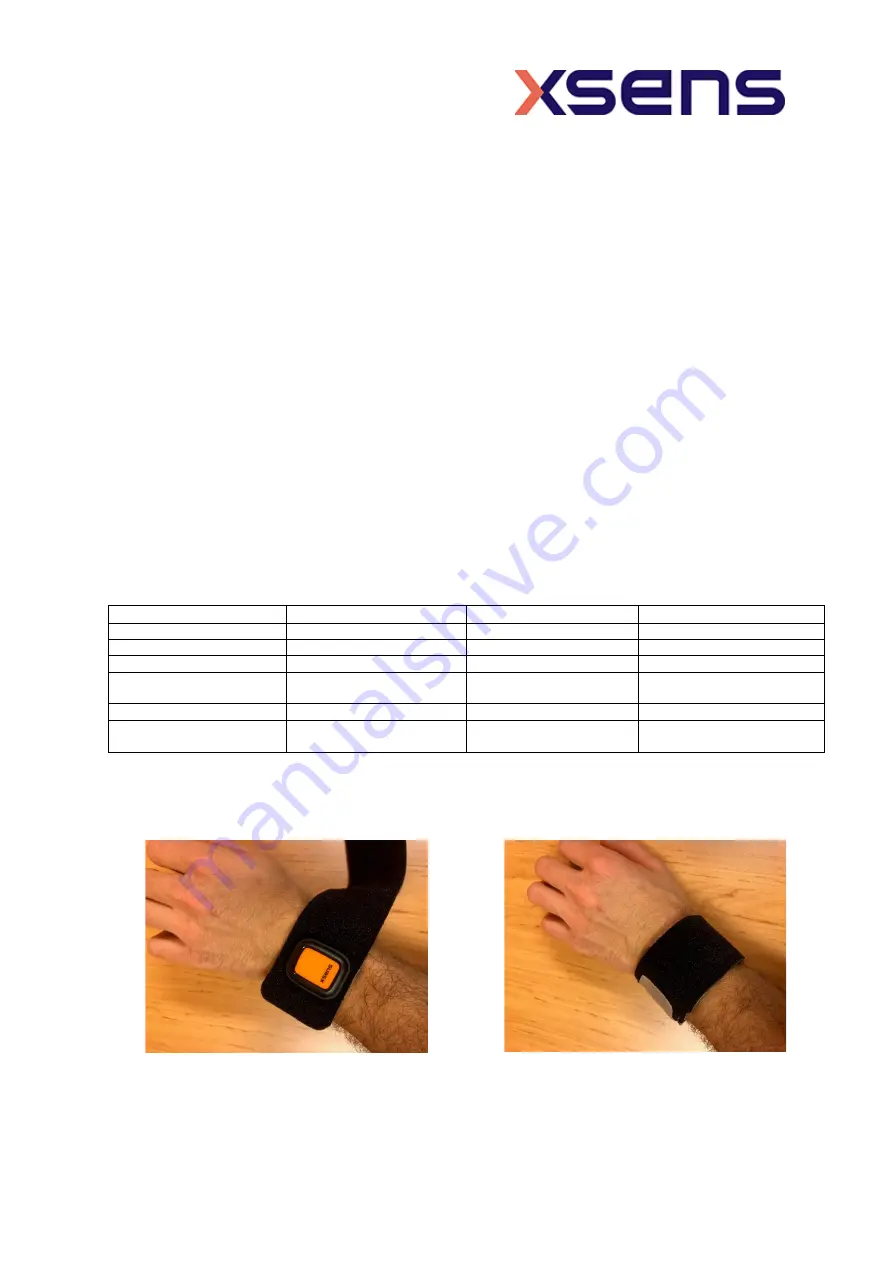
4.3 Xsens DOT straps instructions
Place the sensor above the strap. Make sure the grey side
faces the skin.
Wrap the strap around the spot you chose and stick the
grey Velcro pad on the black side. Make sure the sensor
is firmly in place and doesn’t move underneath the strap


