152
4.13
Basic Setups
Set NVR basic setup, device setup and other setups.
4.13.1
Device Setup
From Main menu->Setting->System->General, you can go to the general interface. See Figure 4-121.
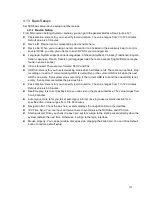
Pack duration: Here is for you to specify record duration. The value ranges from 0 to 120 minutes.
Default value is 60 minutes.
Device ID: Please input a corresponding device name here.
Device No: When you are using one remote control (not included in the accessory bag) to control
several NVRs, you can give a name to each NVR for your management.
Language: System supports various languages: Chinese (simplified), Chinese (Traditional), English,
Italian, Japanese, French, Spanish (All languages listed here are optional. Slight difference maybe
found in various series.)
Video standard: There are two formats: NTSC and PAL.
HDD full: Here is for you to select working mode when hard disk is full. There are two options: stop
recording or rewrite. If current working HDD is overwritten or the current HDD is full while the next
HDD is no empty, then system stops recording, If the current HDD is full and then next HDD is not
empty, then system overwrites the previous files.
Pack duration: Here is for you to specify record duration. The value ranges from 1 to 120 minutes.
Default value is 60 minutes.
Realtime play: It is to set playback time you can view in the preview interface. The value ranges from
5 to 60 minutes.
Auto logout: Here is for you to set auto logout interval once login user remains inactive for a
specified time. Value ranges from 0 to 60 minutes.
Navigation bar: Check the box here, system displays the navigation bar on the interface.
IPC Time Sync: You can input an interval here to synchronize the NVR time and IPC time.
Startup wizard: Once you check the box here, system will go to the startup wizard directly when the
system restarts the next time. Otherwise, it will go to the login interface.
Mouse property: You can set double click speed via dragging the slide bard. You can Click Default
button to restore default setup.
Summary of Contents for NVR-3202K
Page 1: ...i NVR 3202K User manual ...
Page 20: ...9 ...
Page 29: ...18 Figure 3 1 ...
Page 83: ...113 Figure 4 71 Figure 4 72 ...
Page 84: ...114 Figure 4 73 Figure 4 74 ...
Page 90: ...120 Figure 4 79 Figure 4 80 ...
Page 91: ...121 Figure 4 81 Figure 4 82 ...
Page 92: ...122 Figure 4 83 Figure 4 84 ...
Page 94: ...124 Figure 4 86 Figure 4 87 ...
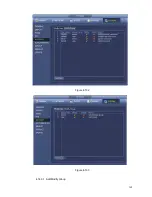
Page 132: ...162 Figure 4 132 Figure 4 133 4 14 3 1 Add Modify Group ...
Page 172: ...202 The motion detect interface is shown as in Figure 5 52 Figure 5 52 Figure 5 53 ...
Page 173: ...203 Figure 5 54 Figure 5 55 Figure 5 56 ...
Page 177: ...207 Figure 5 60 Figure 5 61 ...

