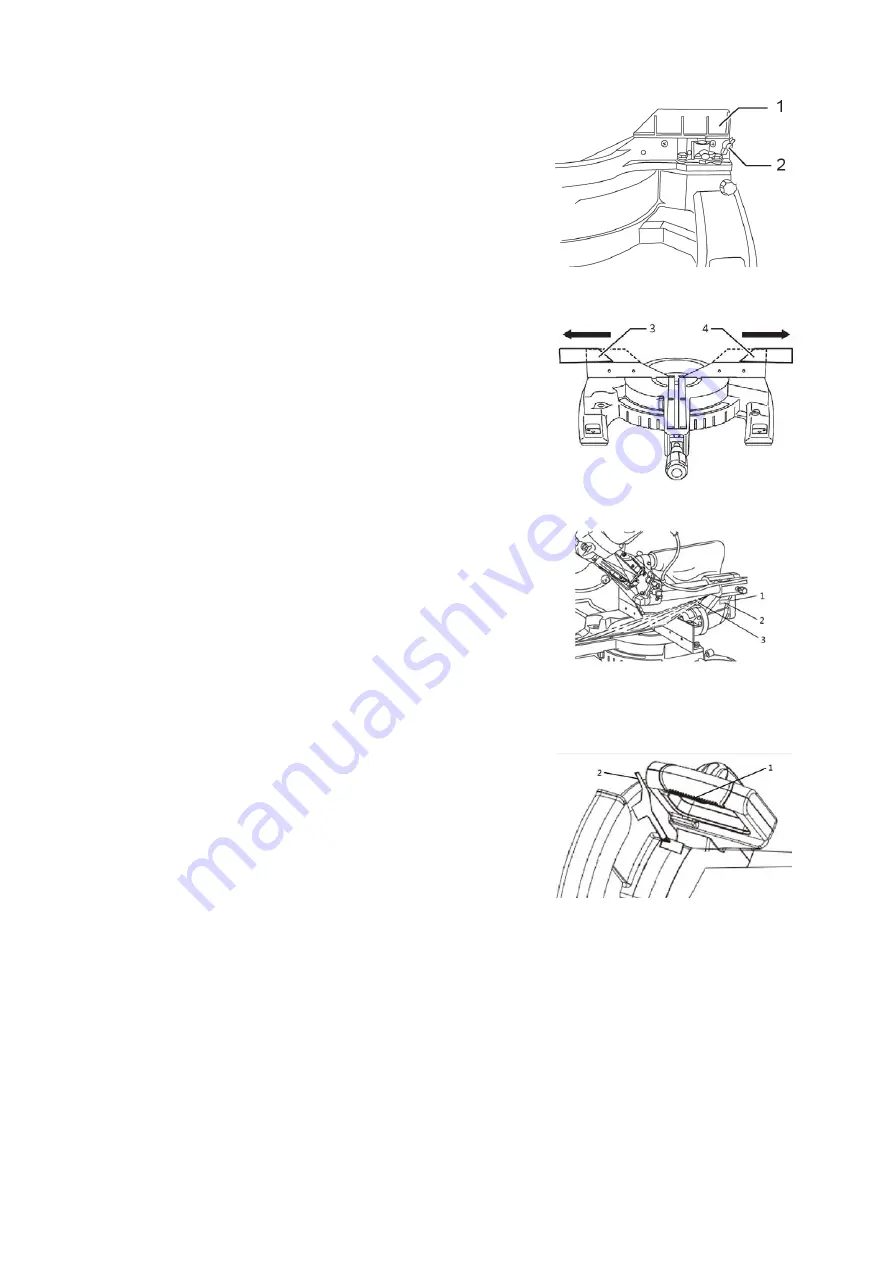
FIG. N
FIG. O
FIG. P
GUIDE FENCE (SLIDING FENCES)
ADJUSTMENT (FIG.N,O)
CAUTION:
Before operating the tool, make sure that the
sliding fence is secured firmly. Before bevel-cutting,
make sure that no part of the tool contacts the sliding
fence when fully lowering and raising the handle in any
position and while moving the carriage through its full
range of travel.
CAUTION:
When performing bevel cuts, slide the
sliding fence(1) to the side and secure it as shown in the
figure. This tool is equipped with the sliding fence which
should ordinarily be positioned as shown in the figure.
When performing left bevel cuts, only set the left sliding
fence (3) to the right position if the tool head contacts it.
When performing right bevel cuts, only set the right
sliding fence (4) to the right position if the tool head
contacts it.
When bevel-cutting operations are complete, don’t forget
to return the sliding fence to the original position and
secure it by firmly tightening the clamping screw (2).
LASER (FIG.P)
Before using laser while cutting, two batteries in
accessories should be placed in battery box (2) in right
side of the arm. Turn on laser switch (1) and check if
laser line (3) in the center of the base.
SWITCH ACTION (FIG.Q)
To prevent the switch trigger (1) from being accidentally
pulled, a lower blade guard lock-off button (2) is
provided. To start the tool, pull the lock-off button
against blade guard and press the switch trigger. Release
the switch trigger and lock-off button to stop.
WARNING:
Before plugging in the tool, always check
to see that the switch trigger actuates properly and returns
to the "OFF" position when released. Do not press the
switch trigger hard without pulling in the lock-off button.
This can cause switch breakage. Operating a tool with a
switch that does not actuate properly can lead to loss of
control and serious personal injury.
FIG. Q
Summary of Contents for 7305B
Page 19: ......


