ASSEMBLY
CAUTION: Always be sure that the tool is switched off and the battery cartridge is removed
before carrying out any work on the tool.
ϭ
Ϯ
ϯ
ϰ
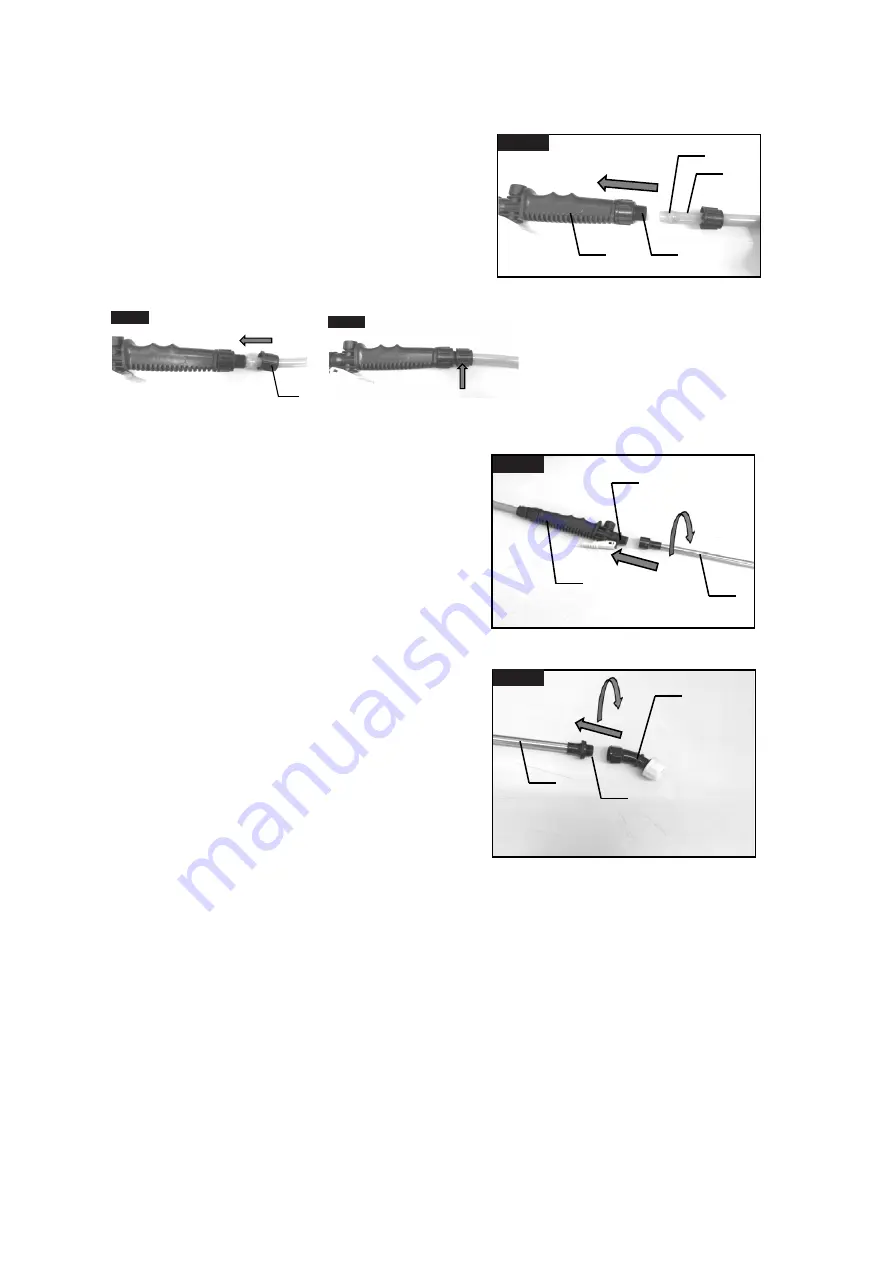
Fig.6
1. End of the water hose
2. Handle grip
3. Hole of the handle grip
4. Water hose
5. Nut
1. To connect the water hose, Insert
the end of the water hose into the hole
of the handle grip as far as it can go.
2. Pull the nut of the water hose on
and then tighten the nut clockwise as
far as it can go.
ϱ
Fig.7
Fig.8
3. To disconnect the water hose, follow the connect procedure in reverse.
Connecting/disconnecting the spray pipe
1. To connect the spray pipe, turn the spray pipe
clockwise while screwing it onto the screw
thread of the handle grip as far as it can go.
2. To disconnect the spray pipe, follow the
connect procedure in reverse.
ϭ
Ϯ
Fig.9
ϯ
1. Spray pipe
2. Handle grip
3. Screw thread of the
handle grip
Connecting/disconnecting the nozzle
1. Select nozzle according to type of spraying
to be done.
2. To connect the nozzle, turn the nozzle
clockwise while screwing it onto the screw
thread of the Spray pipe as far as it can go.
3. To disconnect the nozzle, follow the connect
procedure in reverse.
ϭ
Ϯ
ϯ
Fig.11
1. Nozzle
2. Spray pipe
3. Screw thread of the spray pipe
NOTICE:
1. Firmly attach components to ensure there is no leaking.
2. All connector units use packing. Before assembly, always check to see that the
units have packing.
3. Check to make sure that the spray hose is not cracked, worn and/or damaged.
4. If there is a leak from a connector unit, tighten further using a hand tool (by
approximately 45 degrees).
5. Do not use a spray pipe that is longer than the standard one provided. Doing so may cause
leaking from connector units.


