Page
TIPS FrOM THE PrOS
yOUr
X
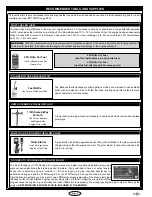
ST 4WD TrUggy rTr SHOUlD InClUDE THE FOllOWIng ITEMS SEPArATEly In THE BOX:
l
Tyres and Wheels (Glued)
l
Body Clips
l
Decal Set
l
Plastic Parts Set
l
Receiver Antenna Support Tube
l
Suspension Plate Holders
l
Air filter Assembly
l
Allen Keys and Wrenches
PrEPArIng TO rUn yOUr
X
ST 4WD TrUggy rTr
Now that you are familiar with the major component parts of your
X
ST 4WD Truggy RTR, and with the functions of the Cirrus 3CFM
transmitter, it's time to prepare your
X
ST 4WD Truggy RTR for its first run.
IMPORTANT:
Before continuing, please double-check that you've read and understood the warnings on page 2. It's important that
you understand this information before preparing to run your
X
ST 4WD Truggy RTR. Also, remember, if you have any questions or
encounter any problems, you can contact your local distributor using the Customer Service Information on page 3.
l
X
ST 4WD Truggy RTR Chassis
l
Cirrus 3CFM 3 Channel FM Transmitter
l
Transmitter Antenna
l
Lexan Body Shell (Printed) and Nylon Wing
STEP 1: FInAl ASSEMBly
l
Make sure to read these Operating Instructions and Assembly Manual in its entirety before starting. This will allow you to become
familiar with the XTM Racing
X
ST 4WD Truggy RTR, XTM Racing 24.7 Nitro Engine and Cirrus 3CFM radio control system.
l
Double-check all of the fasteners to ensure that they're tight.
l
Any screws that are threaded directly into metal should be secured into place with threadlock. This will prevent the screws from loosening
during use. Screws threaded into nylon or composite material do not require threadlock.
l
Do not overtighten any screws that thread into nylon or composite material, or the material may strip out. Screws threaded into nylon
or composite material need only be tightened snugly.
l
After installing the receiver batteries into the battery holder, fit a rubber band or a nylon cable tie around the battery holder. This will
prevent the batteries from coming loose when doing jumps, etc.
l
If you have difficulty sliding the receiver antenna wire through the antenna support tube, first pull the antenna wire through your fingers
several times to straighten it, then lightly wet the antenna wire with glass cleaner. The glass cleaner will make the antenna wire slide
through the support tube much easier.
l
When testing the steering, lift the front of the
X
ST 4WD Truggy RTR off the ground. This will allow the steering system to operate
smoothly, without any binding.
l
If the carburettor barrel does not open completely when you pull the throttle trigger, adjust the throttle trim on the transmitter until the
carburettor barrel opens completely when you pull back fully on the throttle trigger.
l
When oiling the air filter element, place the cleaned air filter element in a plastic bag and then apply the air filter oil on it. Close the bag
and work the oil into the air filter element. This allows you to work the oil into the element without getting excess oil on your hands.
l
When you pinch the fuel line to stop the engine, you must pinch it hard and hold it. The engine will rev up quickly, then stop. We
suggest holding the
X
ST 4WD Truggy RTR while doing this, so that it doesn't lurch out of your hands.
l
Other than during the break-in period, always make sure that you install the body when driving your
X
ST 4WD Truggy RTR. When
your
X
ST 4WD Truggy RTR flips over, the body will help protect the chassis and its components.
l
Place the chassis on a dedicated car stand or similar so that all four wheels are suspended off the ground. This ensures that your
X
ST 4WD Truggy RTR does not accidentally drive away when starting the engine if the idle setting is too high.
q
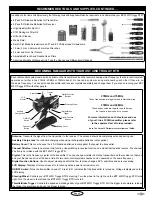
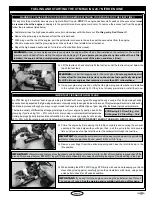
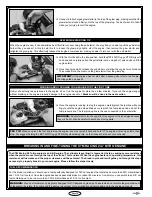
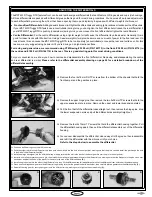
Install the wheels onto the chassis, making sure to tighten the wheel retaining nuts
firmly, using a 17mm wrench.
+
Notice that the back of the wheels are moulded to key over the hex-shaped wheel
hubs. All four wheels and tyres are the same size.
IMPORTANT:
Double-check that the tyres are glued onto the wheels. If they're not,
glue the tyres onto the wheels, using C/A tyre glue. See page 51 for information on
how to glue the tyres onto the wheels.


