background image


34 

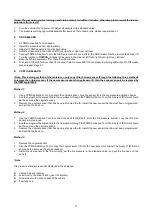
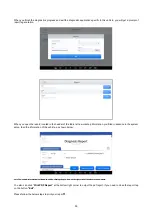
You can view the firmware information here, including the firmware name, the latest firmware version and the currently used 
firmware version.  


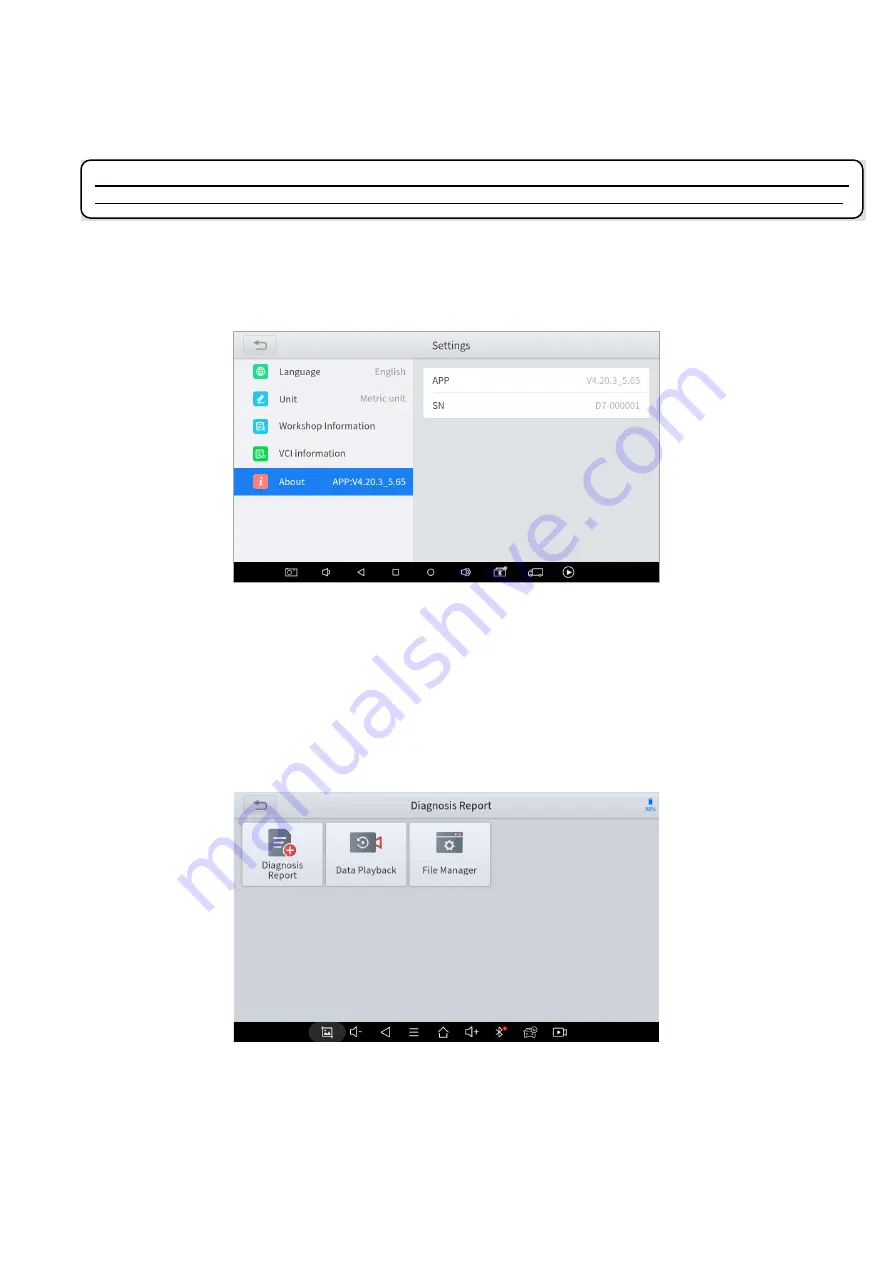
ABOUT 

Tap on 

ABOUT

,


you can check the serial number and APP version on here. 


6.


R

EPORT


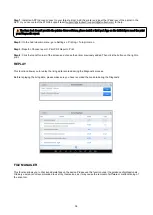
Diagnostic Report is used for viewing and printing the saved files, such as Live Data, Trouble codes or pictures generated 
in the process of diagnosis.  Users also can view a record of which cars have been previously tested. It includes 3 parts:  


Diagnosis Report  


Data Playback 


File Manager 


REPORT 

This  feature  provides  a  history  of  diagnostic  reports,  where  you  can  view  and  delete  the  vehicle's  diagnostic  reports 
according to your needs. 


 The

 Diagnostic tablet supports automatic firmware update, please make sure that the device is connected to the 

network when you enter the diagnostic software and the firmware will be automatically updated to the latest version. 


Summary of Contents for IP508S

Page 1: ...Shenzhen Xtooltech Intelligent Co LTD User Manual IP508S Smart Diagnostic System Version 3 2 Revise date 2022 11 ...

Page 2: ...n the engine starts Make sure the DLC Diagnostic Link Connector is functioning properly before starting the test to avoid damage to the Diagnostic Computer Do not switch off the power or unplug the connectors during testing Doing so may damage the ECU Electronic Control Unit and or the Diagnostic Computer CAUTIONS Avoid shaking dropping or dismantling the scan tool as it may damage the internal co...

Page 3: ...4 Connecting Power 4 Activation 5 3 DIAGNOSTIC 7 Vehicle Connection 7 Beginning Diagnostic Testing 8 Vehicle Selection 8 Diagnosis functions 10 4 SPECIAL FUNCTIONS 15 ABS BLEEDING 15 OIL RESET 18 EPB 20 SAS 21 THROTTLE 22 BMS RESET 23 INJECTOR CODING 24 DPF REGENERATION 26 TPMS RESET 29 5 SETTINGS 32 Language 32 Units 32 ...

Page 4: ...39 Q4 Mailbox supported 39 Q5 How to make an appointment for remote support 40 Q6 How to generate and upload diagnostic log files 40 Q7 How to switch language 40 Q8 Failed to diagnose vehicle 40 Q9 Failed to activate or register 40 Q10 Failed to turn on when charging 40 Q11 Failed to open the Diagnostic app 40 Q12 Can t receive the email after sharing the diagnostic report 41 9 REMOTE ASSISTANCE 4...

Page 5: ...iii Function Buttons 43 Navigation Buttons 43 Notification Bar 44 Compliance Information 45 FCC Compliance 45 CE 45 UKCA 45 Trademarks 47 Copyright 47 ...

Page 6: ... Full OBD II functions 8 reset functions ABS Anti block system bleed Oil light reset EPB Electronic Parking Brake reset SAS Steering Angle Sensors reset BMS matching Injector coding DPF Regeneration TPMS reset 1 5 inch Touch Screen 2 UBS Port Available for charging and data transfer 3 DB15 Port 4 DC Charger Port Reserved compatible with 12V DC chargers 5 Power Button 6 Speaker 7 Name Plate 2 GETTI...

Page 7: ...y enter the guided process and request the user to select the language for the operating system After setting the system language click Next to enter the Wi Fi connection page as shown below Select a network to connect to on the Wi Fi connection page You need to enter the Wi Fi password to establish Wi Fi connectivity and the activation page as shown in the figure below You can also click the Tria...

Page 8: ...tivation to enter the activation page as shown below A pop up window showing Activation Success indicates that you have completed the first boot setup Click OK to enter the diagnostic system and start using the device ...

Page 9: ...he scan tool must be connected to the vehicle s OBD II port so that the tablet can establish correct vehicle communication Please perform the following steps 1 Turn on the tablet 2 Connect vehicle and tablet via the main test cable 3 Switch on the ignition and tap on the Diagnostic application to start your diagnosis The connection method is shown in the figure below 1 Vehicle 2 Main Cable DB15 to...

Page 10: ... 5 Only wiring harnesses provided by XTOOL and designed for the scan tool are permitted to be used with this scan tool to avoid damage to the vehicle or the scan tool 6 When running a Diagnostics function it is forbidden to shut down the scan tool directly You should cancel the task before returning to the main interface and then shutting down the scan tool BEGINNING DIAGNOSTIC TESTING After the t...

Page 11: ...ake sure that the 17 characters entered are correct to ensure accurate test results SELECT VEHICLE BY AREA In addition to the above 3 methods you can also choose a car brand by selecting the appropriate region at the top of the screen You can select the vehicle model that needs to be diagnosed according to the area as shown below OBD II supports reading the related fault codes of the Powertrain Co...

Page 12: ... after selecting the model DIAGNOSIS FUNCTIONS Diagnostics functions supported by the scan tool are listed below Read ECU Information Read Clear Trouble Code Read Live Data Freeze Frame READ ECU INFORMATION This function is to read ECU version information and is the equivalent of System Identification or System Information in some electronic control systems These equivalent terms all refer to read...

Page 13: ...ot detected until very specific test conditions are met such as engine coolant temperature within a range speed within a range for a duration of time throttle percentage within a range etc If the trouble codes are erased when the trouble remains unresolved the trouble code will reappear in the ECU the next time the ECU performs the specific diagnostic test for that trouble If the trouble is resolv...

Page 14: ...parameters we can predict directly where the problem lies which helps to narrow the scope of maintenance For some vehicles during their actual operation the problems such as performance characteristics or sensitivity reduction can be evaluated using live data Click the magnifying glass on the top right you can search for related PIDs based on keywords Custom The scan tool includes support to selec...

Page 15: ...ng the current data values in the form of text You can view the recorded files in Reports Data Replay Pause Click this button to pause the recording timeline FREEZE FRAME When the signal of the sensor is abnormal the ECU will save the data at that moment of failure to form a freeze frame It is usually used to analyze the reasons that may lead to component failures ...

Page 16: ...u the device will list all the fault codes under the system Users can click on a fault code such as DF1068 to view the freeze frame recorded by the car when the fault code occurs including context when the fault appeared and current context and additional data Context when fault appeared record the live data when fault appeared to help the user to know the vehicle status Some vehicles don t suppor...

Page 17: ...shorten the braking time and distance prevent the vehicle from skidding and tailing during emergency braking ensure good driving stability and steering maneuverability and avoid violent friction between the tires and the ground to reduce tire wear When the ABS contains air the ABS bleeding function must be performed to bleed the brake system to restore ABS brake sensitivity ABS Bleeding can be per...

Page 18: ...ocedure and pumping the brake pedal continuously with steady applies every 2 seconds during the entire procedure 5 Continue pumping the brake pedal when air bubbles are no longer visible select OK to enter next bleed procedure for left front wheel ...

Page 19: ...times to complete the bleed procedure for the left front wheel right front wheel and right rear wheel in turn 7 Stop pumping the brake pedal and close the right rear bleeder screw 8 Click OK to complete the entire bleed procedure ...

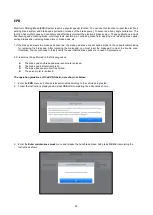
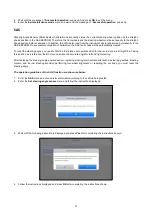
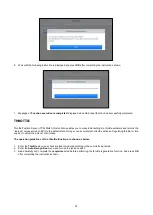
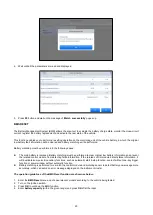
Page 20: ...n can be performed in the following cases If the service lamp is on you must provide service for the car After service you need to reset the driving mileage or driving time so that the service lamp turns off and the system enables the new service cycle After changing engine oil or electric appliances that monitor oil life you need to reset the service lamp The operation guidelines of the Oil Reset...

Page 21: ...19 5 Confirm the New Value you just entered and then click OK at the bottom right to complete the procedure 6 Message of Write successfully displays when Oil Reset function has successfully performed ...

Page 22: ...send a signal to the onboard tablet asking for replacing the brake pad After replacing the brake pad you must reset the brake pad to clear the trouble code Otherwise the car continues to falsely notify the user that the brake pads are in need of replacement 2 A reset must be performed in the following cases The brake pad and brake pad wear sensor are replaced The brake pad indicator lamp is on The...

Page 23: ...ngle you need to first find the relative zero point position for the car to drive in a straight line Taking this position as a reference the ECU can calculate the accurate angle for left and right steering After replacing the steering angle position sensor replacing steering mechanical parts such as steering gearbox steering column end tie rod steering knuckle performing four wheel alignment or re...

Page 24: ...earned values stored on ECU to the default state Doing so can accurately control the actions of regulating throttle or idle engine to adjust the amount of air intake The operation guidelines of the Throttle function are shown as below 1 Enter the Throttle menu and choose relevant models according to the vehicle being tested 2 Enter the Auto Recognition menu and turn on the ignition switch 3 Read c...

Page 25: ...t be performed to clear original low battery information and prevent the related control module from detecting false information If the related control module detects false information it will invalidate some electric auxiliary functions such as automatic start stop function sunroof without one key trigger function or power window without automatic function Battery matching is performed to re matc...

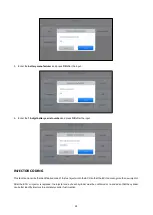
Page 26: ...t INJECTOR CODING This function can write the identification code of the fuel injector into the ECU so that the ECU can recognize the new injector After the ECU or injector is replaced the injector code of each cylinder must be confirmed or re coded so that the cylinder can better identify injectors to accurately control fuel injection ...

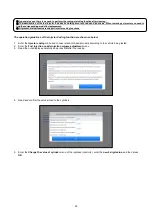
Page 27: ...the reading 4 Read and confirm the value stored in the cylinders 5 Enter the Change the value of cylinder menu of the replaced injector s enter the new 5 digit value and then press OK In general cases there is no need to perform the coding matching function after cleaning The identification of the fuel injector includes its working accuracy value and type value When replacing an injector you need ...

Page 28: ...or regeneration to take place a prolonged high exhaust temperature must be obtained In the event of the car being driven in such ways that regeneration is not possible i e frequent short journeys a diagnostic trouble code will eventually be registered in addition to the DPF light and Check Engine indicators displaying A service regeneration can be requested in the workshop using the diagnostic too...

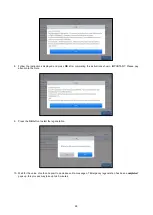
Page 29: ...ation menu 3 Read carefully and complete the requisites listed before performing the DPF regeneration function Press OK after completing the instructions shown 4 Read the fuel tank level and make sure that it fulfills the requirement displayed 5 Read the carbon deposit load 6 Choose the drive to warm up option and follow the instructions listed below Press OK after completing the instructions show...

Page 30: ...he instructions shown IMPORTANT Please pay attention to the Note 9 Press the OK button to start the regeneration 10 Wait for the value of carbon deposit to decrease until a message of Emergency regeneration has been completed pops up this process may take up to 40 minutes ...

Page 31: ... pressure system may differ by the region where it is manufactured Therefore under the TPMS Reset function we provide 6 menus for the major automotive manufacturing regions including Korea Japan USA China Australia and Europe as shown below 1 For tire pressure sensor matching some vehicle models may need the TPMS activation tool 2 After learning process you may need to run the car for some while b...

Page 32: ...IC RELEARN 1 Install all tire pressure sensors appropriately 2 Pull up the parking brake 3 Turn the ignition to ON RUN with the engine off 4 Enter the tire pressure learning mode through the instrument panel on vehicle There will be the corresponding prompt which are differ from different car make and model please subject to the vehicle manual or consult a professional 5 Starting from the left fro...

Page 33: ...placed by the OEM equipment Method 1 1 Use a TPMS Activation Tool to activate the original sensor copy the sensor ID to the tire pressure activation device 2 And then program the copied ID into the new sensor through the TPMS Activation Tool The binary of ID format should be the same as the original sensor 3 Remove the original sensor that has been just copied the ID install the new sensor that ha...

Page 34: ...n After the configuration is successfully changed you can switch the target language How to change the language of your software Step1 Contact your dealer or XTOOL Support and leave a message about the language you need and the S N of your device A technician will modify the language configuration for you in the background Wait for a response from the technician indicating Step 1 is complete Step2...

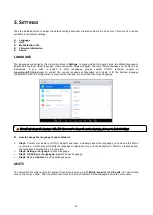
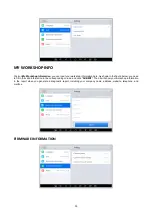
Page 35: ... As shown in the figure below you need to fill in the valid information in the corresponding column and click SUBMIT Then it will show your workshop information in the report when you generate a diagnostic report including your company name address website telephone and mailbox FIRMWARE INFORMATION ...

Page 36: ...rated in the process of diagnosis Users also can view a record of which cars have been previously tested It includes 3 parts Diagnosis Report Data Playback File Manager REPORT This feature provides a history of diagnostic reports where you can view and delete the vehicle s diagnostic reports according to your needs The Diagnostic tablet supports automatic firmware update please make sure that the ...

Page 37: ...kshop information you filled in advance in the system setup then the information of the vehicle as shown below Note The vehicle information is allowed to edit by clicking the pen icon on the right side of the picture shown above You also can click Print PDF Report at the bottom right corner to output the pdf report If you need to close the report tap on the button Exit Please follow the below step...

Page 38: ...button on the right to print REPLAY This function allows you to replay the living data recorded during the Diagnostic process Before replaying the living data please make sure you have recorded the live data during the Diagnostic FILE MANAGER This function allows you to check and delete files on the device Please use this function under the guidance of professionals Ordinary users are not recommen...

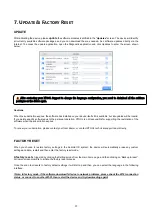
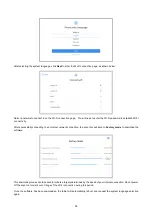
Page 39: ... please contact your local dealer or contact XTOOL technical support team directly FACTORY RESET When you choose to restore factory settings in the Android OS system the device will automatically erase any custom settings and data restart and then enter the factory reset mode A factory reset is triggered by clicking the Settings mode from the main home page and then clicking on Backup reset Follow...

Page 40: ...cessfully connecting to an Internet network connection the scan tool will jump to Factory mode to download the software This download process can take several minutes largely determined by the speed of your Internet connection Do not power off the scan tool or walk out of range of the Wi Fi connection during this period Once the software has been downloaded the tablet will automatically reboot and...

Page 41: ... Diagnosis Clear Cache Q2 HOW TO PRINT A DIAGNOSTIC REPORT The XTOOL device is compatible with third party print drivers You can download the printer driver you need in the browser that comes with the tablet to install it and then set your printer in the OS settings After the configuration is completed you can print Reports Q3 FAILED TO EXTRACT FILES Since the XTOOL tablet is equipped with an Andr...

Page 42: ... Communication Interface box please check the status of the VCI box indicator 3 Confirm whether you have entered the correct Diagnostic menu 4 Confirm whether the AUTO SCAN function can assist you to enter the correct Diagnostic menu 5 Check whether the software is the latest version If not please update to the latest version and retest Q9 FAILED TO ACTIVATE OR REGISTER For Activation Failed This ...

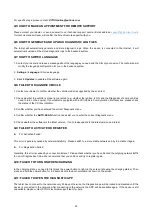
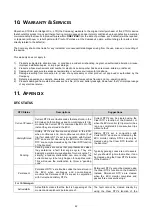
Page 43: ...the future This TeamViewer ID can individually access all TeamViewer clients Before launching the remote desktop application make sure that the tablet is connected to the Internet so that you can access the tablet to receive remote support from a third party If you encounter problems and are not able to solve them you could open this application and ask for remote assistance To obtain remote suppo...

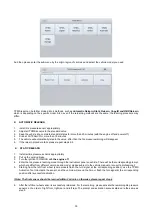
Page 44: ...nuous 2 trip monitors fail Current DTC s command the MIL On the instant they are stored in the ECU Current DTC s can be cleared using the Clear DTC s function of the Scantool or when the ECU monitor 2 trip monitor has ran and completed 40 consecutive trips without a fault History Stored History DTC s are trouble codes stored in the ECU when continuous and non continuous monitors 2nd trip fail Hist...

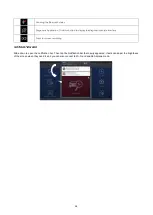
Page 45: ...he Internet This function is helpful when consulting with a colleague about a particular set of scan tool readings Updates Once the scan tool is connected to a Wi Fi Internet connection any available software updates are identified on this icon Users can upgrade the available software with one click Settings Users can set the language units repair shop information and can view information about th...

Page 46: ...e diagnostic vehicle interface Press for screen recording NOTIFICATION BAR Slide down to open the notification bar Then tap the Notification bar that newly appeared Users can adjust the brightness of the screen when they need it and you can also connect to Wi Fi and enable Airplane mode ...

Page 47: ...nment s requirements for exposure to radio waves The guidelines are based on standards that were developed by independent scientific organizations through periodic and thorough evaluations of scientific studies The standards include a substantial safety margin designed to assure the safety of all persons regardless of age or health FCC RF Exposure Information and Statement the SAR limit of the USA...

Page 48: ...ATIVITY CITY LIUXIAN AVENUE NANSHAN DISTRICT SHENZHEN CHINA FACTORY ADDRESS 2 F BUILDING 12 TANGTOU THIRD INDUSTRIAL ZONE SHIYAN STREET BAOAN DISTRICT SHENZHEN CHINA SERVICE HOTLINE 0086 755 21670995 86267858 EMAIL MARKETING XTOOLTECH COM FAX 0755 83461644 WEBSITE WWW XTOOLTECH COM ...

Page 49: ...rms No part of this manual can be reproduced stored in a retrieval system or transmitted in any form or by any means electronic mechanical photocopying recording or otherwise without the prior written permission of XTOOL This manual is designed for the usage of the IP508S Smart Diagnostic System and provides operating instructions and product descriptions for users of this scan tool Use the device...

Reviews: