background image

02

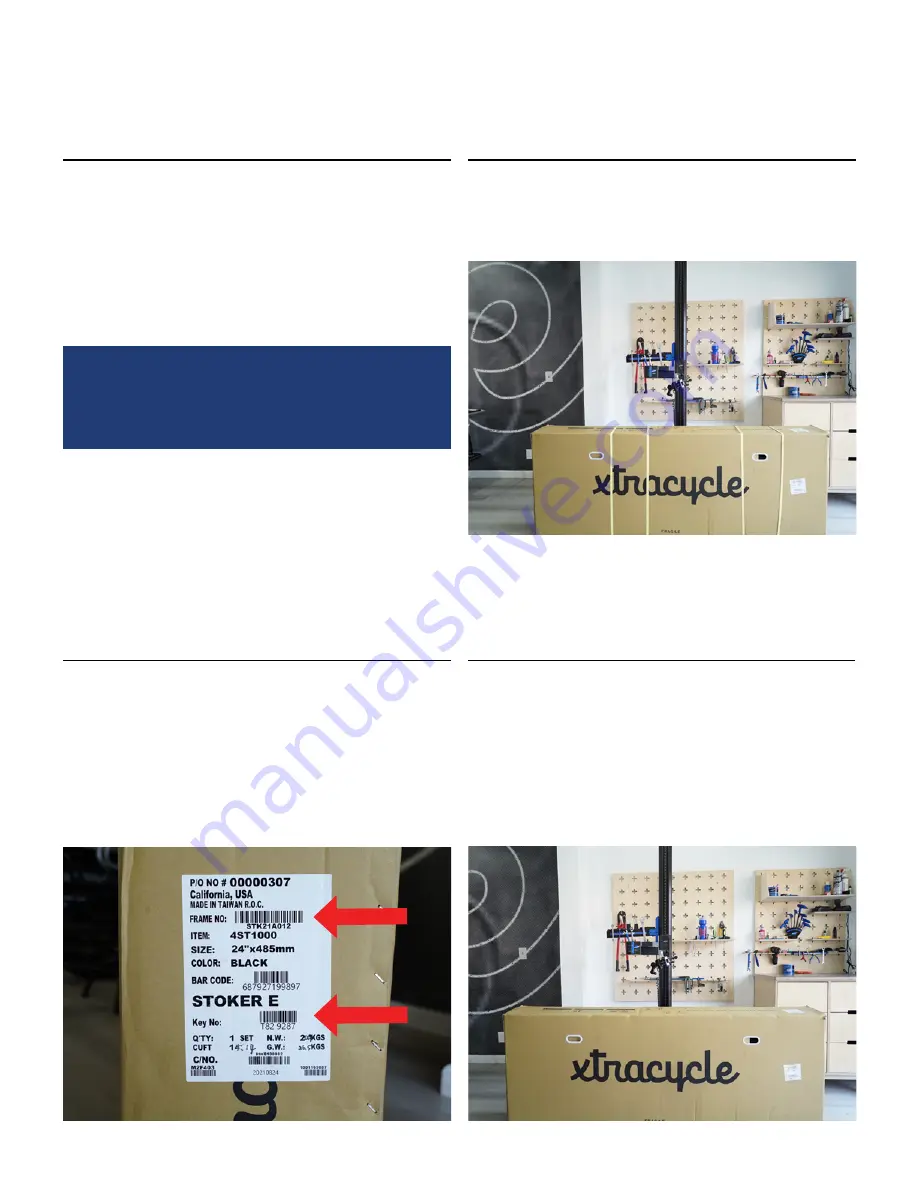
Record the serial number and the Shimano key number 
which can be found on the label on the side of the box. Keep 
these numbers in a secure place since they might be needed 
in case somethig happens to your bike or you lose your 
Shimano key.  The serial number is the number under the bar 
code next to "Frame No:". For the Swoop, this will start with 
SWP (the barcode show here is for a Stoker). The key number 
is the number under the bar code next to "Key No:".

01 - Open the bike box

Look over the box for signs of shipping damage. If damage 
is present, please take pictures in case a shipping damage 
report needs to be filed.

Assembling the

xtracycle swoop

2

Tools needed

3 mm Allen wrench
4 mm Allen wrench
5 mm Allen wrench
6 mm Allen wrench
Snippers / scissors for cutting zip ties
10 mm socket wrench
Electrical tape
Pedal wrench

03

Cut away the yellow zip ties holding the box closed.

Please note: We show the bike being assembled in a 
bike stand but the bike can be assembled without one. 
If assembling your bike without a stand, be sure the bike 
stays upright and is not turned upside down as this can 
interfere with the function of the hydraulic brakes.


Summary of Contents for Swoop 2021

Page 1: ...Swoop assembly Manual 2021...

Page 2: ...Look over the box for signs of shipping damage If damage is present please take pictures in case a shipping damage report needs to be filed Assembling the xtracycle swoop 2 Tools needed 3 mm Allen wr...

Page 3: ...nspect the contents and look again for any signs of shipping damage 06 Remove the small parts box the KickBack 3 and the seat post and set these aside 07 Cut the string attaching the rear of the bike...

Page 4: ...eat post in place 10 Install the front wheel fender and light The rear wheel comes pre installed The front wheel and fender is zip tied to the bike frame Cut these zip ties and remove the wheel and fe...

Page 5: ...er spring L bracket from the small parts box Install the front fender top mounting tap to the top of the front fork with the appropriate hardware in this order M6 x 50mm bolt M6 washer thru fork fende...

Page 6: ...using the M6 Allen wrench 17 Install the front light to the fender front tab with an M6 x 15mm bolt Attach front light wires from frame to front light wires on top of fender 18 Attach the front light...

Page 7: ...ack 3 22 The KickBack 3 mounting plate needs to be slid into these brackets and then the mounting plate bracket bolt can be threaded into the boss on the underside of the boom tube 23 Start to thread...

Page 8: ...asher over the U bolt threads then lightly thread on a washer and nut 25 Moving the legs as necessary to allow for access to the bolts lightly snug all four nuts with a 10mm socket wrench Alternating...

Page 9: ...nd handlebars You will now be adjusting the front stem and handlebars Loosen the stem bolts and rotate the stem to a forward facing position 30 Once the handlebars are straight tighten down the stem b...

Page 10: ...g off the front of the handlebars into the Shimano Cable Tool TL EW300 which is located in the small parts box Holding the cable tool connect the wire into the handlebar computer 34 You will hear a cl...

Page 11: ...of the U Tube 38 Determine if you would like to have the U tubes installed in the wide setting shown on the left side of the bike pictured below or the narrow setting shown on the right side In the w...

Page 12: ...e you will need to loosen the tailpiece on the back end of the bike in order to acquire additional tolerance This is the tail piece 41 Four bolts are securing the tailpiece in place Loosen these four...

Page 13: ...er side of the frame 45 If you loosened the tailpiece to install the U tubes tighten the tailpiece into place 46 Complete assembly After ensuring that the brakes and gears are set to your preference t...

Page 14: ......

Reviews: