71
E-mail: sales@xtramus.com
Website: www. Xtramus.com
XTRAMUS TECHNOLOGIES
®
6.2. Connecting NuPAD with NuSTreams-P5G/NuStreams-P9A
Before using NuPAD as NuStreams-P5G/P9A
’s assistant extension keypad, you have to connect
NuPAD
’s
Connection Port
with NuStreams-P5G/P9A
’s
Console Port
with a CAT-5 straight-through
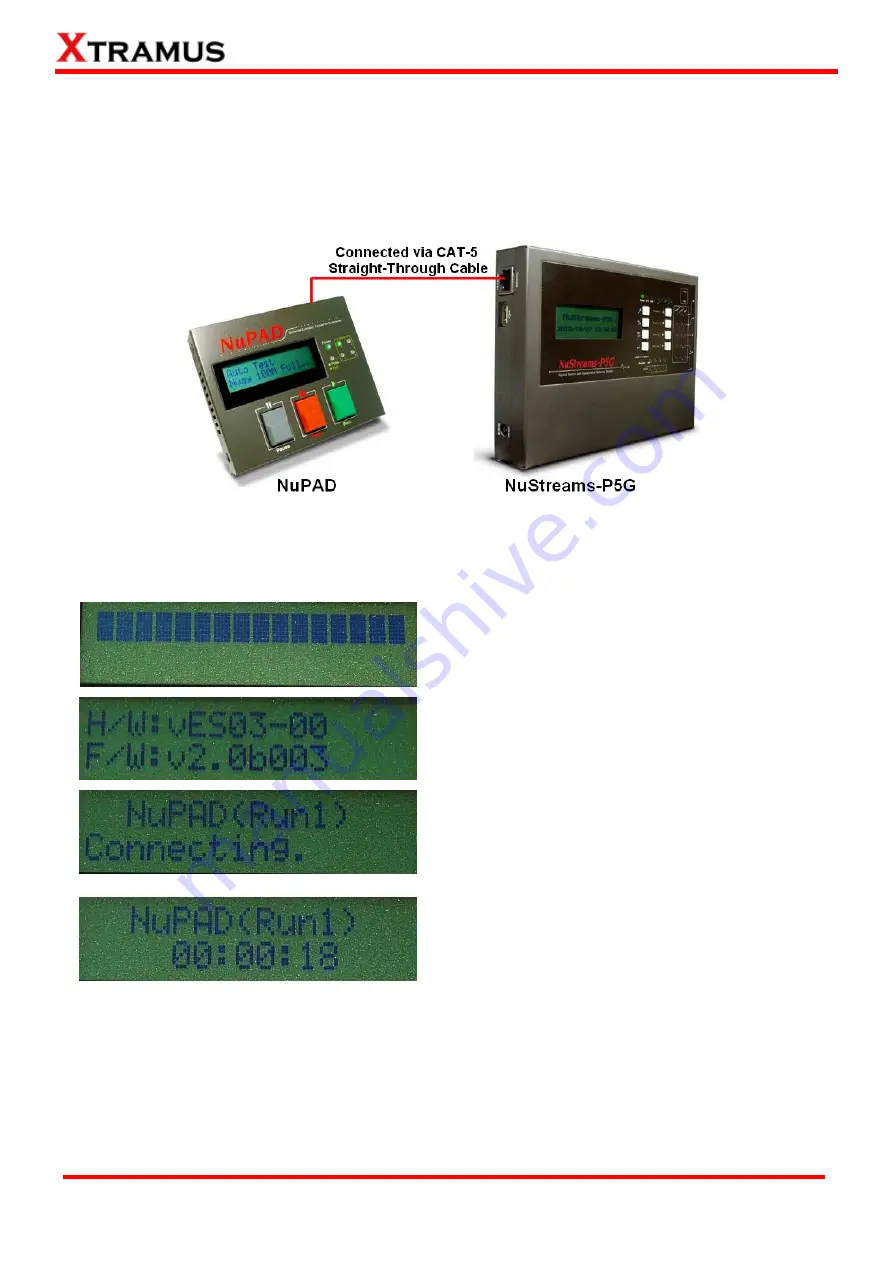
cable first. The figure down below is an installation example of connecting NuStreams-P5G and
NuPAD.
After connecting NuStreams-P5G/P9A with CAT-5 straight-through cable, NuPAD will start
establishing connection with NuStreams-P5G/P9A, and its LCD will display system status as shown
down below.
1. NuPAD is powering up.
2. Showing NuPAD
’s hardware and firmware version.
3. NuPAD is starting connecting with
NuStreams-P5G/P9A. During this process, NuPAD
’s
buzzer will be beeping.
4. Connection established, and NuPAD
’s buzzer stops
beeping. If NuPAD
’s buzzer keeps beeping and the
connection between NuStreams-P5G/P9A and
NuPAD can
’t be established, please power off both
NuStreams-P5G/P9A and NuPAD, power them on,
and try again.
Please note that NuStreams-P5G/P9A cannot be connected to your PC and its LCD should be on the
Main Display menu when connecting NuStreams-P5G/P9A with NuPAD for controlling DUT tests.

