background image

19 


FCC Warning  


This device complies with part 15 of the FCC Rules. Operation is subject to the following two conditions: (1) 

This device may not cause harmful interference, and (2) this device must accept any interference received, 

including interference that may cause undesired operation.  


Any Changes or modifications not expressly approved by the party responsible for compliance could void 

the user's authority to operate the equipment.  


Note: 

This equipment has been tested and found to comply with the limits for a Class B digital device, 

pursuant to part 15 of the FCC Rules. These limits are designed to provide reasonable protection against 

harmful interference in a residential installation. This equipment generates uses and can radiate radio 

frequency energy and, if not installed and used in accordance with the instructions, may cause harmful 

interference to radio communications. However, there is no guarantee that interference will not occur in a 

particular installation. If this equipment does cause harmful interference to radio or television reception, 

which can be determined by turning the equipment off and on, the user is encouraged to try to correct the 

interference by one or more of the following measures:  


-Reorient or relocate the receiving antenna.  


-Increase the separation between the equipment and receiver.  


-Connect the equipment into an outlet on a circuit different from that to which the receiver is connected.  


-Consult the dealer or an experienced radio/TV technician for help.  


* RF warning for Portable device:  

The device has been evaluated to meet general RF exposure requirement. The device can be 
used in portable exposure condition without restriction.    


Summary of Contents for X8MT16

Page 1: ...1 User Manual Model X8MT16 FCC ID 2ADVA X8MT16 Thank you for choosing this Tablet PC In order to keep your device in its best condition please read this manual and keep it for future reference...

Page 2: ...2 1 Power 2 VOL 3 VOL 4 Earphone jack 5 USB Port 6 TF Card 7 Speaker 8 Rear Camera 9 Front Camera...

Page 3: ...ys Function 5 3 2 Startup and Shutdown 6 3 3 Screen wakeup and sleep 6 3 4 Usage of Touch Screen 7 3 5 Home Page 7 4 Basic Setting 8 4 1 Wireless and Internet 8 4 2 Add Network 9 4 3Bluetooth 10 4 4 D...

Page 4: ...ircumstance Never shock throw prod the TABLET PC or drop extrude bend the TABLET PC Never disassemble the device and accessories arbitrarily otherwise the device and accessories are not in our company...

Page 5: ...er icon please hold the column and slip down your finger then the reminder board is opened 3 Quick Start Guide 3 1 Keys Function Keys Function Description Power button Short press to sleep wake up lon...

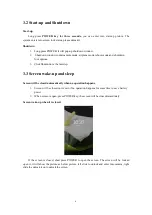
Page 6: ...the last step 3 3 Screen wake up and sleep Screen will be closed automatically when no operation happens 1 Screen will be closed on its own if no operation happens for some time to save battery power...

Page 7: ...ide Quickly slide or slide indicates make quick vertical or horizontal movement byfinger Pull Before you pull you need to hold the it with strength until you pull it into the position youwant Rotate F...

Page 8: ...rface choose setting application procedure 2 Click WLAN open Wi Fi TABLET PC will automatically search the available Wi Fi wireless internet As Picture 4 6 3 Choose the Wi Fi internet you want to conn...

Page 9: ...tomwill remind you available WLAN network 3 Keep WI FI on during sleep 1 Click icon in right top of Picture 4 8 select advanced 2 Click Keep WI FI on during sleep as Picture 4 2 4 3 Bluetooth Bluetoot...

Page 10: ...up request window enter into related password and match the device to connect 4 4 Display 4 4 1 Adjust the screen brightness 1 Click Setting application procedure 2 Click display choose brightness 3...

Page 11: ...d 4 4 2 Auto rotation System is defaulted as open auto rotation when it is turned off system won t rotate TABLET PC screen by G sensor 4 4 3 Sleep 1 Click setting application 2 Click display 3 Click s...

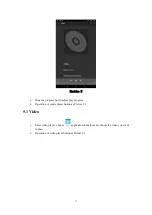
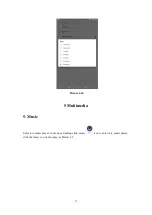
Page 12: ...12 Picture 4 43 5 Multimedia 5 Music Enter into music player in menu or desktop click music icon to enter into music player click the music you want to play as Picture 5 1...

Page 13: ...gress bar to adjust play progress Operation of music player button as Picture 5 1 5 1 Video Enter video player choose application in main menu choose the video you want to play Operation of video play...

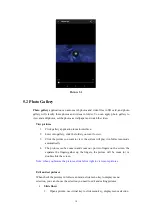
Page 14: ...the picture you want to view the system will play it in full screen mode automatically 4 The pictures can be zoom in and zoom out put two fingers on the screen the separate the fingers gather up the...

Page 15: ...5 If you wish to give up to crop click cancel to return to picture browse Edit 1 Click menu key display the menu selection 2 Click edit 3 Adjust the brightness style color antialias setting in select...

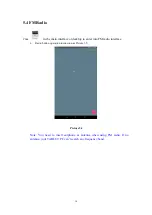
Page 16: ...erface or desktop to enter into FM radio interface Radio button operation instruction as Picture 5 5 Picture 5 4 Note You need to insert earphone as antenna when using FM radio If no antenna your TABL...

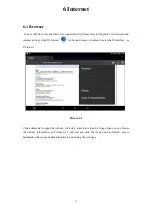
Page 17: ...IE browser Picture6 1 in the main menu or desktop to enter the IE interface as Picture 6 1 Click address bar to input the website click start enter into related web page then you can browse the websi...

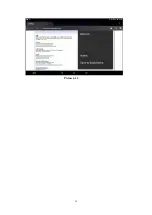
Page 18: ...18 Picture6 1 2...
Page 19: ...ate radio frequency energy and if not installed and used in accordance with the instructions may cause harmful interference to radio communications However there is no guarantee that interference will...

Reviews: