
7
INSTALLATION
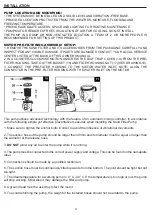
POWER CONNECTION
Be sure to check whether used voltage is corresponding to the required voltage indicated on the
nameplate label. The voltage for the motor should not exceed 10% or below the requirement on the
requirement on the nameplate label. If too much voltage is applied, the motor will overheat and lead
to overload trip and shorten the life of the component. All connections must be applied by a qualified
technician. All wiring must comply with local and national and local laws. The leakage circuit breaker
must be configured to avoid electric shock when deterioration of the insulation occurs due to product
age.
CONTROL PANEL INSTRUCTION
TIMER INITIATION
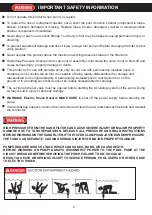
NOTE:
Make sure the power supply is off.
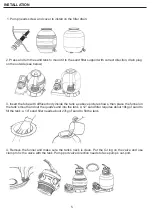
1. Unscrew the four screws on the lid of the terminal box and remove the lid.
2. Remove the battery.
3. Remove the rubber film on the surface of the battery.
4. Replace the battery.
5. Replace the lid on the terminal box and re-tighten the four screws.
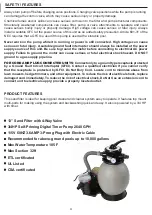
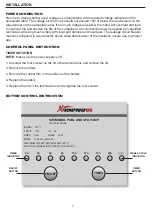
SWIMMING POOL AND SPA PUMP
MADE IN CHINA
MODEL : 72717
VOLTS : 115V
AMPS : 3.6A
QMAX : 150L/min (44GPM)
MAXIMUM WATER TEMPERATURE:
40 °C
MOTOR OVERHEATING PROTECTION DEVICE
Hz : 60
HMAX : 10M
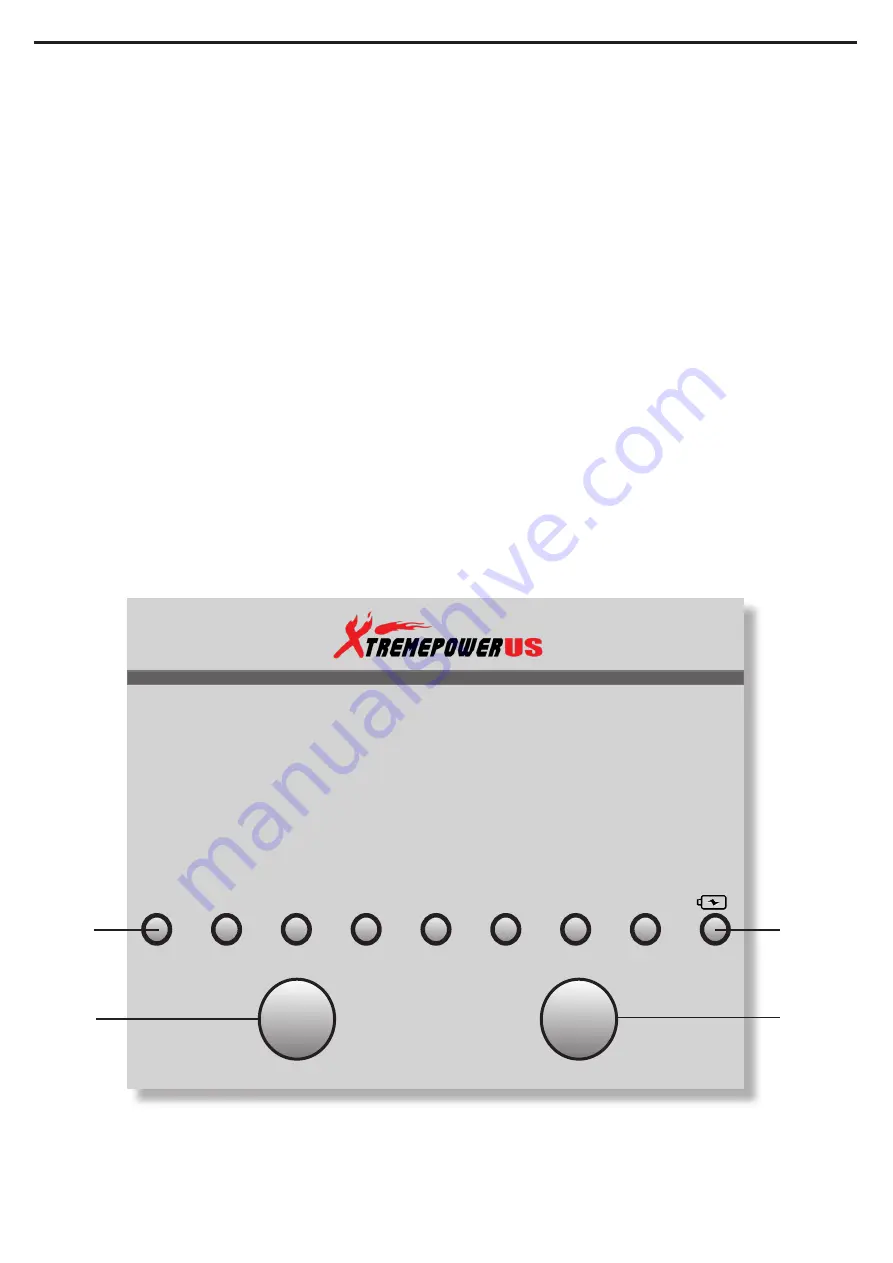
TIMES
ON/OFF
2h
4h
6h
8h
10h
12h
16h
24h
TIMER
INDICATOR
ON/OFF
BUTTON
TIMER
BUTTON
SINGLE CYCLE
INDICATOR
BUTTON CONTROL INSTRUCTION


