background image


The gateway for Smart Linux TV 

ET5000 User Manual

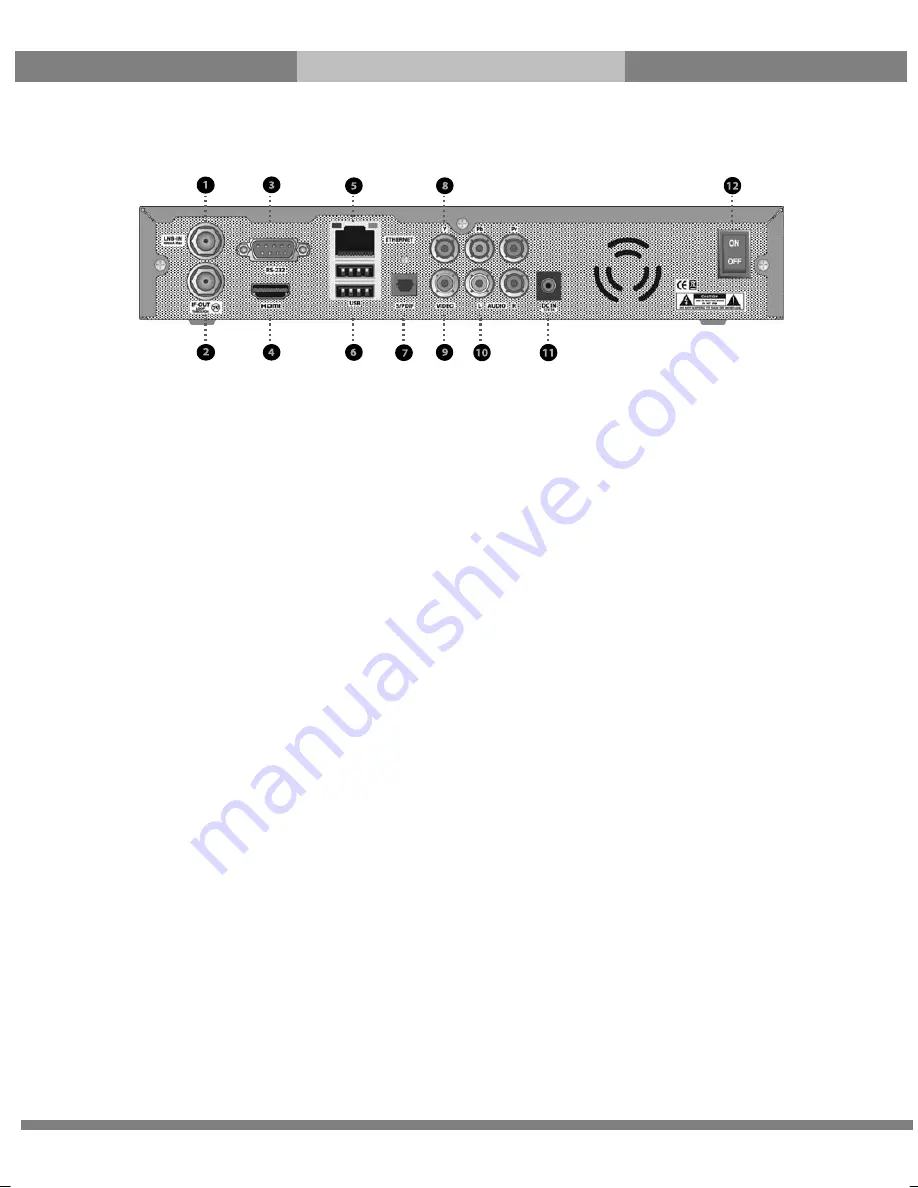
Rear Panel 


LNB-IN 

One satellite cable can be connected. 


IF-OUT 

Other satellite signal receiving devices can be connected through this interface. 


RS-232 

RS-232 data port is provided. 


HDMI 

Connects to TV using a HDMI cable for both audio and video signals. 


Ethernet 

Connects the PC or another set top box of ET5000. 


USB 

Connects the USB memory stick or external HDD. 


S/PDIF 

Connects to a digital audio system using S/PDIF cable. 


Component (YPbPr) 

Connects to TV using a component cable 


Video output 

Connects to TV using RCA cable. 


Audio output 

Connects to TV using RCA cable. 


DC-IN 

Connects the detachable D/C power adapter. 


On/off Switch 

Powers On/Off. 


Summary of Contents for ET5000

Page 1: ......

Page 2: ...TV 14 3 Connecting Power 15 4 Power ON OFF 16 II First Time Installation using Wizard 17 Step 1 Language Selection 17 Step 2 Configuring Satellite Connection 17 Step 3 Configuring Tuner A 18 Step 4 Pa...

Page 3: ...figuration 40 B Automatic Scan of Services 41 C Manual Scan of Services 42 2 2 System Configuration 44 A A V Settings 44 B Language Selection 46 C Customization 46 D Selecting Time Zone 48 E Hard Disk...

Page 4: ...oduct Please do not clean the product with wet cloth which may cause a short circuit No wet objects should be placed near the product 4 Ventilation Allow a sufficient space between the product and oth...

Page 5: ...ve HDD is still running This may result in damage to the HDD and thus the system The company shall not be liable for any corruption of data on the HDD caused by careless use or misuse of users 11 Batt...

Page 6: ...for Smart Linux TV ET5000 User Manual B Packaging Contents Please check all package contents before using your product ET5000 Remote Control Batteries HDMI cable Optional A C Adaptor Power Code User M...

Page 7: ...ct Descriptions Front Panel Buttons Standby Up Down Left Right Status Indicator Red standby Green operation Yellow update box or message available etc USB Connects to the USB memory stick or external...

Page 8: ...to TV using a HDMI cable for both audio and video signals Ethernet Connects the PC or another set top box of ET5000 USB Connects the USB memory stick or external HDD S PDIF Connects to a digital audio...

Page 9: ...d in only with the corresponding Smartcard ET5000 provides two Smartcard Reader slots and users need to purchase those Smartcards that are required for viewing such subscription based services Inserti...

Page 10: ...s the audio track option to choose e g AC3 Stereo TV Displays the TV channel list Radio Displays the Radio channel list Help Displays major important operation methods of ET5000 This provides users wi...

Page 11: ...channel list during viewing mode 17 Filelist Displays the list of recordings stored on the internal HDD if any 18 ll Play and Pause 19 Fast Rewind Fast rewinds at up to 128 times faster than the norma...

Page 12: ...d Readers MPEG2 H 264 Hardware Decoding 1 x DVB S2 Tuner Status Indicator 128MB NAND Flash 256MB DDR Memory 10 100MB Ethernet Interface 2 x USB 2 0 RS 232 HDMI YPbPr Composite Video RGB S PDIF for dig...

Page 13: ...d optical S PDIF USB 2 x USB 2 0 Ethernet 1 RS 232 1 Power Mains voltage 950 250 50 60 V Hz Power consumption Max typ operation stand by 30 20 1 W RF RF range 950 2 150 MHz Modulation FEC de multiplex...

Page 14: ...ystem runs properly 1 Connecting Satellite Cables ET5000 is integrated with one satellite tuner and one of the first steps is to connect satellite cable to ET5000 in order to gain optimal signal quali...

Page 15: ...ctor is available for this purpose Connect your TV to ET5000 using a HDMI cable as follows B Connecting TV via Component Cable The secondly recommend TV connection for digital TV is via component cabl...

Page 16: ...to ET5000 as follows 3 Connecting Power An A C adapter and a power cord are provided as the basic accessories of ET5000 Connect the A C adapter to DC IN at the rear panel of ET5000 Connect the power...

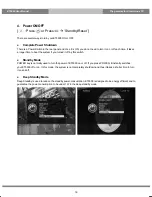
Page 17: ...to boot the system if you turned it off by this switch Standby Mode POWER key is normally used to turn the power of ET5000 on or off If you press POWER it instantly switches your ET5000 off or on In...

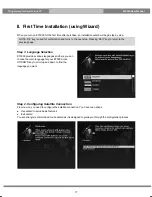
Page 18: ...main language for your ET5000 Use UP DOWN key to scroll up and down to find the language you want Step 2 Configuring Satellite Connection From now on you need to configure the satellite connection You...

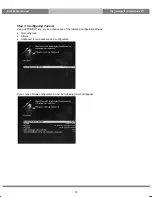
Page 19: ...x TV Step 3 Configuring Tuner A Using LEFT RIGHT key you can choose one of the following Configuration Modes Not configured Simple Advanced for an advanced user configuration If you choose Simple conf...

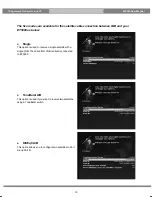
Page 20: ...nd your ET5000 as below Single This option is used to receive a single satellite with a single LNB The cable from LNB is directly connected to ET5000 ToneBurst A B This option is used if you want to r...

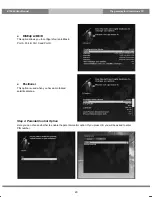
Page 21: ...to configure four satellites in Port A Port B Port C and Port D Positioner This option is used when you have a motorized satellite antenna Step 4 Parental Control Option Here you can choose whether t...

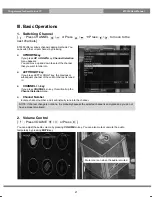
Page 22: ...y If you press LEFT or RIGHT key the previous or subsequent channel of the current channel is tuned in CHANNEL key If you press CHANNEL key this will call up the Channel Selection menu Channel Number...

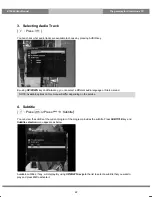
Page 23: ...language or Stereo sound 4 Subtitle Press or Press Subtitle You can view the subtitle of the current program if the program provides the subtitle Press SUBTITLE key and Subtitle selection menu appears...

Page 24: ...avigate through the Teletext page by using UP DOWN key to select a text page Also just simply enter the page number that you want to read MUTE key Once you activated Teletext you can toggle between th...

Page 25: ...setting Infobar is designed to provide you comprehensive information of the channel that you are currently watching Press OK to call up infobar A The tuner being used for the current channel SNR Sign...

Page 26: ...ensions to call up a menu for Sleep Timer and Graphical Multi EPG 7 Channel List Channel Selection Menu Press If press UP DOWN key this will activate Channel Selection Menu as below Four types of the...

Page 27: ...s list Call up the Channel Selection list by Pressing UP or DOWN key Go to All list by pressing RED key Select the channel that you want to add to the Favourites list Press MENU key on the selected ch...

Page 28: ...me Displays the name of the selected program Description Displays a short description of the selected program Timer Type Select Zap for channel tuning reservation Select Record for recording reservati...

Page 29: ...lection Multi EPG window You can move the previous or next program within the same channel by using YELLOW Previous BLUE Next You can switch to another channel by using UP DOWN key RED key is used to...

Page 30: ...ll appear on the left upper side of the screen as below In this state Timeshifted recording is running until you press either PLAY or PAUSE again You can restart viewing of the program If you want to...

Page 31: ...nage recording Instant Recording Press RED or Press Press RED or REC key to start the recording of the current program Five recording options are given Add recording stop after current event This opti...

Page 32: ...ding is to stop Add recording indefinitely This option is used when you want to keep recording running without a specific end time Recording will continue unless you stop it Don t record This option i...

Page 33: ...re assigned for each different function RED Delete This option is used to delete a timer GREEN Add This option is used to add a timer YELLOW Disable This option is used to disable the timer and X mark...

Page 34: ...Stop Recording Press RED or Press Stop Recording If you want to stop recording press RED or REC again while recording is running Select Stop Recording NOTE Make sure that the HDD on your ET5000 has e...

Page 35: ...ed files menu Press Filelist to activate this menu Select the file that you want to play It will instantly replay the file and display the recording infobar This infobar gives you the following inform...

Page 36: ...ng file press MENU key while Recorded files menu is on Select Delete and confirm OK to delete Other than delete in this menu you have options in sorting and listing of the recording files Sort by date...

Page 37: ...yer you can enjoy Music Photo and Video contents stored on the internal HDD and or a USB memory stick plugged into ET5000 If you play Media Player the following player will appear Go into any director...

Page 38: ...s network connection is established you can directly download plug ins from a designated website of ET5000 Press MENU and select Plug ins menu to active Plug in browser Press GREEN key to download a...

Page 39: ...0 goes into Standby mode or Deep Standby mode using this menu Three color keys are used to setup this sleep timer RED This option is used to enable or disable Sleep Timer GREEN This option is used to...

Page 40: ...t program Media player Activate Media player of ET5000 For more information please refer to the page 36 Information Has two sub menus for Service About Service menu provides the detailed information o...

Page 41: ...t 2 1 Service Searching Press Setup Service Searching Here you setup the tuners of your ET5000 and run channel scanning automatically or manually A Tuner Configuration Press Setup Service Searching Tu...

Page 42: ...Automatic Scan menu there are two options to choose from as below Clear Before Scan YES is used when you want to delete the existing channel list before you start the automatic scan If you want to kee...

Page 43: ...ght You need to know the polarity of the transponder that you want to scan FEC Forward Error Correction You need to enter the exact FEC value of the transponder that you want to scan Modulation Here y...

Page 44: ...gateway for Smart Linux TV ET5000 User Manual Press OK to activate the manual scan This will take some minutes As the scan proceeds you will see the progressive bar and the newly found services under...

Page 45: ...settings that you might need to optimize your ET5000 in the way you like it Please read the followings carefully A A V Settings Press Setup System A V Settings Here you will find options necessary to...

Page 46: ...used when you want to set Dolby Digital audio as the default audio If the program you are watching has AC3 and Stereo AC3 is used On the other hand NO is used when you do not want to set Dolby Digital...

Page 47: ...ess Setup System Language A variety of languages are available for the OSD of ET5000 C Customization Press Setup System Customize In this menu you will find various customization options and this menu...

Page 48: ...r not Margin before record minutes If you enter a number here for example 5 the recording will begin 5 minutes before the defined time If it is 0 it means that the recording starts exactly at the defi...

Page 49: ...d appears as below Enable multiple bouquets If you set this option at YES it will enable multiple bouquets D Selecting Time Zone Press Setup System Timezone You can set your time zone in this menu Usi...

Page 50: ...up Press Setup System Harddisk setup You can set the duration of time after which HDD is to be put into standby mode Here you can choose from No standby 10 or 30 seconds 1 2 5 10 20 30 minutes 1 2 4 h...

Page 51: ...menu In the Network Configuration menu you will see five sub menus as follows Adapter settings Through this menu you can set the basic Ethernet configuration User Interface YES is used to activate the...

Page 52: ...red if you selected not to use DHCP You need to enter the address of the Nameserver Network test When you are not sure whether the network configuration has been done correctly or not you can run this...

Page 53: ...rent Skin other than the default one 2 3 Parental Control Press Setup Parental Control If you want to prevent certain channels from being accessed by others you can do so using this menu Go to Parenta...

Page 54: ...TV ET5000 User Manual Set the parental control option at YES using LEFT RIGHT key The menu will change as below Protect setup If you set this option at YES you will be asked to enter PIN code when you...

Page 55: ...be activated only if you set Protect services at YES Here there are two options White list This option is used to block all channels except those channels in the parental control list Black list This...

Page 56: ...ranged in the alphabetical order and you can select an alphabet to enter into the list where you can find the channel that you want to lock Once the selected channel is locked next time when you or an...

Page 57: ...urations run the Factory Reset process Select YES in the below menu to run the factory reset Upon the completion of factory reset process your ET5000 will reboot automatically and start the First Time...

Page 58: ...your ET5000 this is the menu that you need to use Also here you can check very detailed information of a specific service A Service Information Press Information Service In this menu you can see all t...

Page 59: ...al The gateway for Smart Linux TV B System Information Press Information About This menu is for you to check the current system of your ET5000 You can see the following information S W version Detecte...

Page 60: ...if you modify it For example if you distribute copies of such a program whether gratis or for a fee you must give the recipients all the rights that you have You must make sure that they too receive...

Page 61: ...teractive use in the most ordinary way to print or display an announcement including an appropriate copyright notice and a notice that there is no warranty or else saying that you provide a warranty a...

Page 62: ...ve works These actions are prohibited by law if you do not accept this License Therefore by modifying or distributing the Program or any work based on the Program you indicate your acceptance of this...

Page 63: ...istribution conditions are different write to the author to ask for permission For software which is copyrighted by the Free Software Foundation write to the Free Software Foundation we sometimes make...

Page 64: ...list Automatic Scan Service scan Window Manual Scan Service scan Window Language Language Selection Window Customize Customize Window Timezone Timezone Window Harddisk Harddisk setup Harddisk setup In...

Page 65: ...tly mounted If your remote control has been used for long change the batteries Point the remote control directly toward the product Make sure that nothing blocks the front panel display 4 Channel sear...

Page 66: ...rce signals called Y U and V together referred to as YUV with sync pulses Y represents the brightness or luminance of the picture and includes synchronizing pulses so that by itself it could be displa...

Page 67: ...s video game consoles such as the PlayStation 3 and some models of Xbox 360 and AV receivers to compatible digital audio devices computer monitors and digital televisions As an uncompressed connection...

Page 68: ...ng national international and sporting news weather and TV schedules Subtitle or closed captioning information is also transmitted in the teletext signal typically on page 888 or 777 YPbPr A color spa...

Reviews: